by Tiwari Academy Team
NCERT Solutions for Class 6 Computer Science Chapter 2 More about MS Windows updated for new academic session 2026-27. In grade 6 Computer Book chapter 2, student will learn about the different tools of Microsoft Windows and their applications.
Class 6 Computer Science Chapter 2 MS Windows
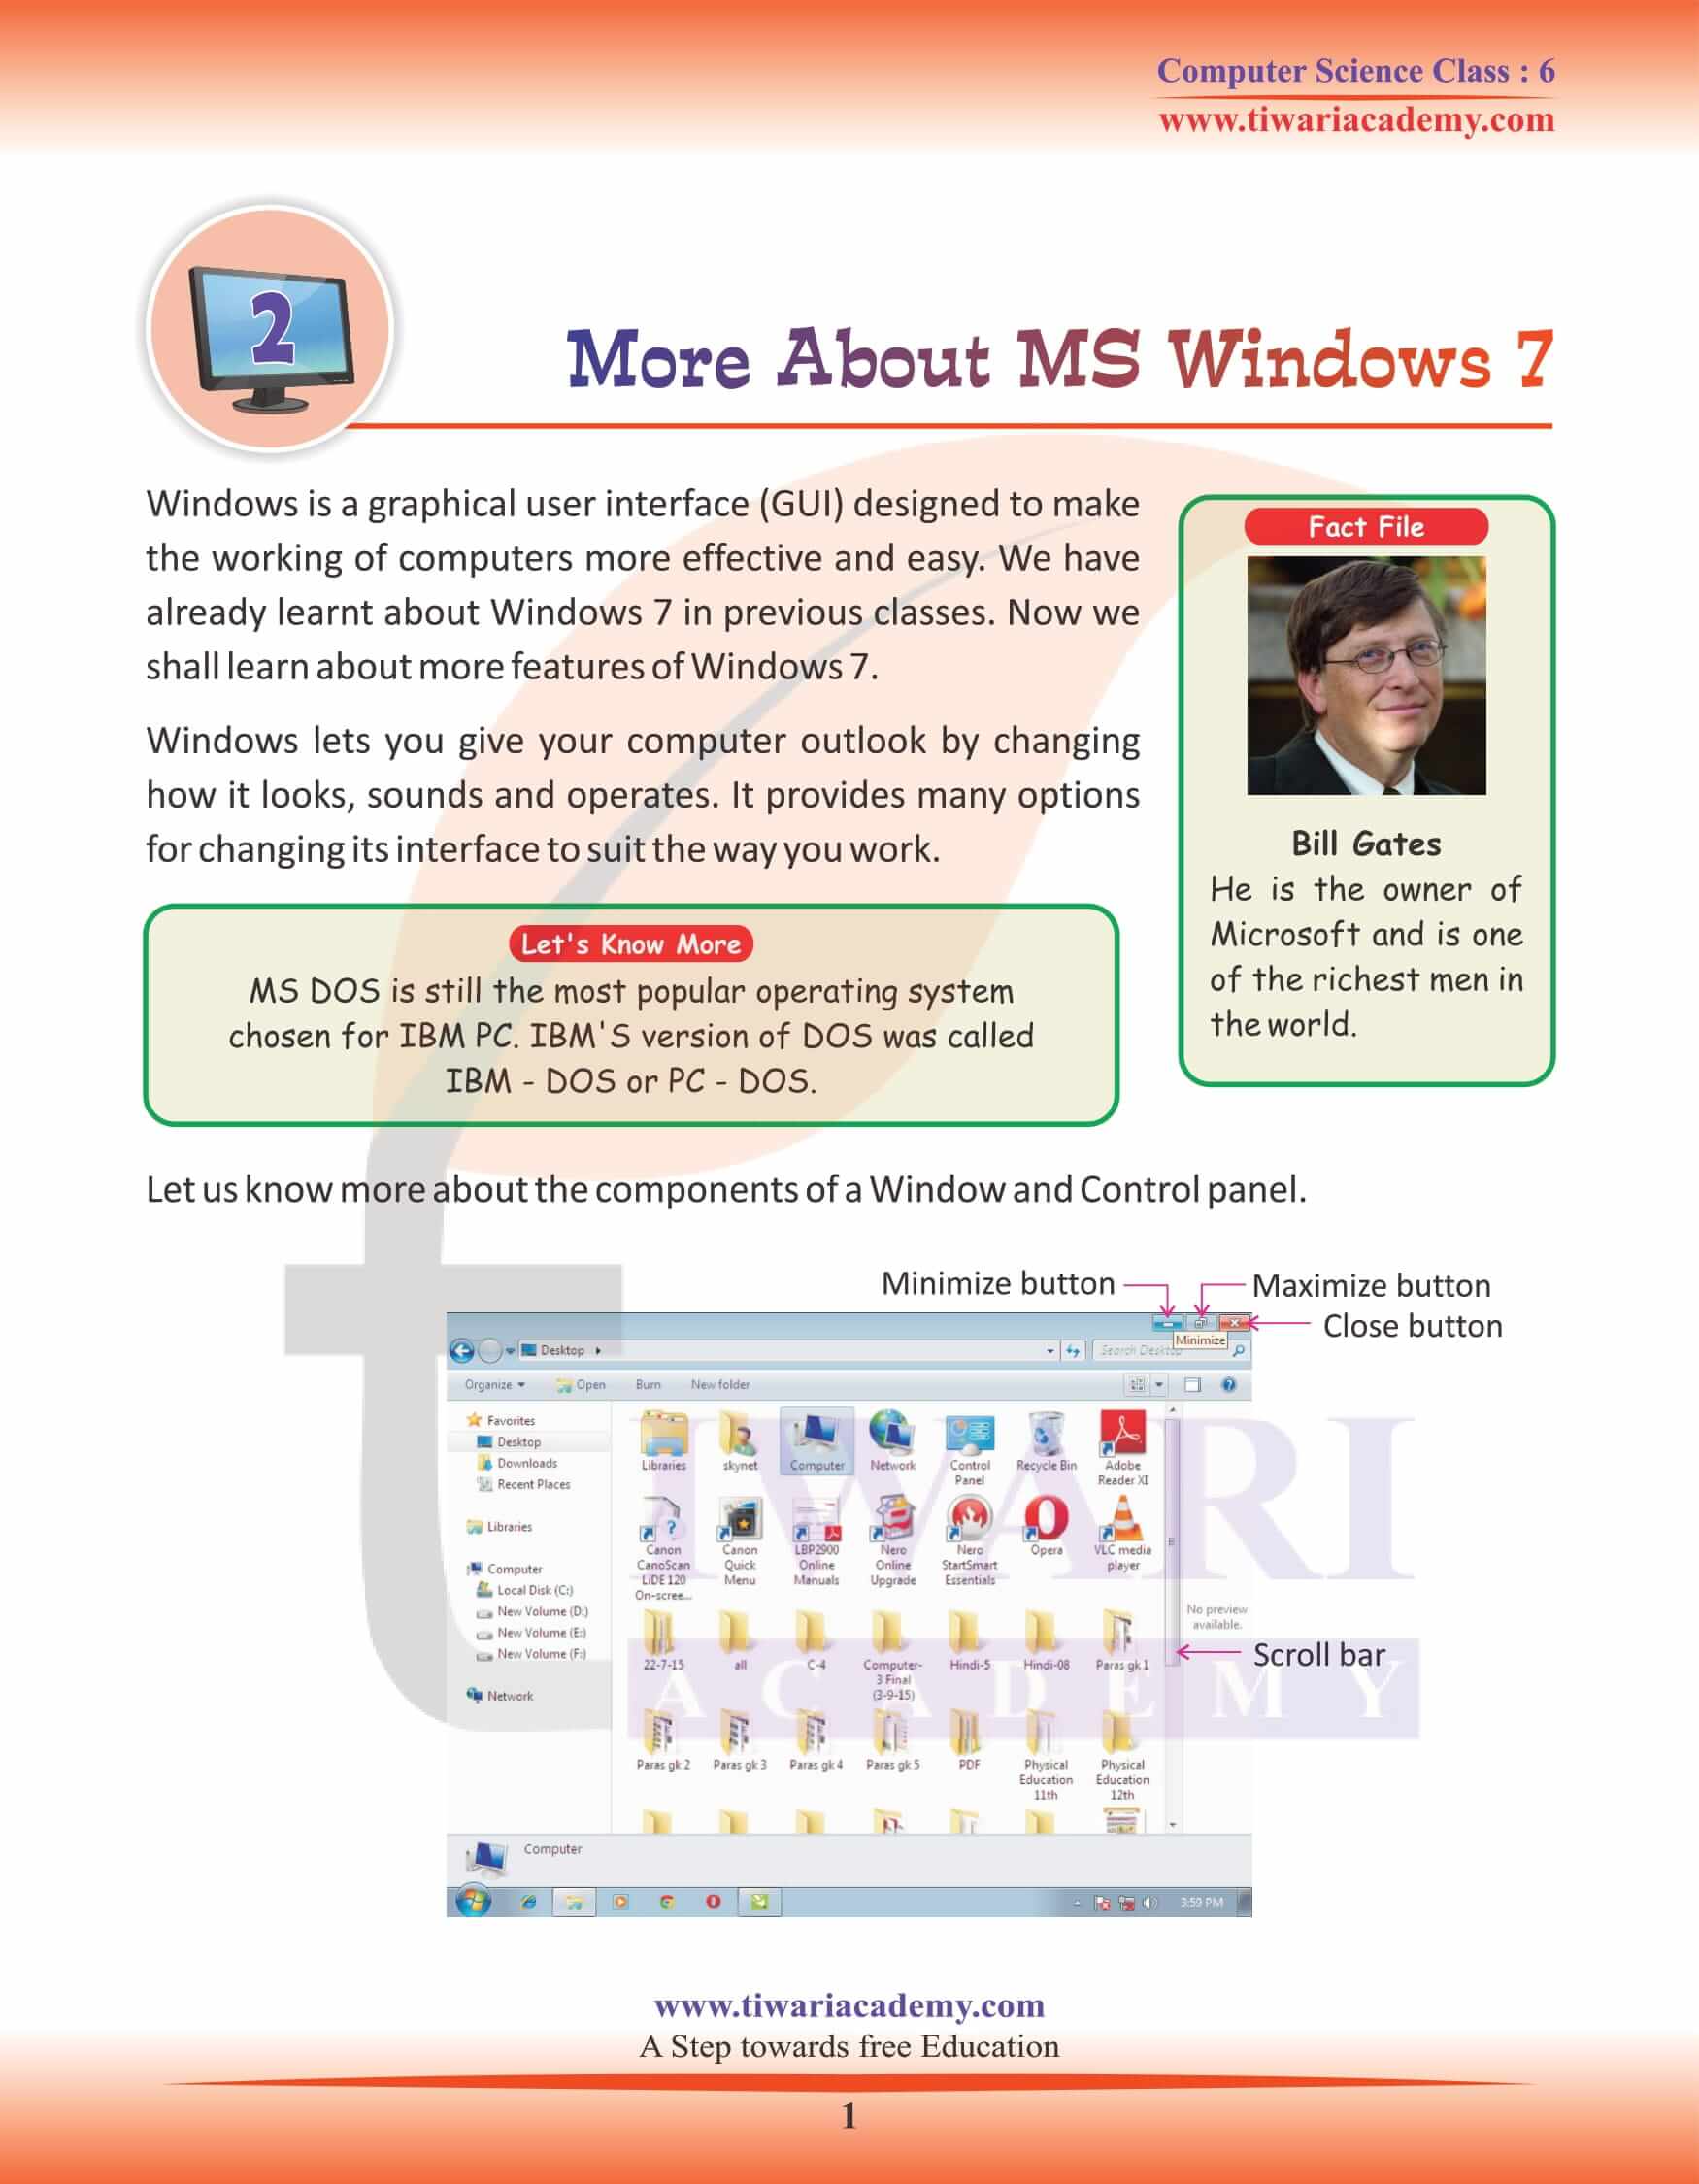
Bill Gates
He is the owner of Microsoft and is one of the richest men in the world.
Let’s Know More
MS DOS is still the most popular operating system chosen for IBM PC. IBM’S version of DOS was called IBM – DOS or PC – DOS.
Windows is a graphical user interface (GUI) designed to make the working of computers more effective and easy. We have already learnt about Windows 7 in previous classes. Now we shall learn about more features of Windows 7. Windows lets you give your computer outlook by changing how it looks, sounds and operates. It provides many options for changing its interface to suit the way you work.
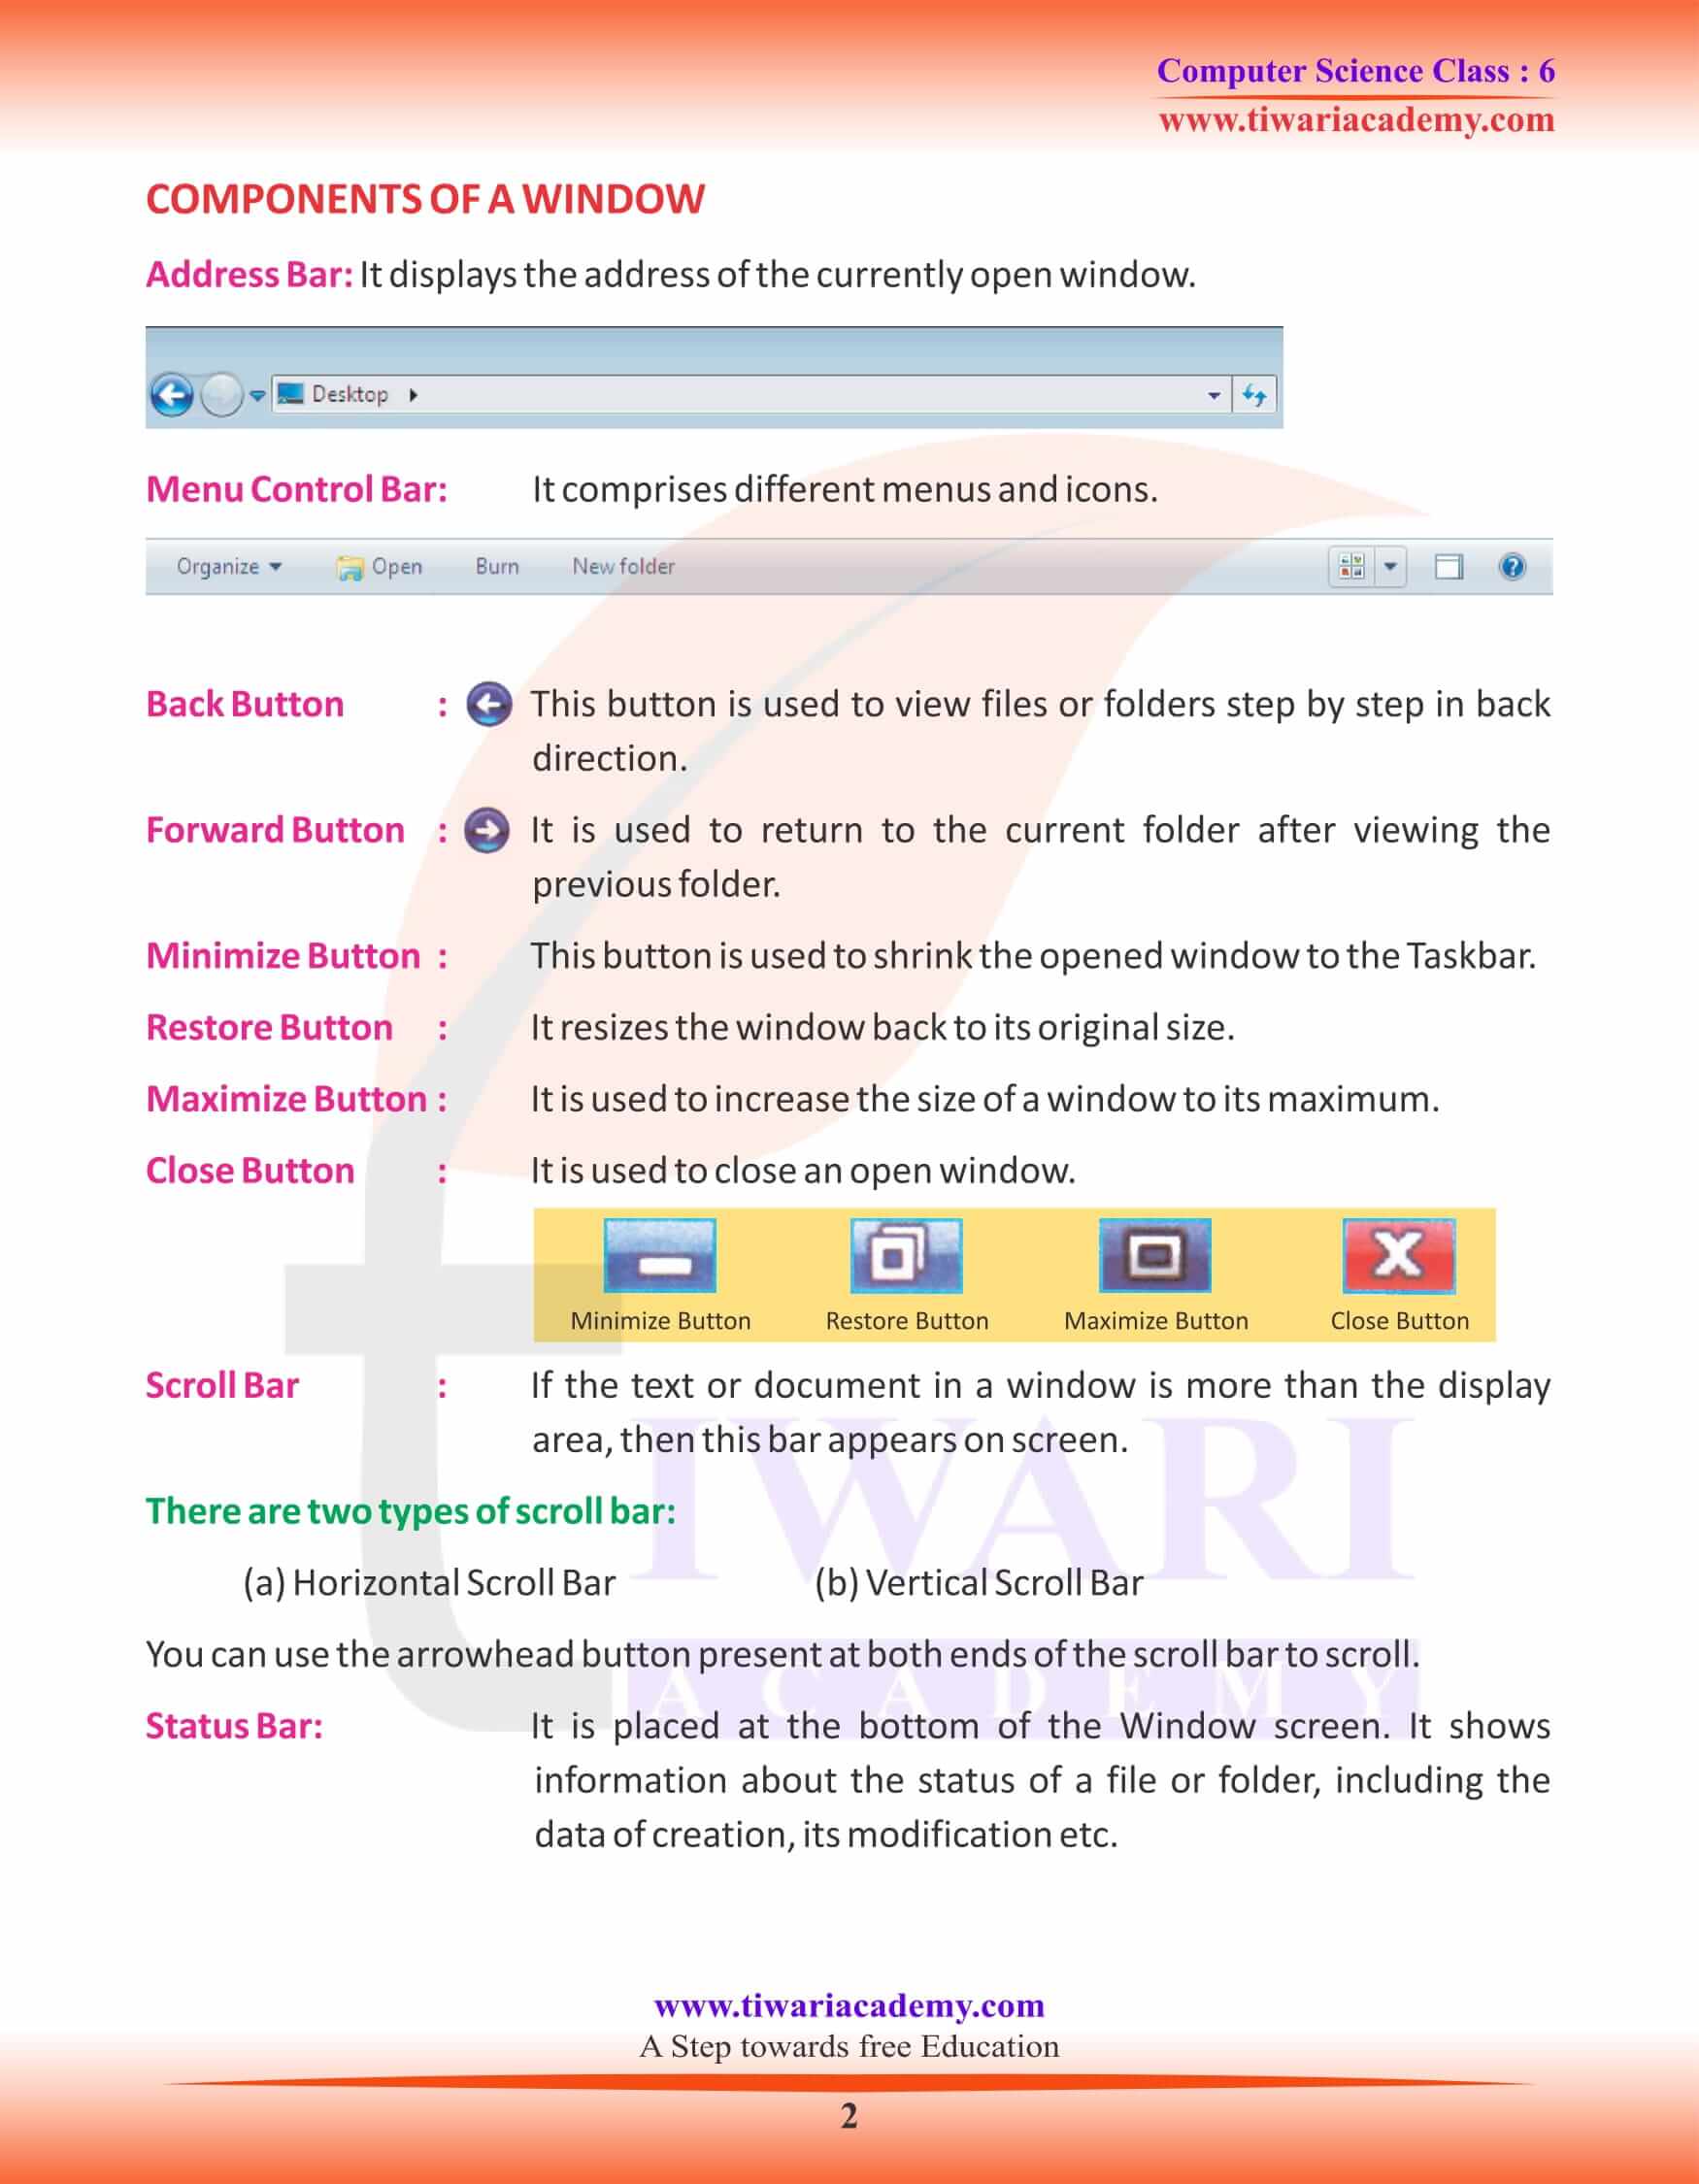
Minimize Button Restore Button Maximize Button Close Button
COMPONENTS OF A WINDOW
Address Bar: It displays the address of the currently open window.
Menu Control Bar: It comprises different menus and icons.
Back Button : This button is used to view files or folders step by step in back direction.
Forward Button : It is used to return to the current folder after viewing the previous folder.
Minimize Button : This button is used to shrink the opened window to the Taskbar.
Restore Button : It resizes the window back to its original size.
Maximize Button : It is used to increase the size of a window to its maximum.
Close Button : It is used to close an open window.
Scroll Bar : If the text or document in a window is more than the display area, then this bar appears on screen.
Two types of scroll bar
There are two types of scroll bar:
(a) Horizontal Scroll Bar (b) Vertical Scroll Bar You can use the arrowhead button present at both ends of the scroll bar to scroll.
Status Bar: It is placed at the bottom of the Window screen. It shows information about the status of a file or folder, including the data of creation, its modification etc.
MOVING A WINDOW
You can follow these steps for moving a window.
- Step 1: Click on the top left corner of the window.
- Step 2: Click on the move option.
- Step 3: Use the Arrow keys to move the window to its new position.
- Step 4: Press the enter key.
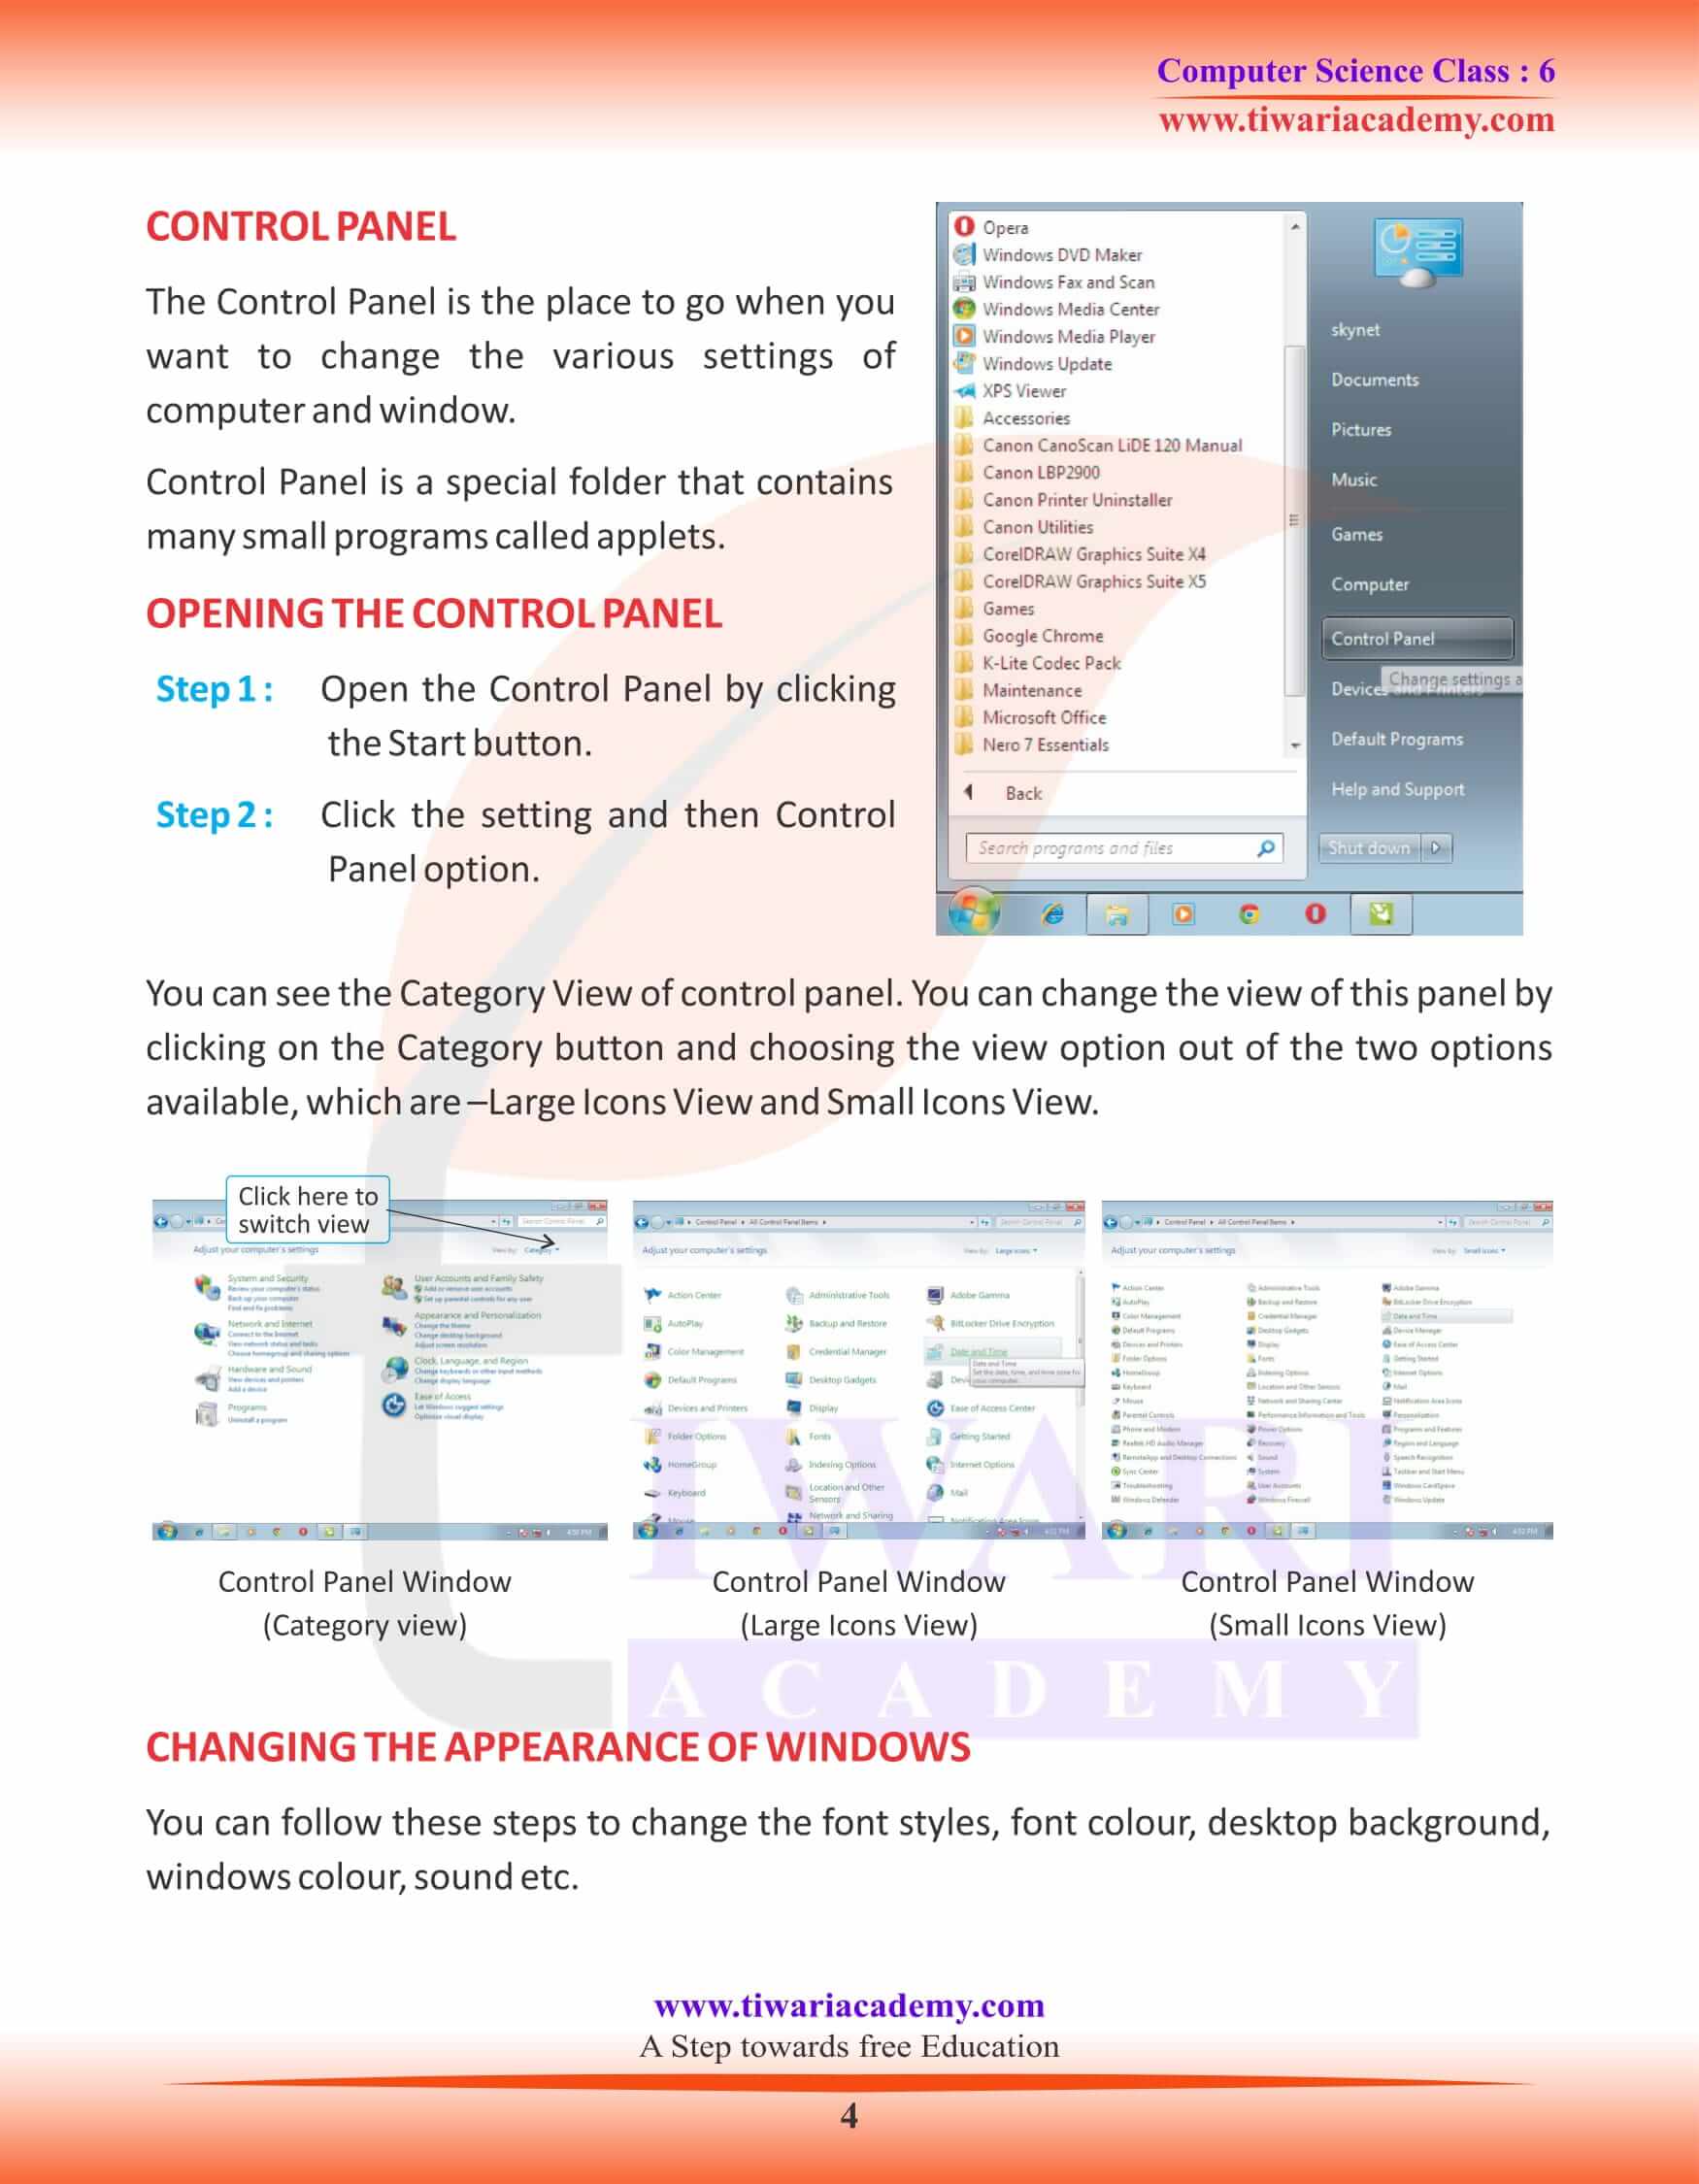
CONTROL PANEL
The Control Panel is the place to go when you want to change the various settings of
computer and window. Control Panel is a special folder that contains many small programs called applets.
OPENING THE CONTROL PANEL
Step 1 : Open the Control Panel by clicking the Start button.
Step 2 : Click the setting and then Control Panel option.
You can see the Category View of control panel. You can change the view of this panel by
clicking on the Category button and choosing the view option out of the two options available, which are –Large Icons View and Small Icons View.
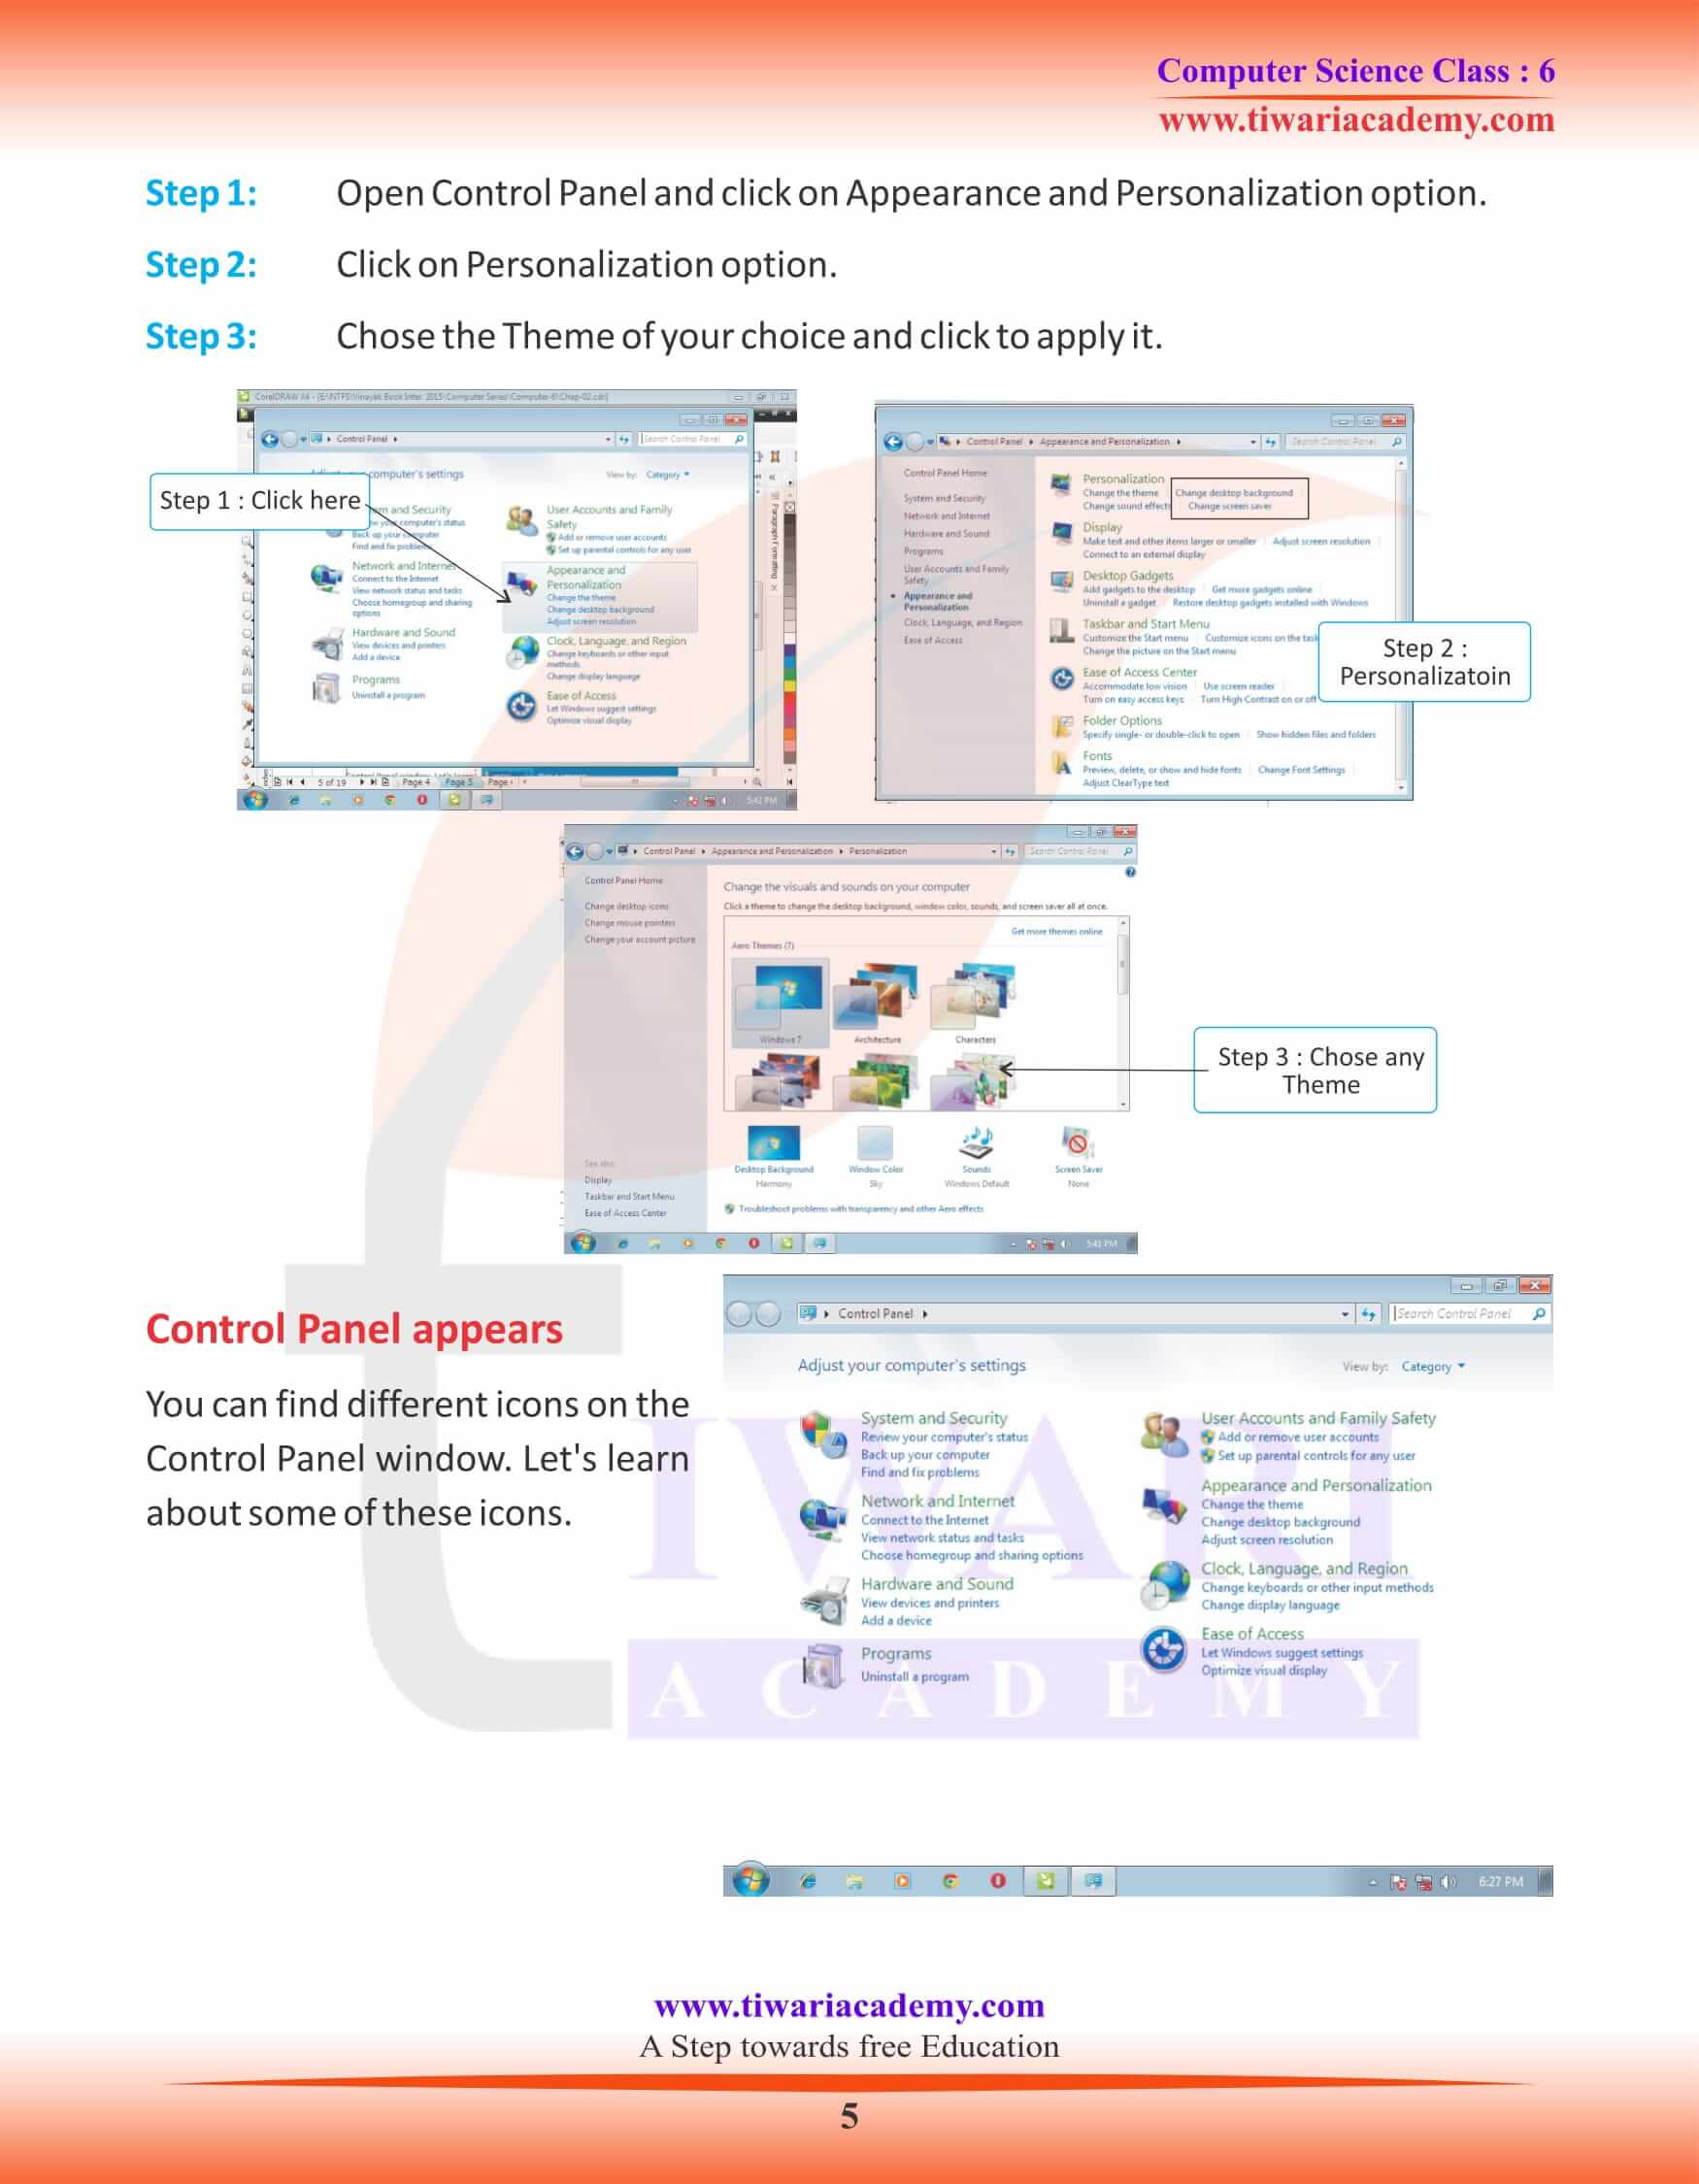
Control Panel appears
You can find different icons on the Control Panel window. Let’s learn about some of these icons.
Let’s Know More
We can run many applications at a time in Windows. This is called Multitasking.
Back
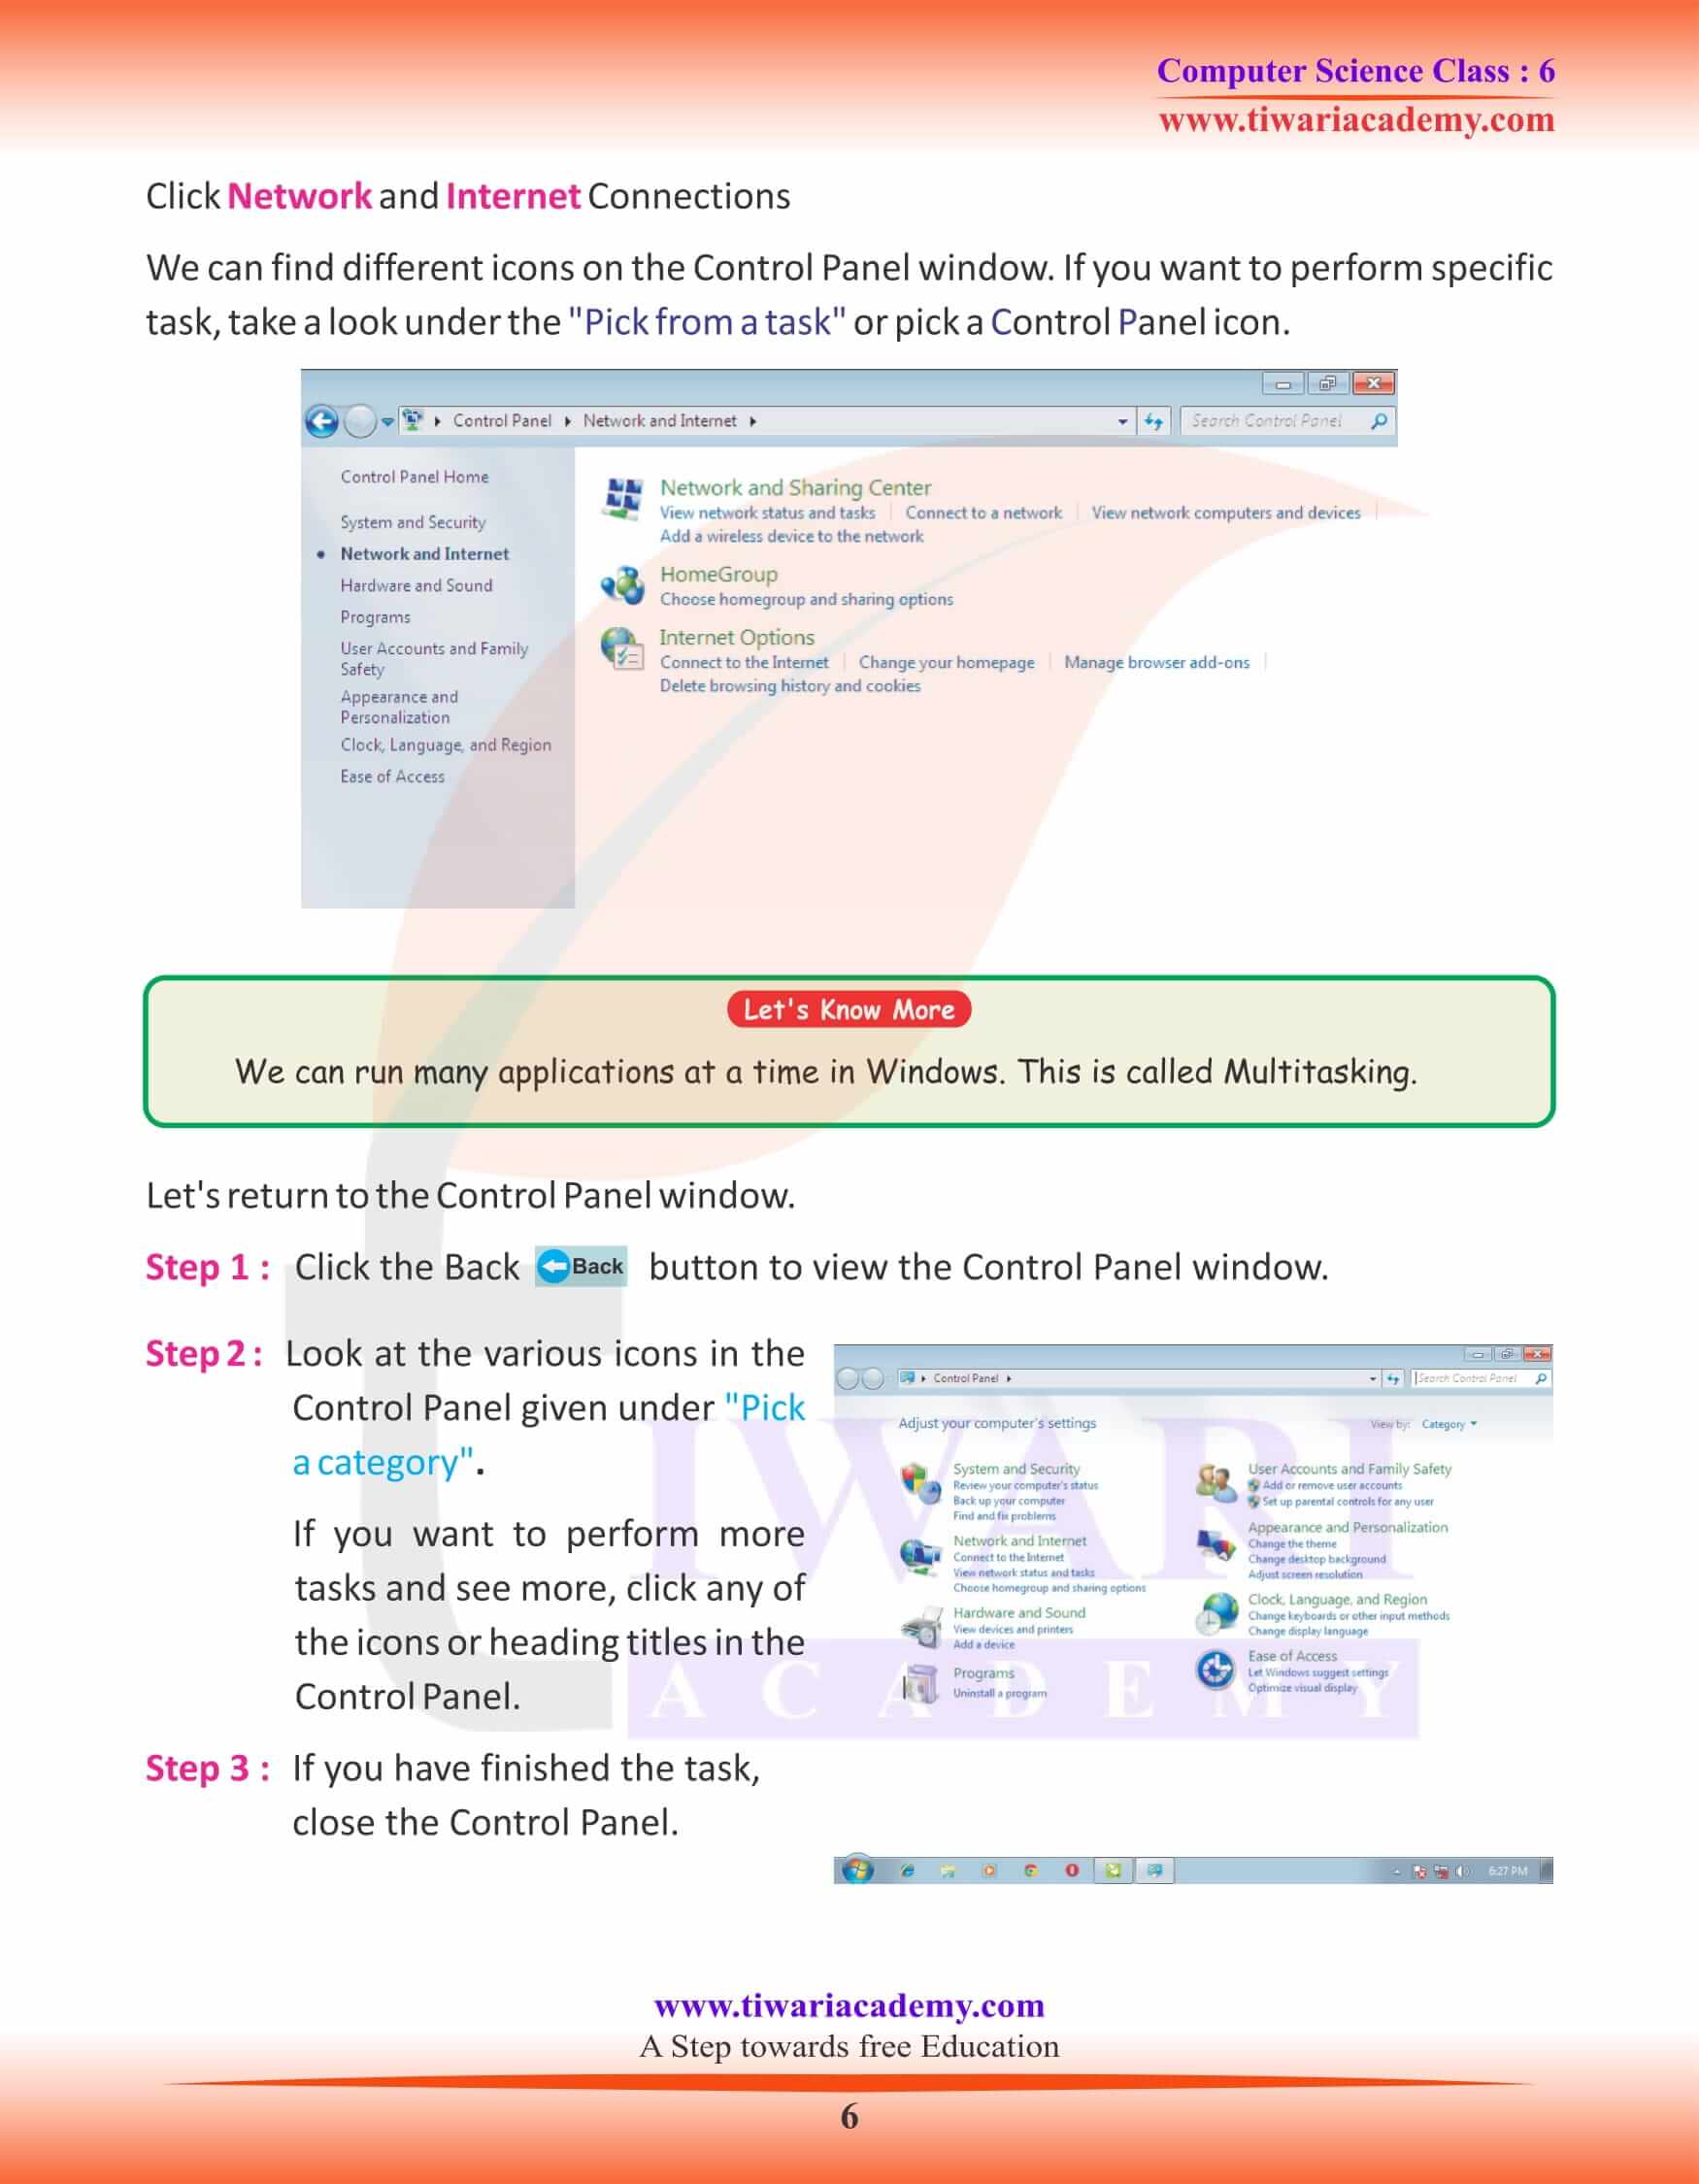
Step 2 : Look at the various icons in the Control Panel given under “Pick a category”.
If you want to perform more tasks and see more, click any of the icons or heading titles in the Control Panel.
Step 3 : If you have finished the task, close the Control Panel.
Click Network and Internet Connections
We can find different icons on the Control Panel window. If you want to perform specific task, take a look under the “Pick from a task” or pick a Control Panel icon. Let’s return to the Control Panel window.
Step 1 : Click the Back button to view the Control Panel window.
Windows 11 It is the latest version of Windows.
Let’s Know More
Know the Fact
Linux is also a very popular Operating System Software, available free of cost.
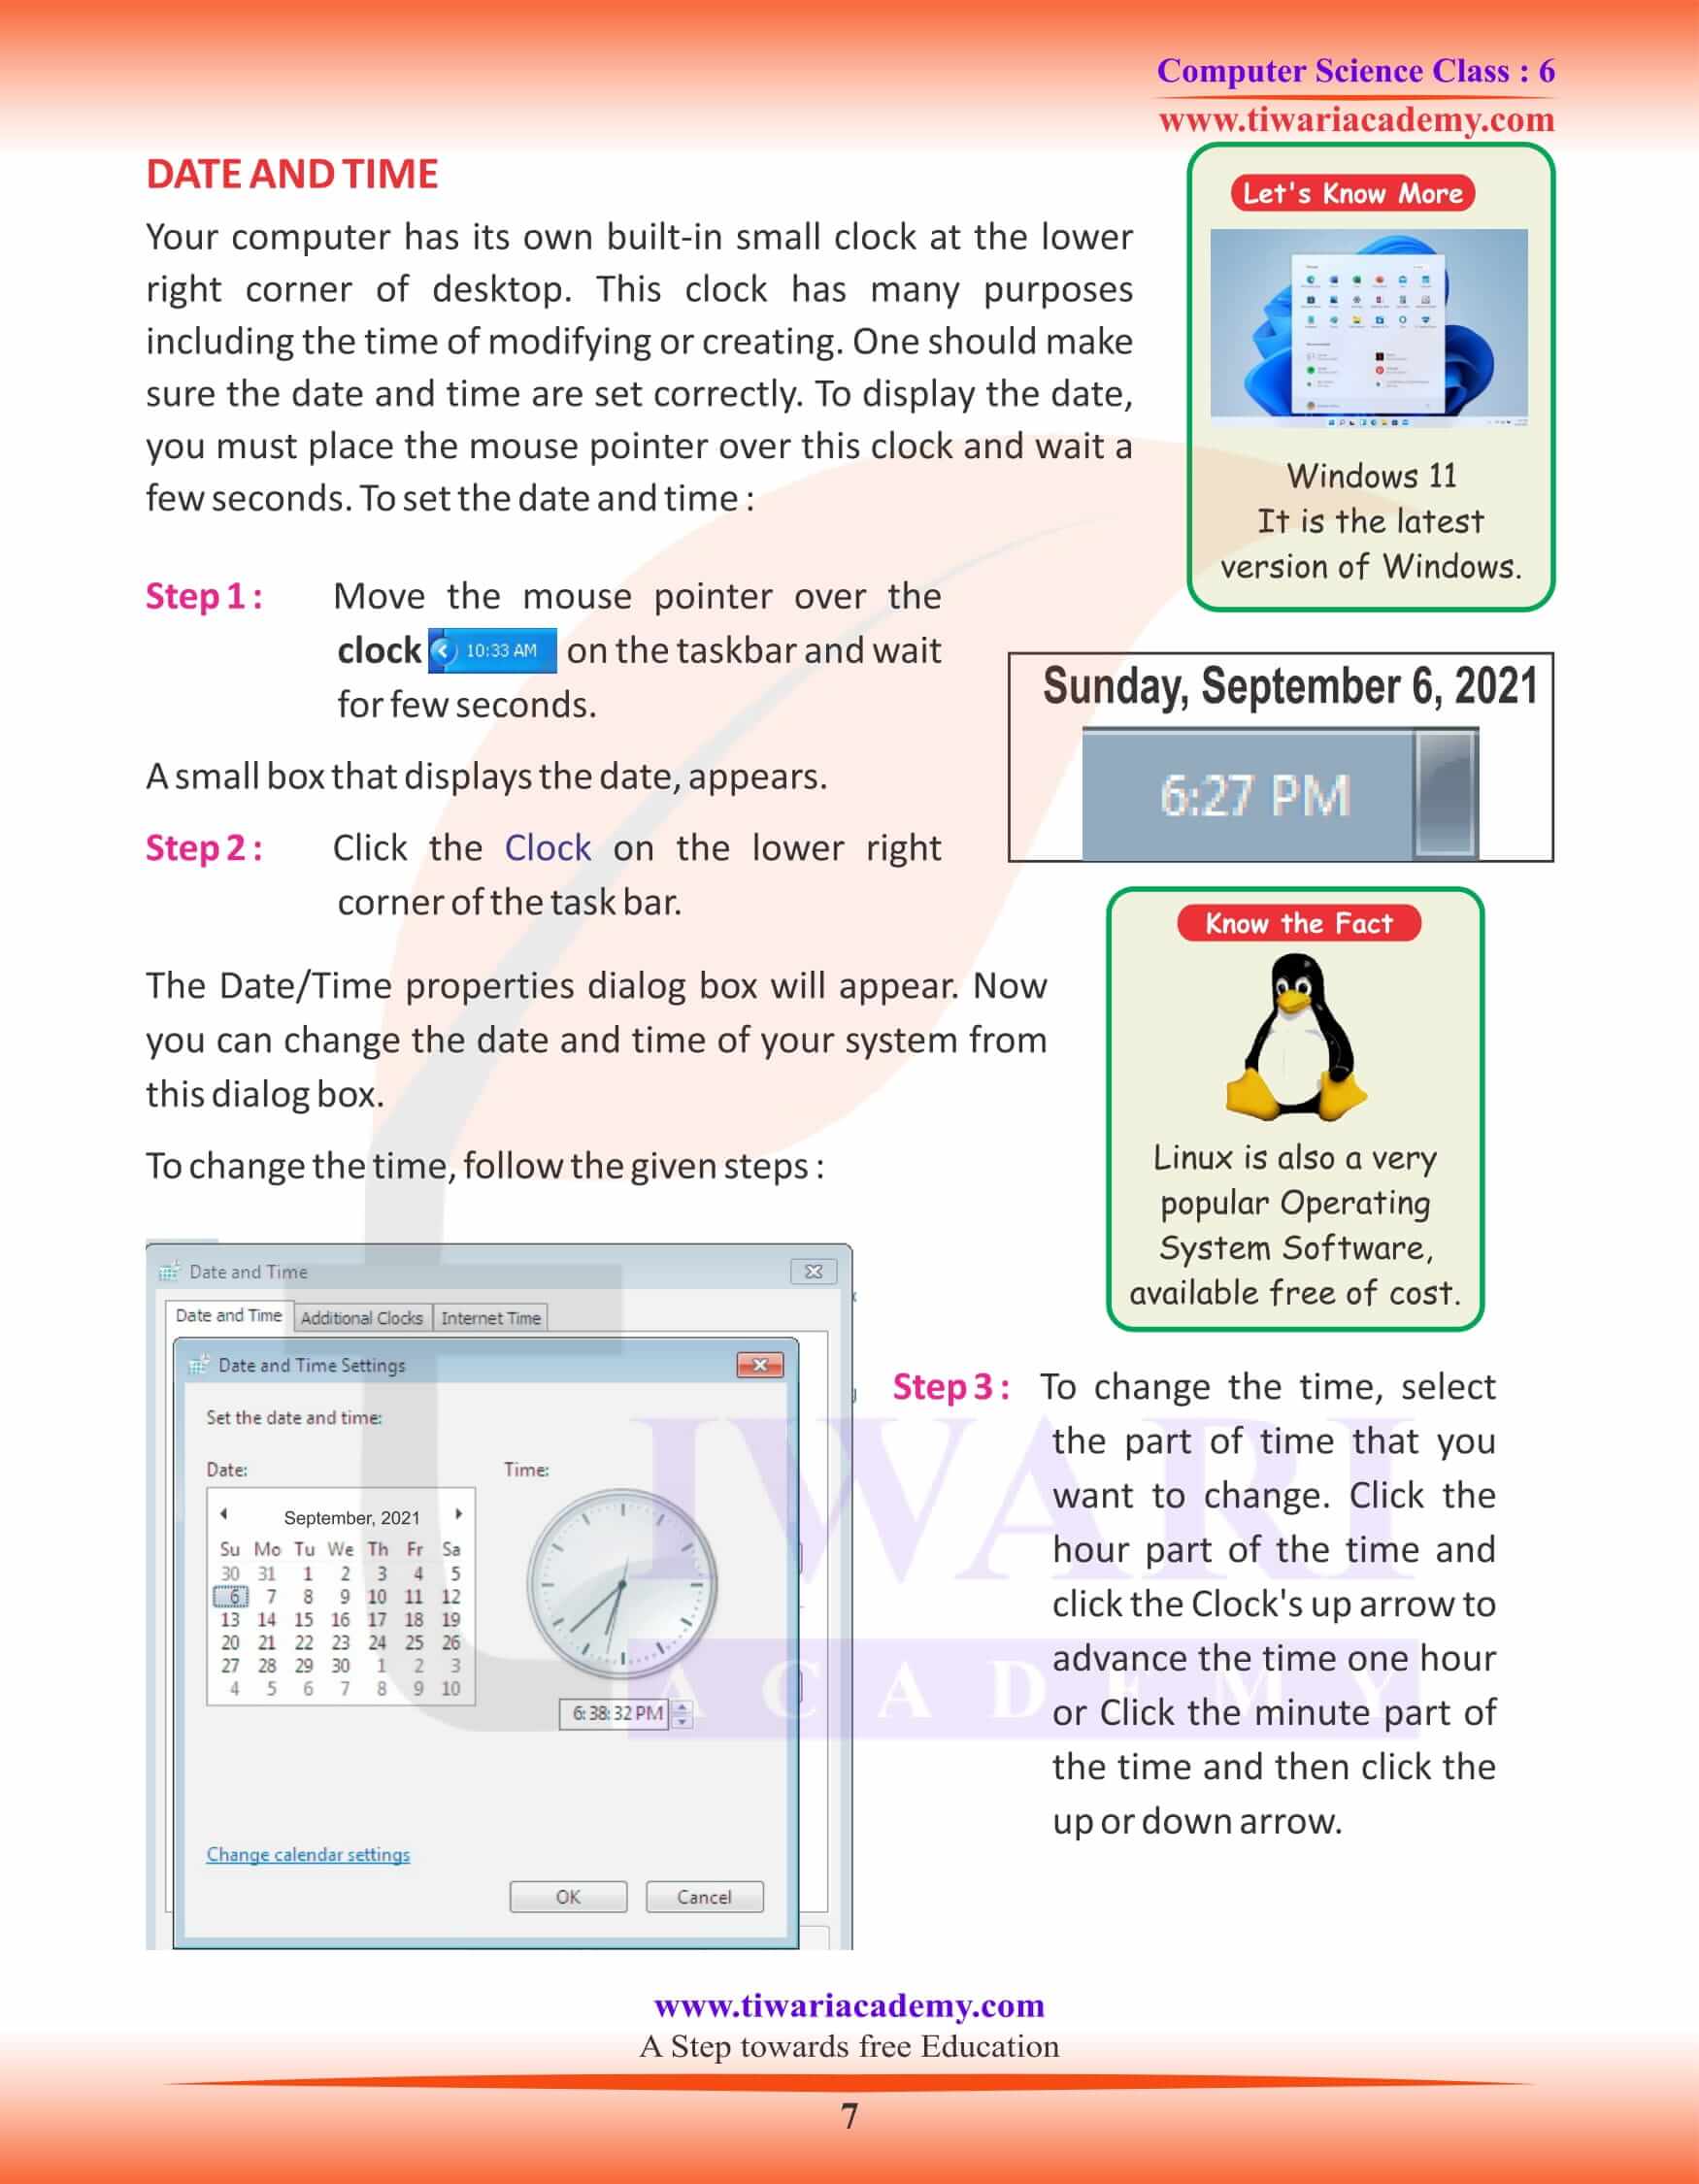
DATE AND TIME
Your computer has its own built-in small clock at the lower right corner of desktop. This clock has many purposes including the time of modifying or creating. One should make sure the date and time are set correctly. To display the date, you must place the mouse pointer over this clock and wait a few seconds. To set the date and time :
Step 1 : Move the mouse pointer over the clock on the taskbar and wait for few seconds.
A small box that displays the date, appears.
Step 2 : Click the Clock on the lower right corner of the task bar.
The Date/Time properties dialog box will appear. Now you can change the date and time of your system from this dialog box.
To change the time, follow the given steps :
Step 3 : To change the time, select the part of time that you want to change. Click the hour part of the time and click the Clock’s up arrow to advance the time one hour or Click the minute part of the time and then click the up or down arrow.
MOUSE
Smooth and easy movement of mouse is essential for computer. Sometimes the mouse works too slowly or very fast. Sometimes it does not respond well to double-clicks. We can adjust mouse setting to make it easier for you to work with. Follow these steps to change the setting of the mouse:
Step 1 : Open the control panel by clicking the start button and then click Control Panel.
Step 2 : Double-click the Printer and other Hardware icon.
Step 3 : Double click the Mouse icon to open the Mouse properties dialog box.
Dr. Engelbart is the inventor of the computer mouse. Sunday, To change the Date, follow the given steps :
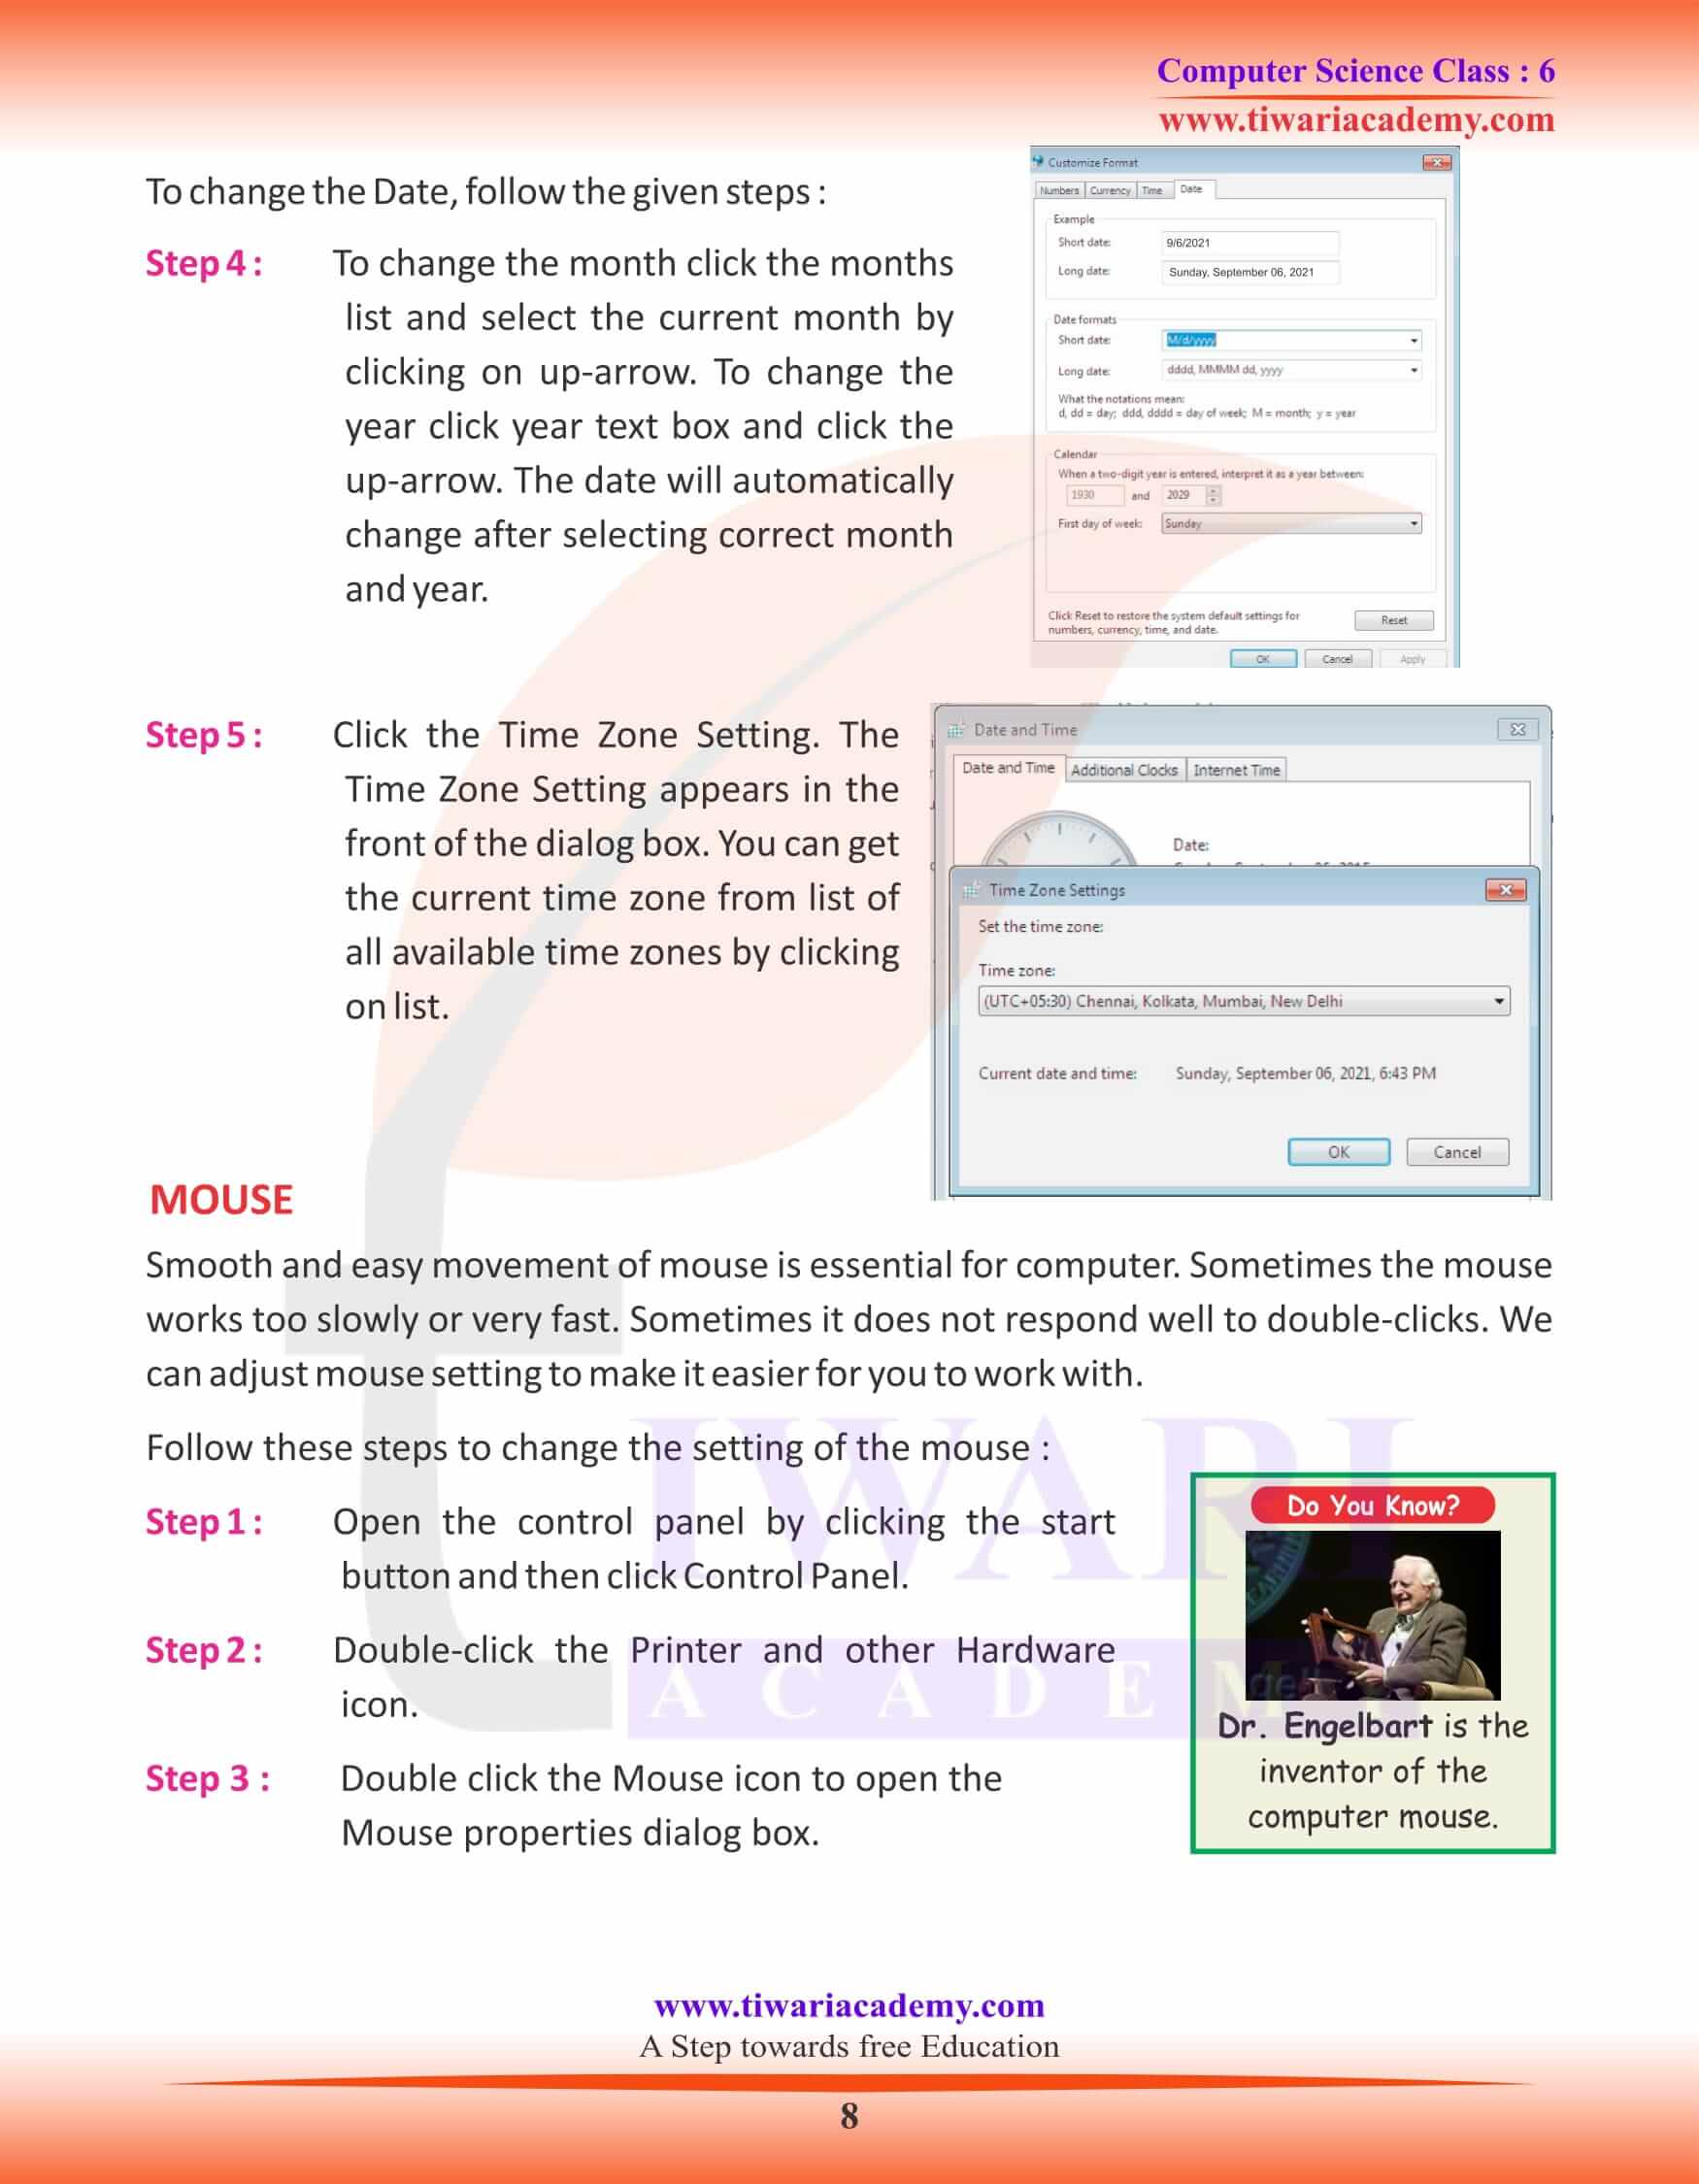
Step 4 : To change the month click the months list and select the current month by clicking on up-arrow. To change the year click year text box and click the up-arrow. The date will automatically change after selecting correct month and year.
Step 5 : Click the Time Zone Setting. The Time Zone Setting appears in the front of the dialog box. You can get the current time zone from list of all available time zones by clicking on list.
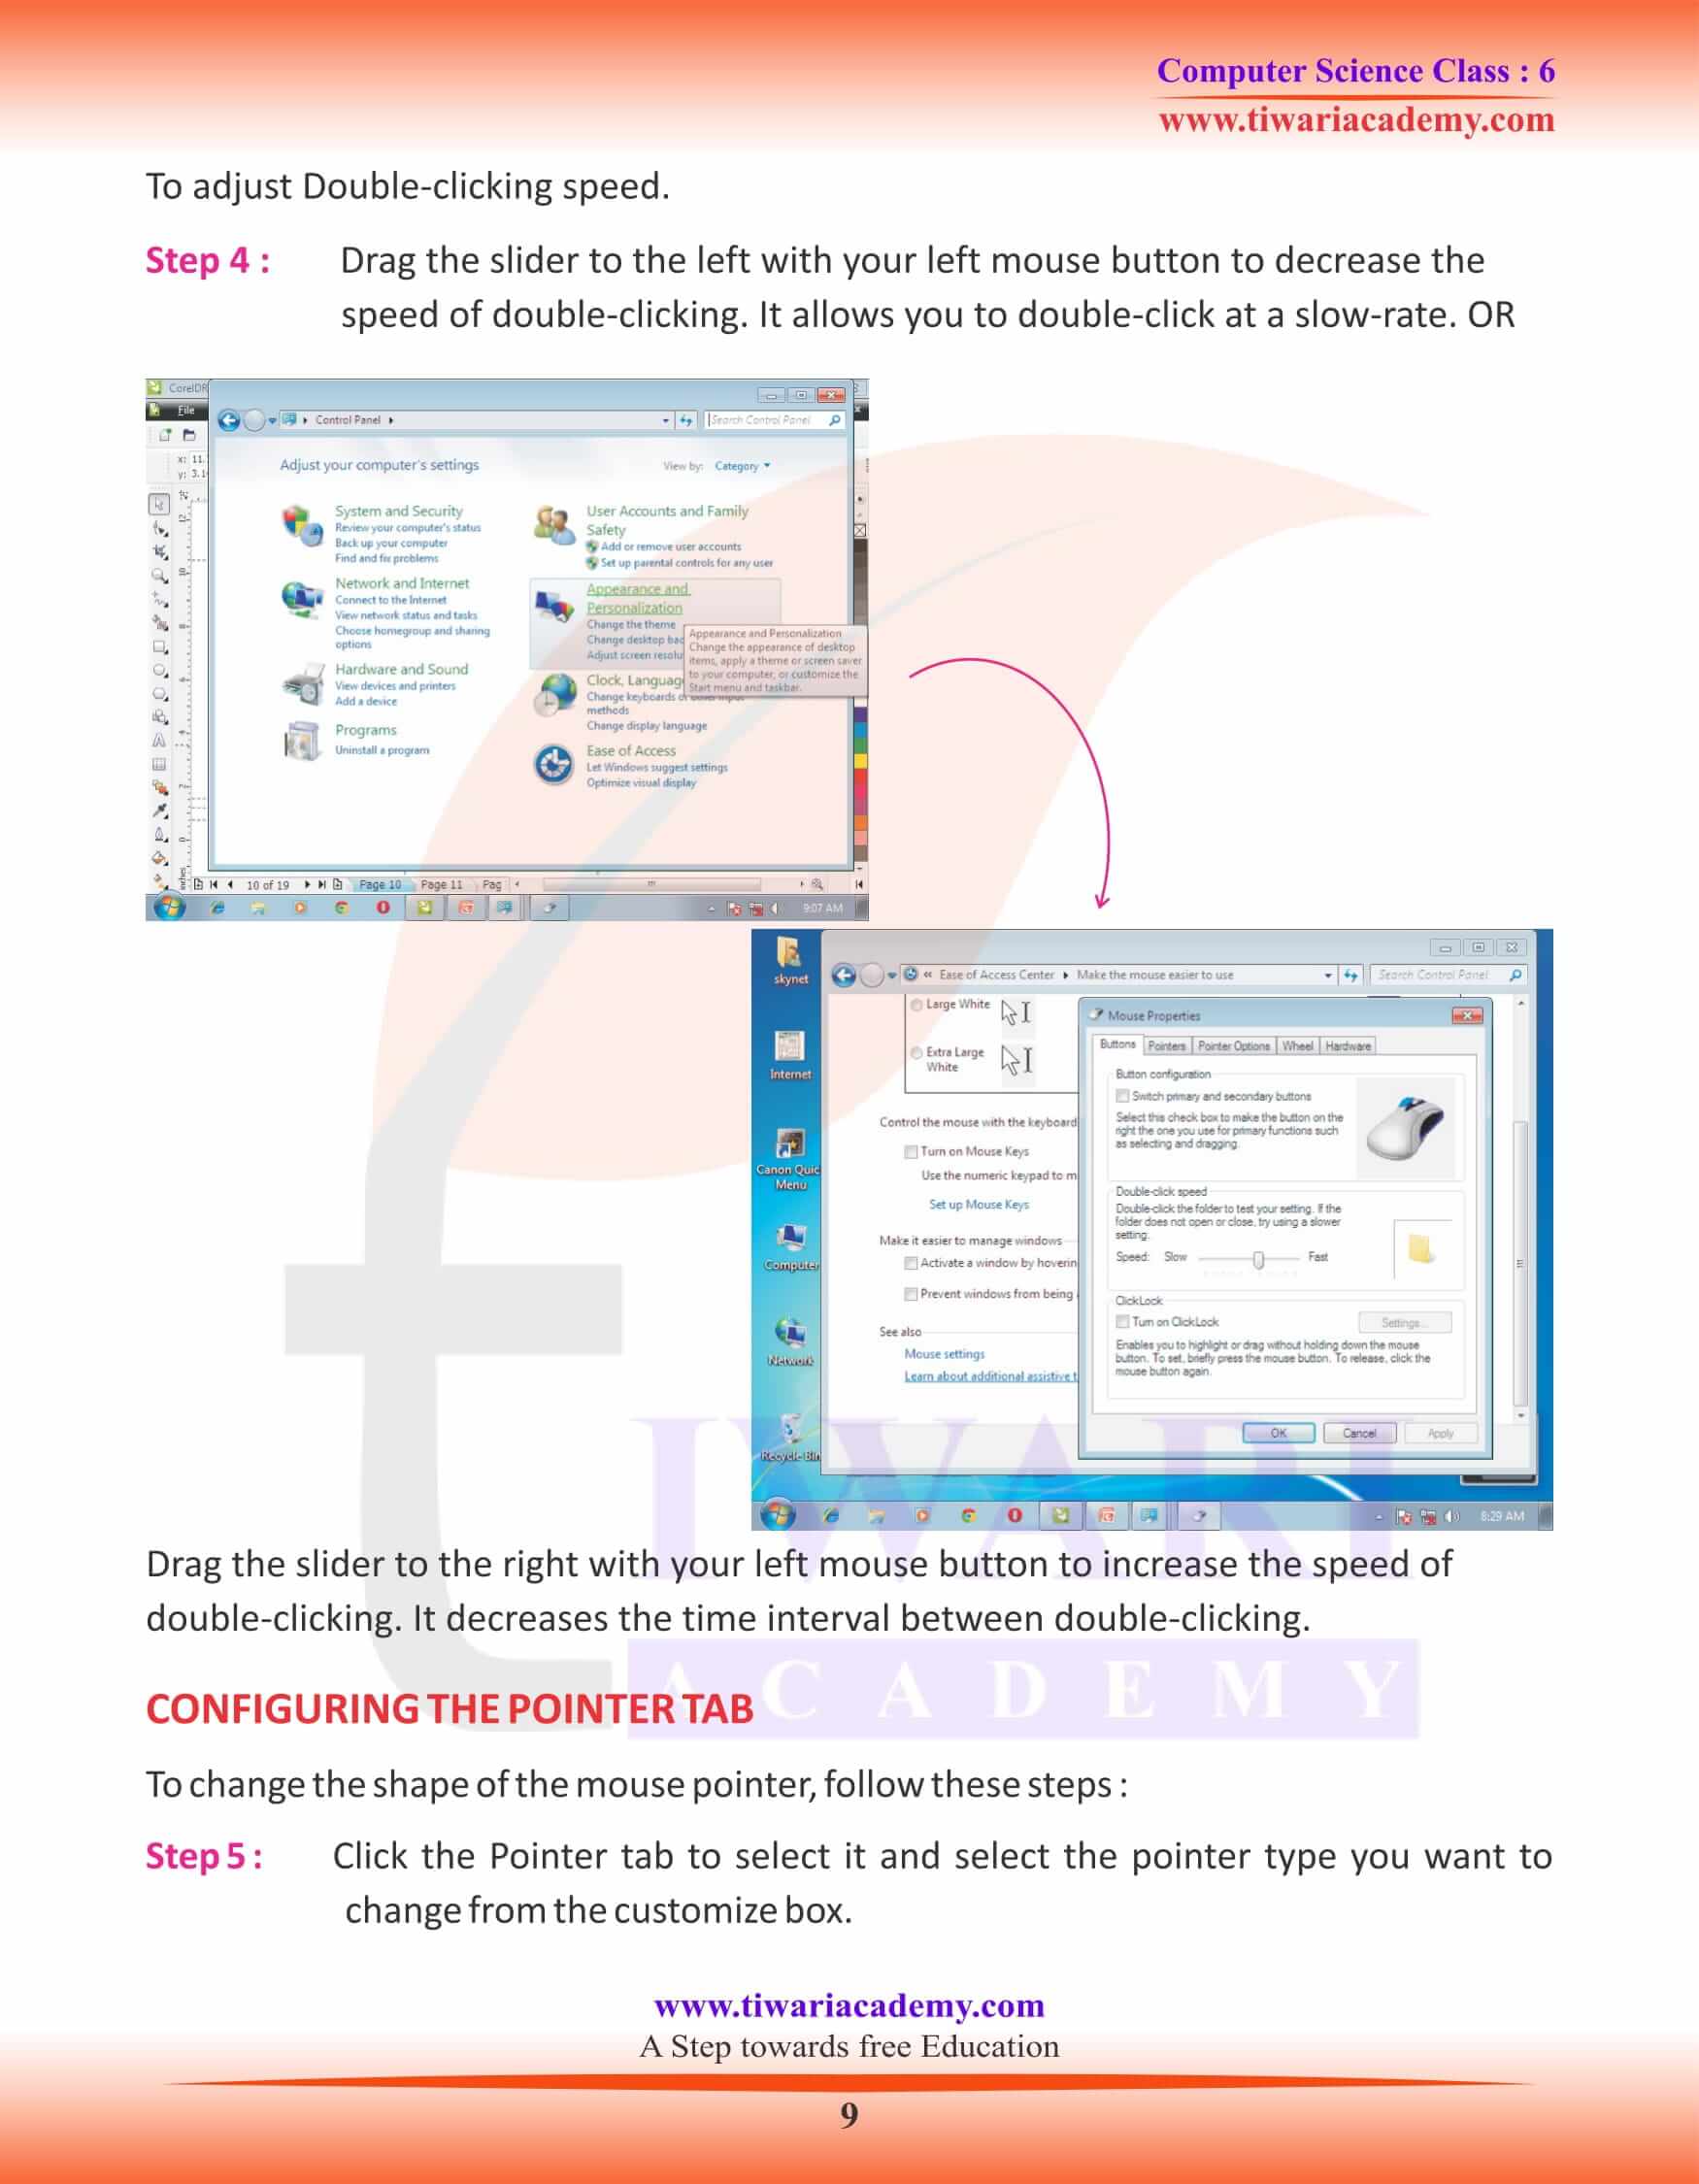
To adjust Double-clicking speed.
Step 4 : Drag the slider to the left with your left mouse button to decrease the speed of double-clicking. It allows you to double-click at a slow-rate. OR Drag the slider to the right with your left mouse button to increase the speed of double-clicking. It decreases the time interval between double-clicking.
CONFIGURING THE POINTER TAB
To change the shape of the mouse pointer, follow these steps :
Step 5 : Click the Pointer tab to select it and select the pointer type you want to change from the customize box.
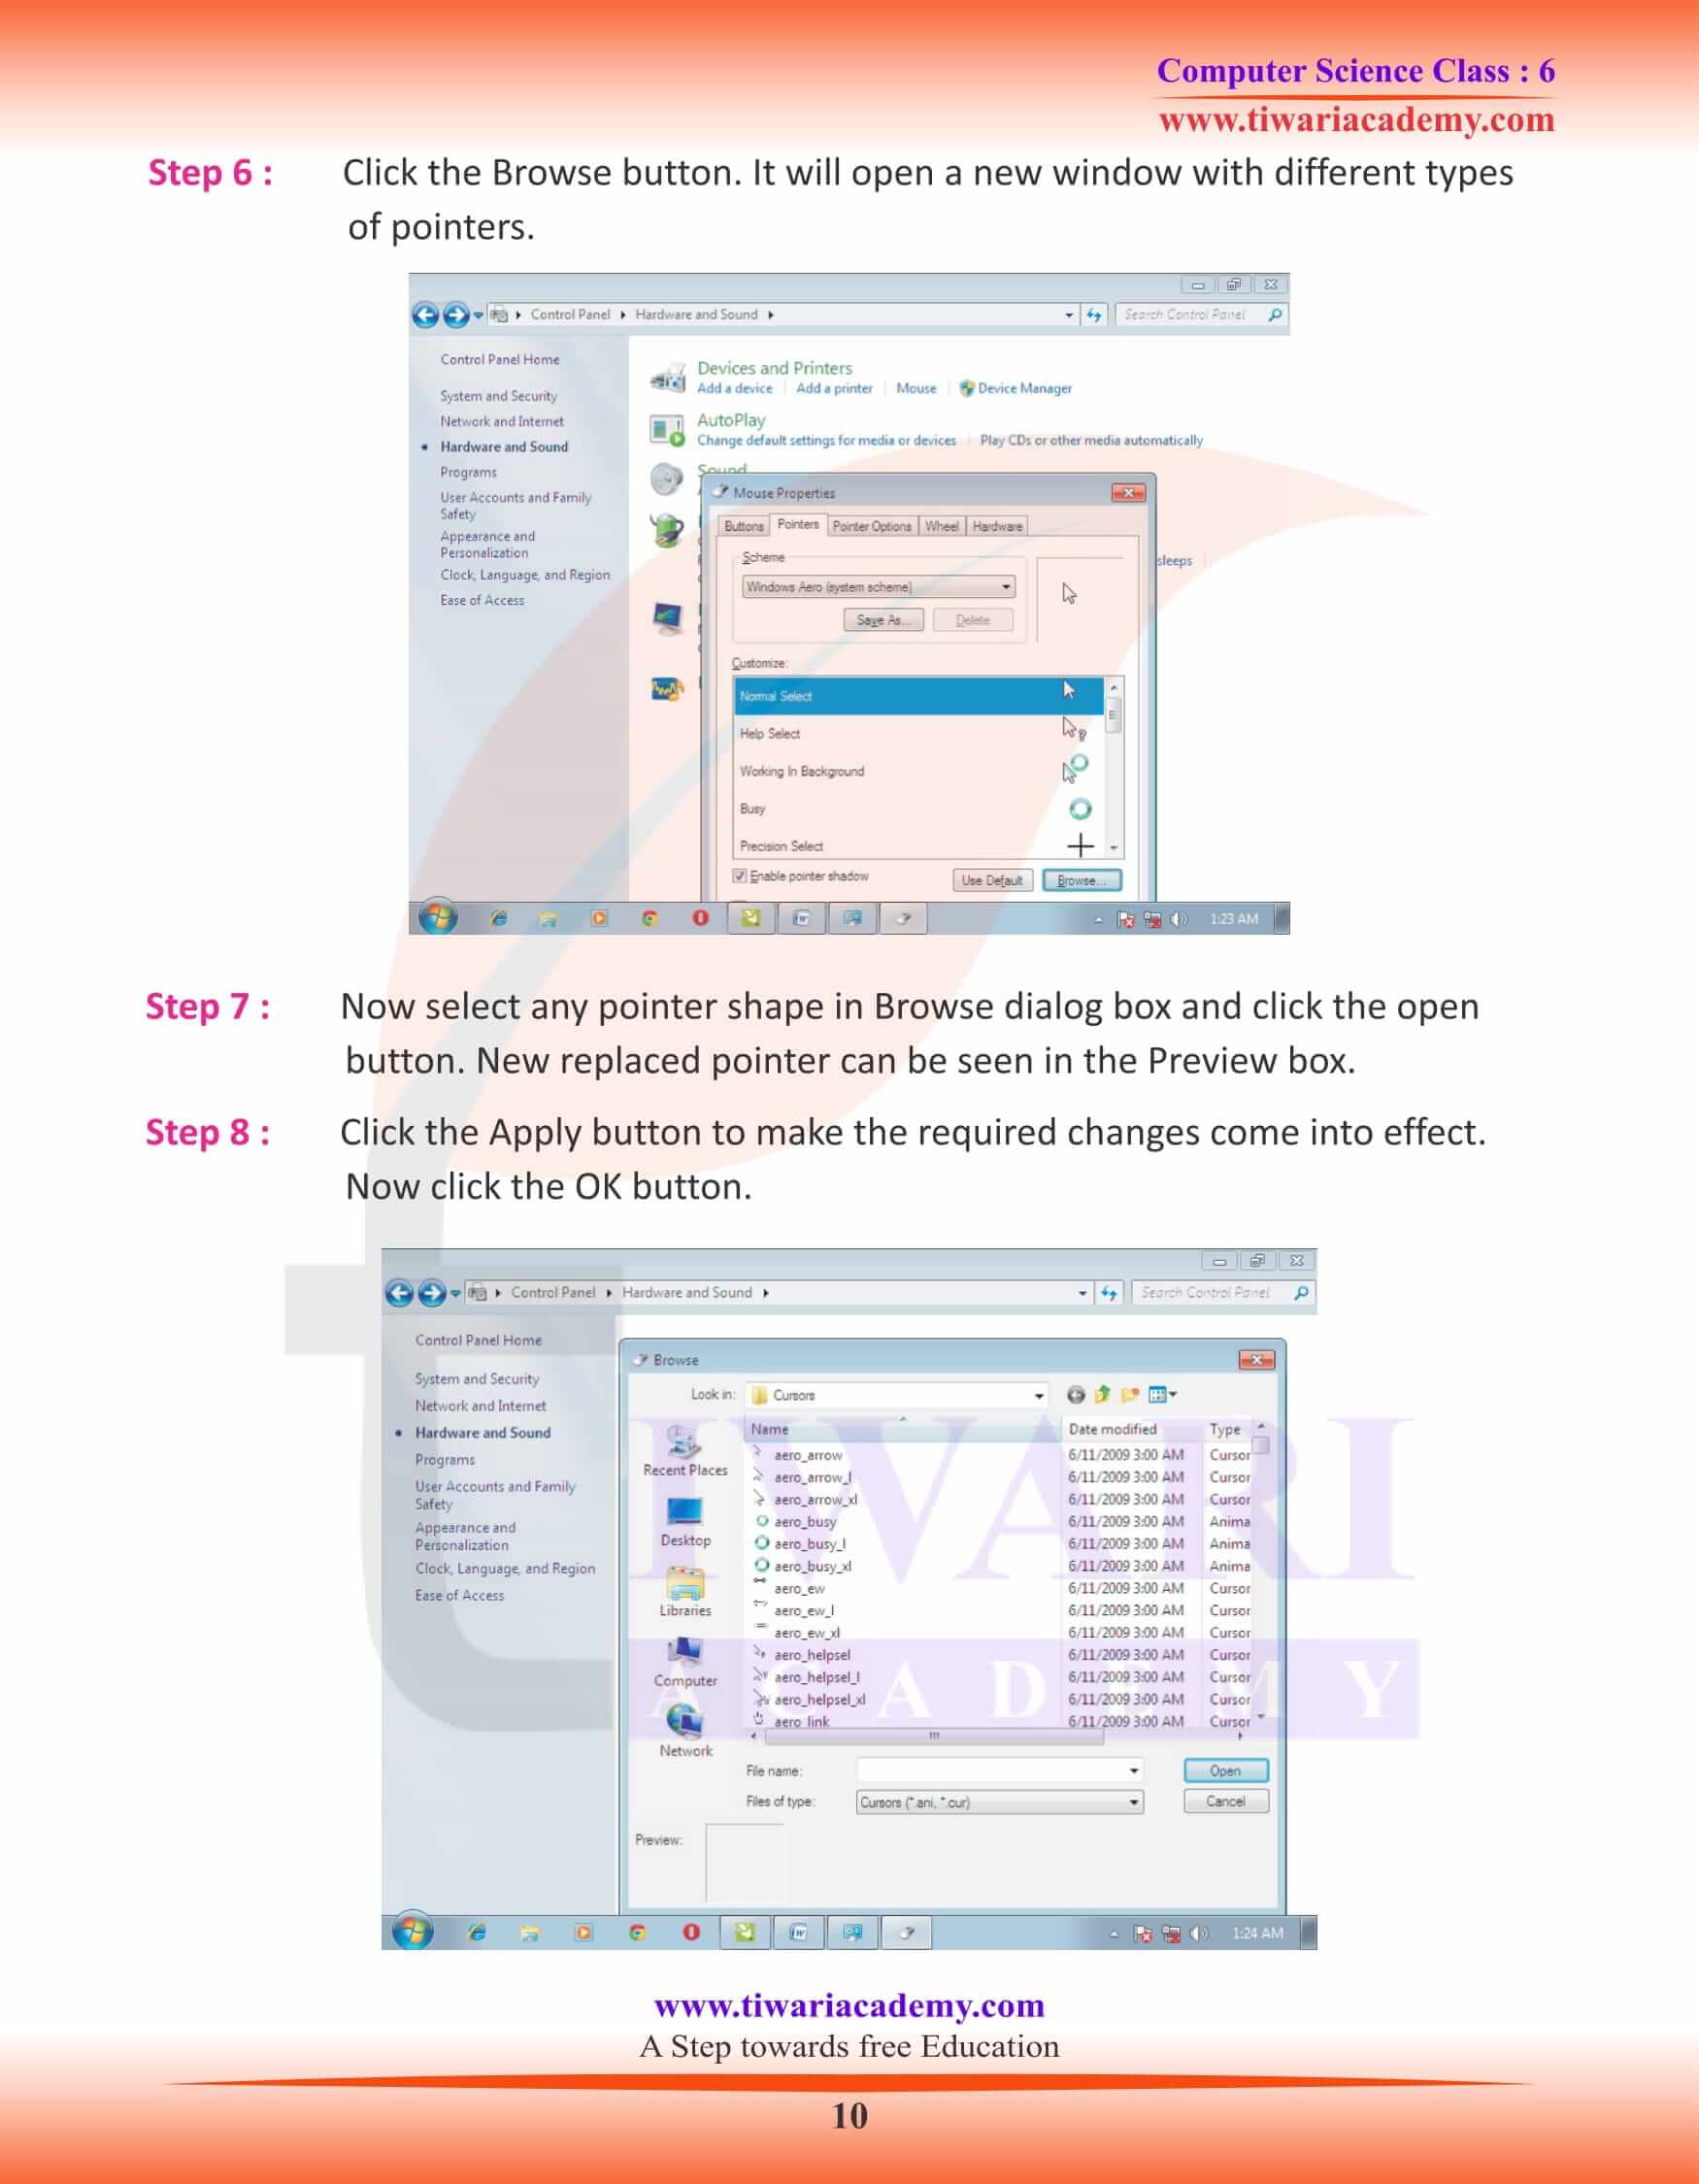
Step 6 : Click the Browse button. It will open a new window with different types of pointers.
Step 7 : Now select any pointer shape in Browse dialog box and click the open button. New replaced pointer can be seen in the Preview box.
Step 8 : Click the Apply button to make the required changes come into effect. Now click the OK button.