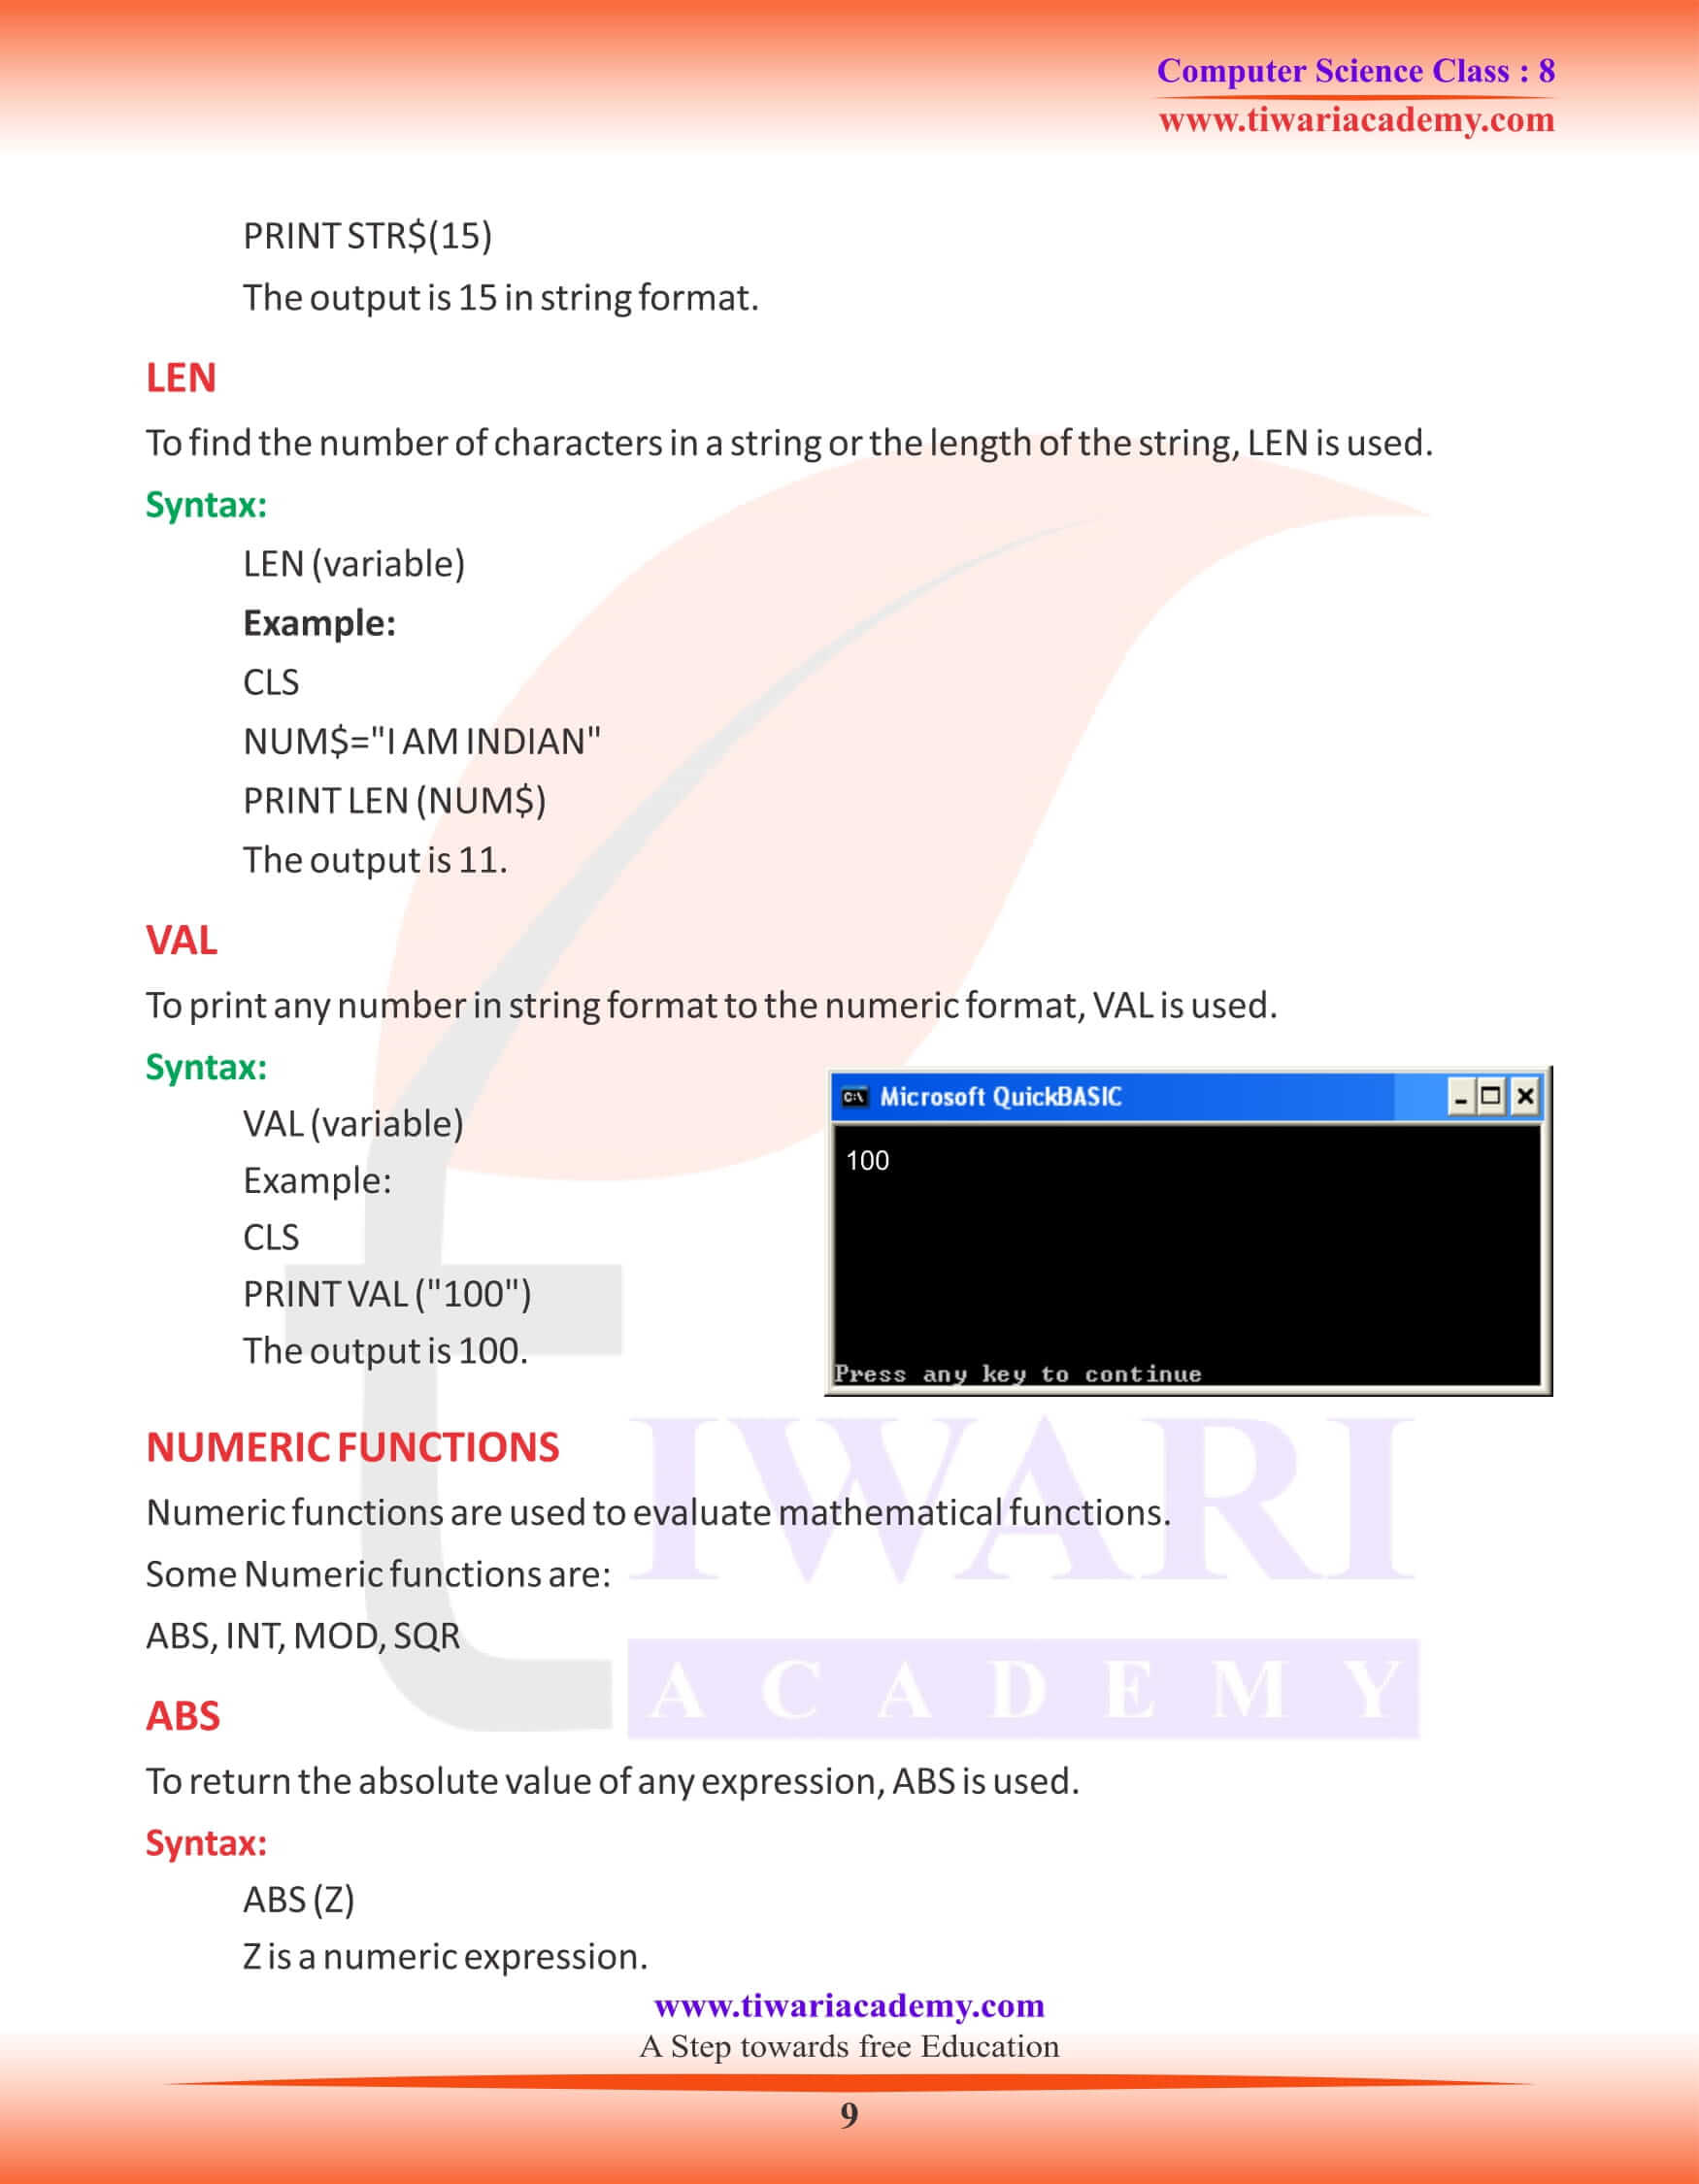
by Tiwari Academy Team
NCERT Solutions for Class 8 Computer Science Chapter 8 Q-Basic prepared and updated new academic session 2026-27. Grade 8 Computer book chapter 8 explains about the programing methods using Qbasic. It is easy to understand and student work with fun during the use of this type of programing language.
Class 8 Computer Science Chapter 8 QBasic
Introduction to Qbasic
The computer needs the sequence of instructions in a form that it can understand to perform any task. A programming language is a set of words, instructions and symbols that makes a programmer competent to communicate instructions to a computer. Beginners All-Purpose Symbolic Instruction Code is one of the programming language. It was developed by John G. Kemeny and Thomas E. Kurty in 1964 at Dartmouth College. G.W. Basic, QBasic, Visual Basic, Turbo Basic, etc. are various forms of BASIC.
It is very easy so it is very popular programming language. QBasic is a programming language developed by Microsoft. It is used to write, edit, execute and correct a program. It is an ideal programming language for programmers because of its intuitive commands, simple structure and flexibility. In QBasic, loops are made with the help of control statements.
CONTROL STATEMENTS
Control statements are very powerful tools for programmers. These are used to control the flow of the program as per your choice. It has many control statements. Some are conditional, some are unconditional and some use counters.
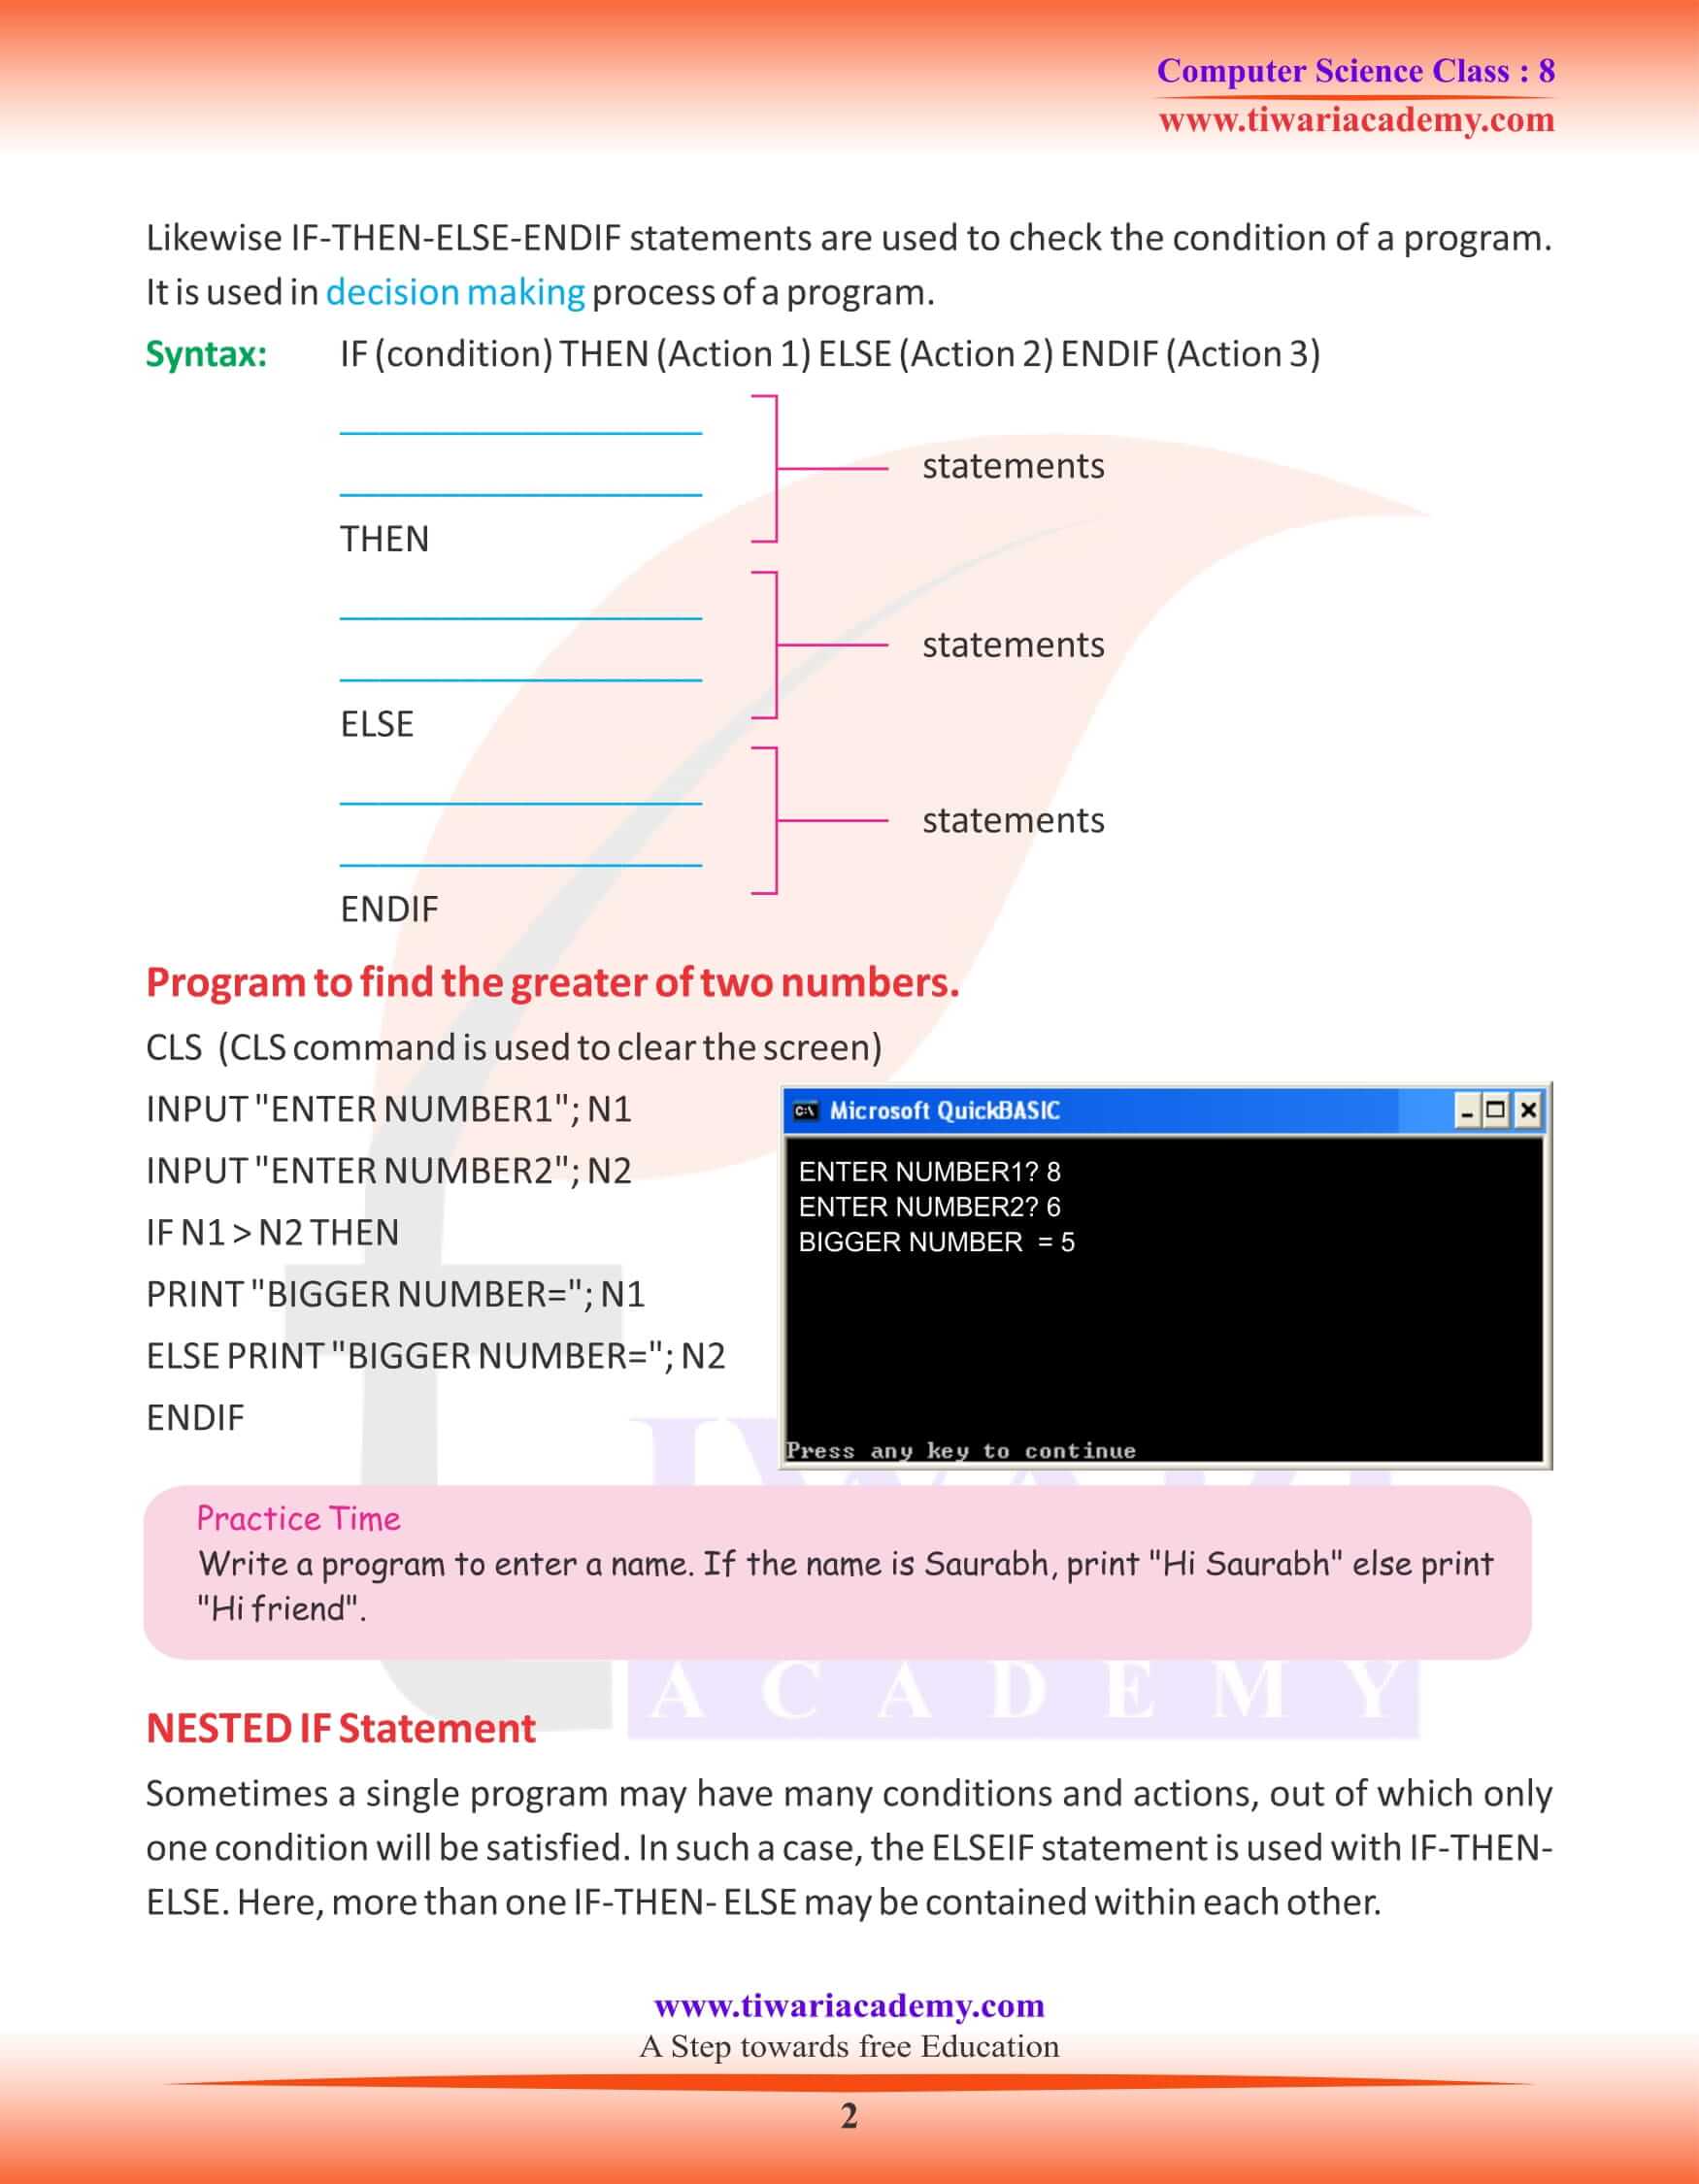
The IF-THEN-ELSE-ENDIF statement
Generally all of us use conditional statements to take decisions.
Likewise IF-THEN-ELSE-ENDIF statements are used to check the condition of a program. It is used in decision making process of a program.
Program to find the greater of two numbers.
CLS (CLS command is used to clear the screen)
INPUT “ENTER NUMBER1”; N1
INPUT “ENTER NUMBER2”; N2
IF N1 > N2 THEN
PRINT “BIGGER NUMBER=”; N1
ELSE PRINT “BIGGER NUMBER=”; N2
ENDIF
Practice Time Write a program to enter a name. If the name is Saurabh, print “Hi Saurabh” else print “Hi friend”.
ENTER NUMBER1? 8
ENTER NUMBER2? 6
BIGGER NUMBER = 5
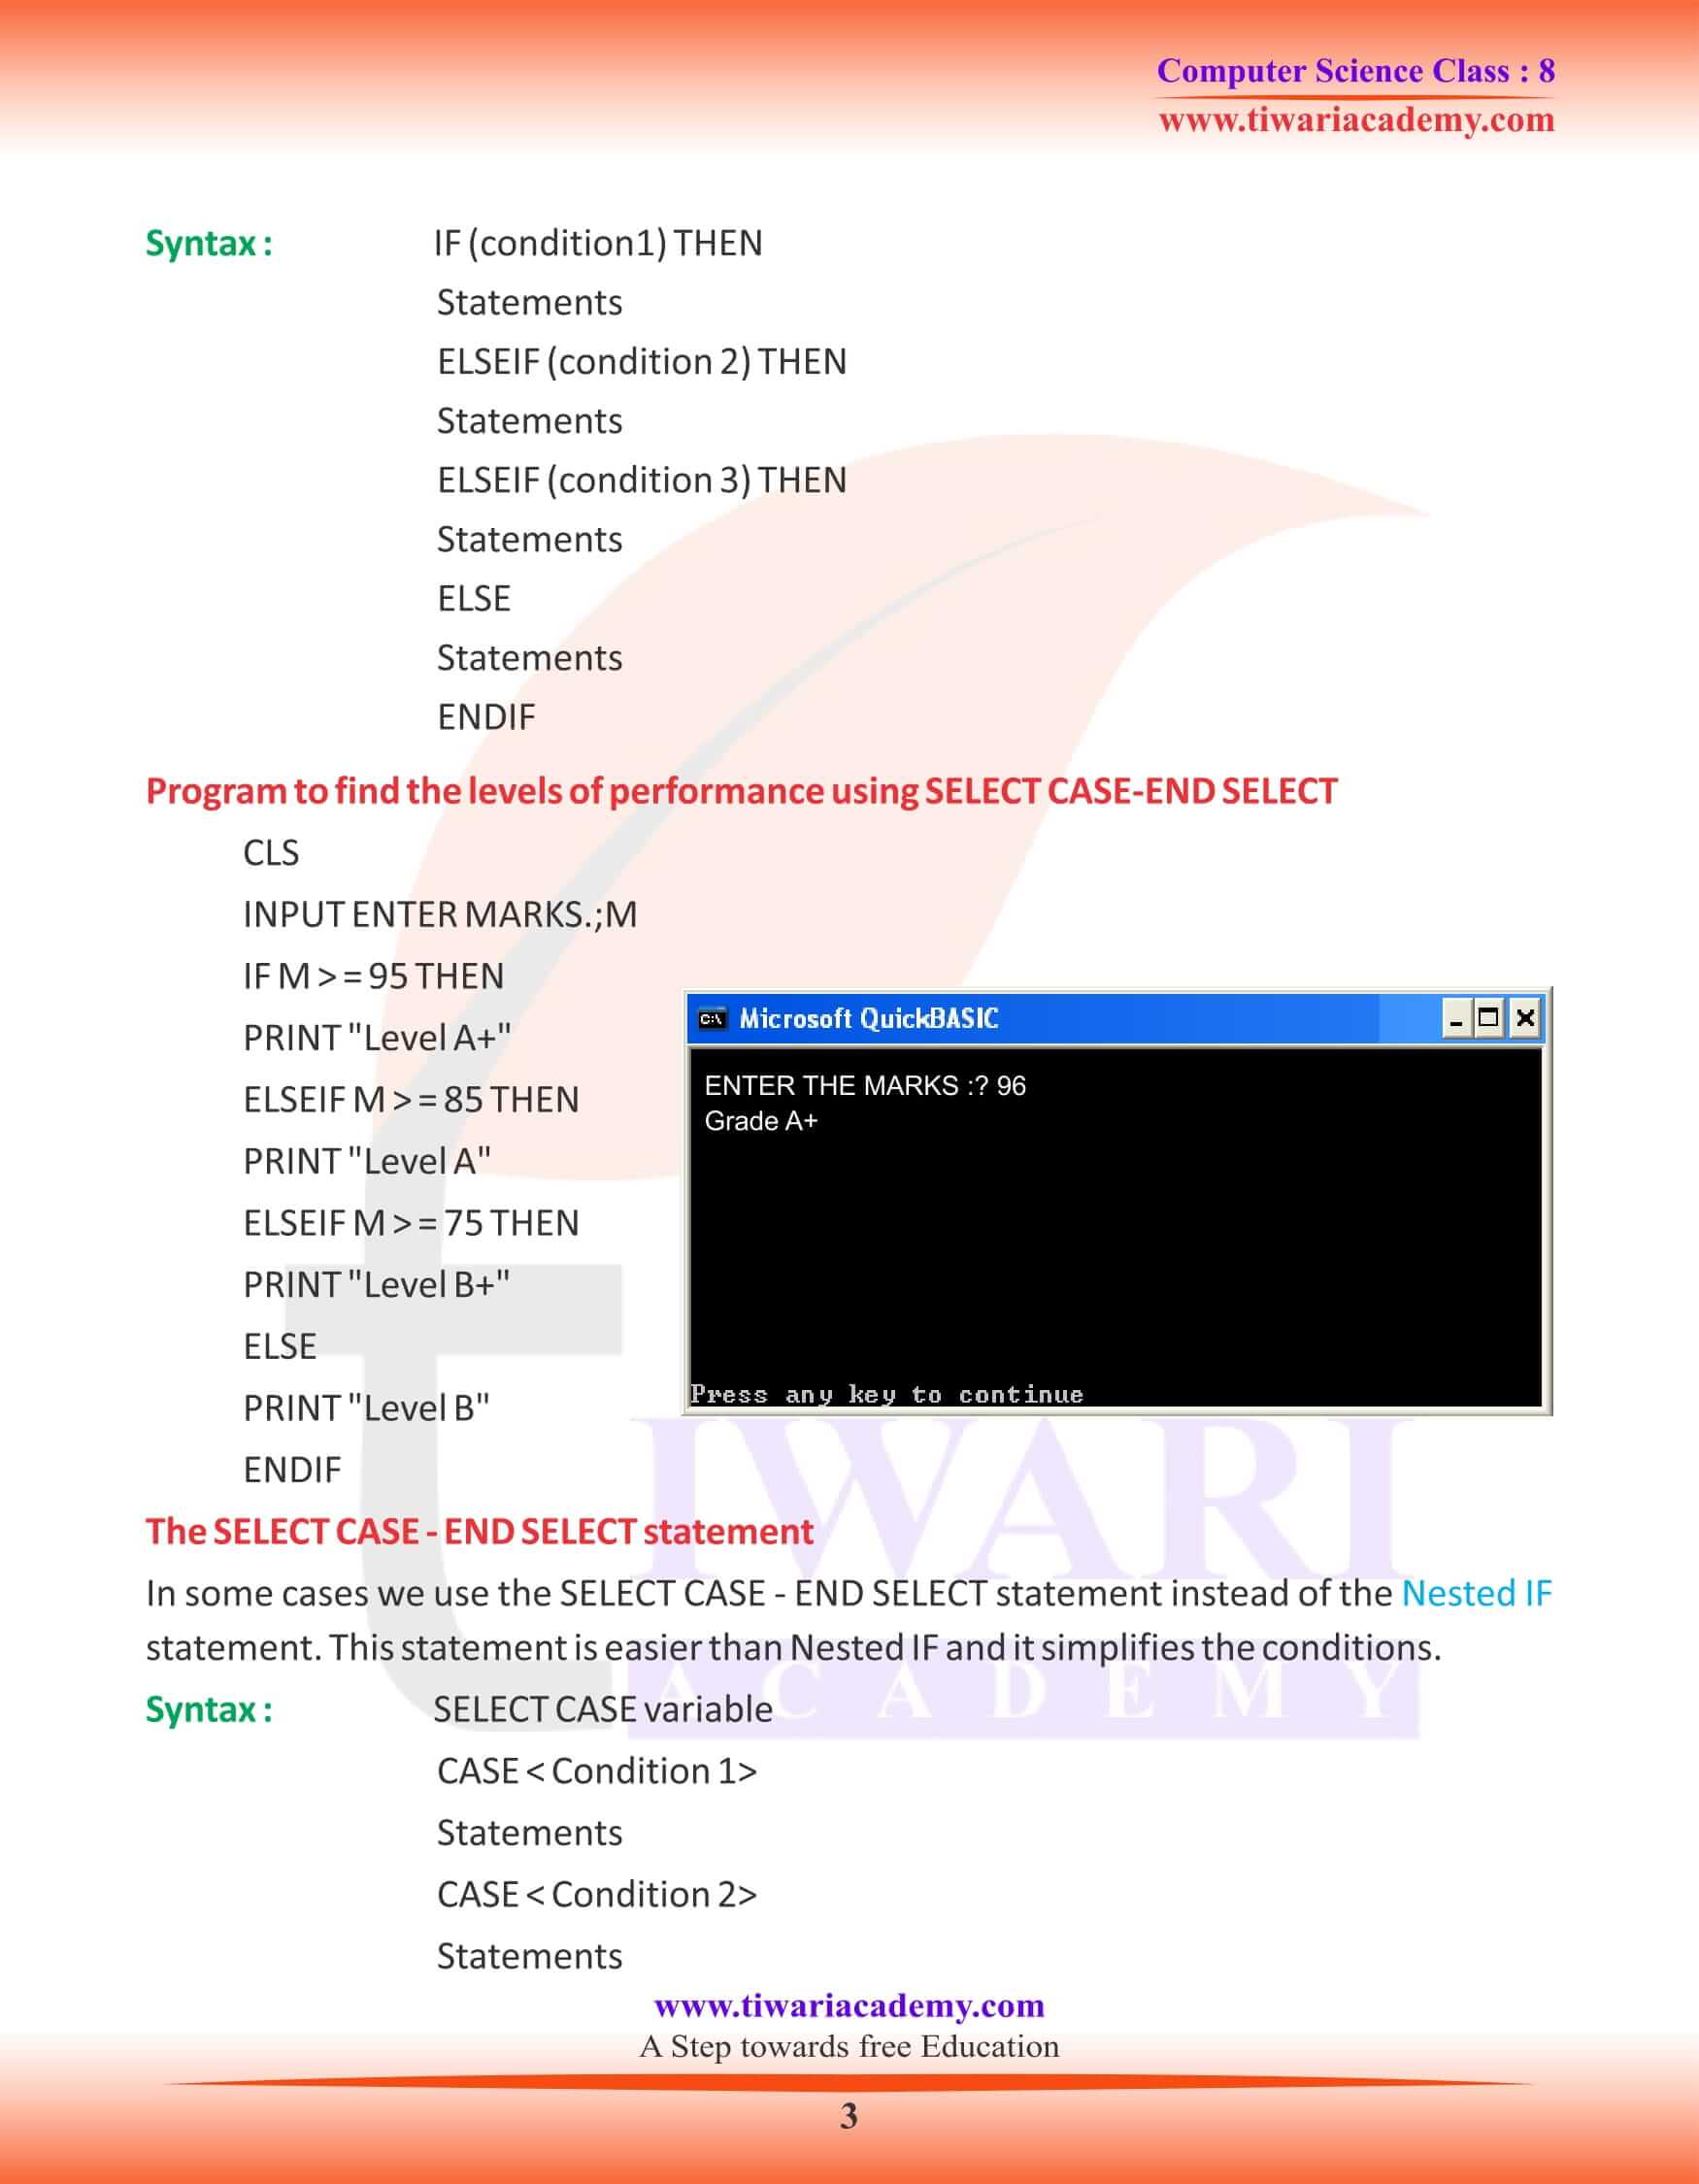
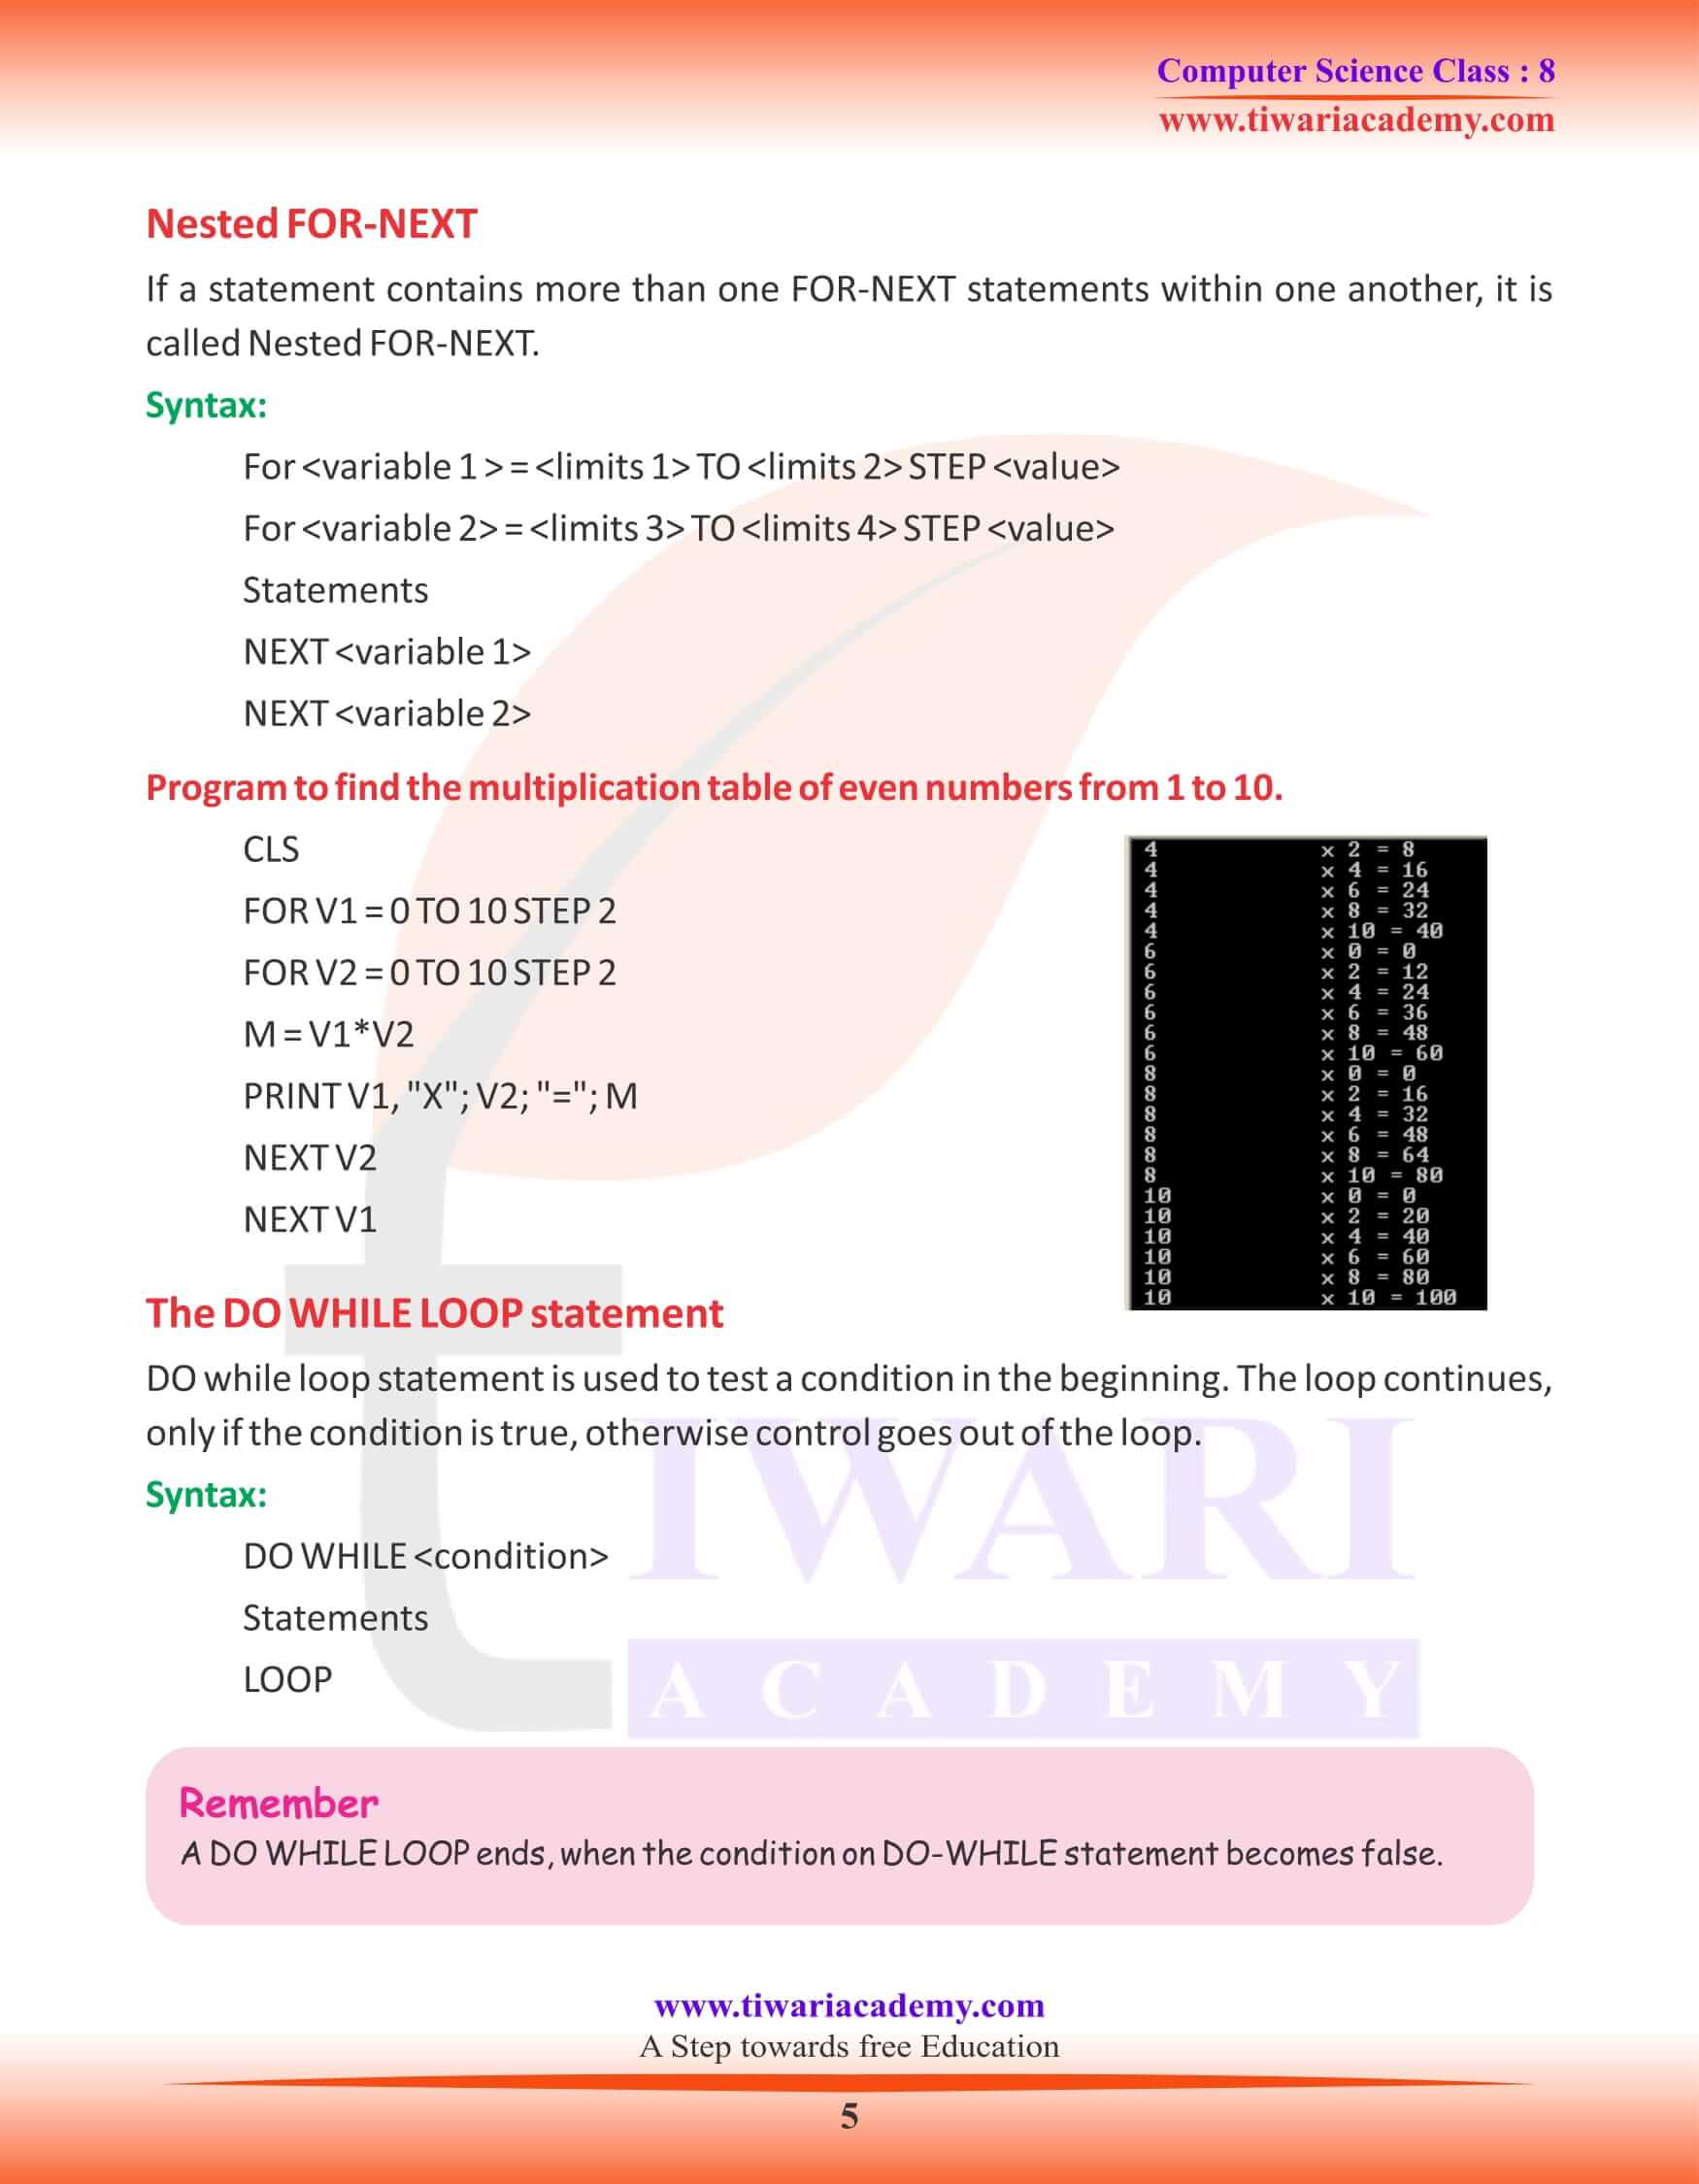
NESTED IF Statement
Sometimes a single program may have many conditions and actions, out of which only one condition will be satisfied. In such a case, the ELSEIF statement is used with IF-THENELSE. Here, more than one IF-THEN- ELSE may be contained within each other.
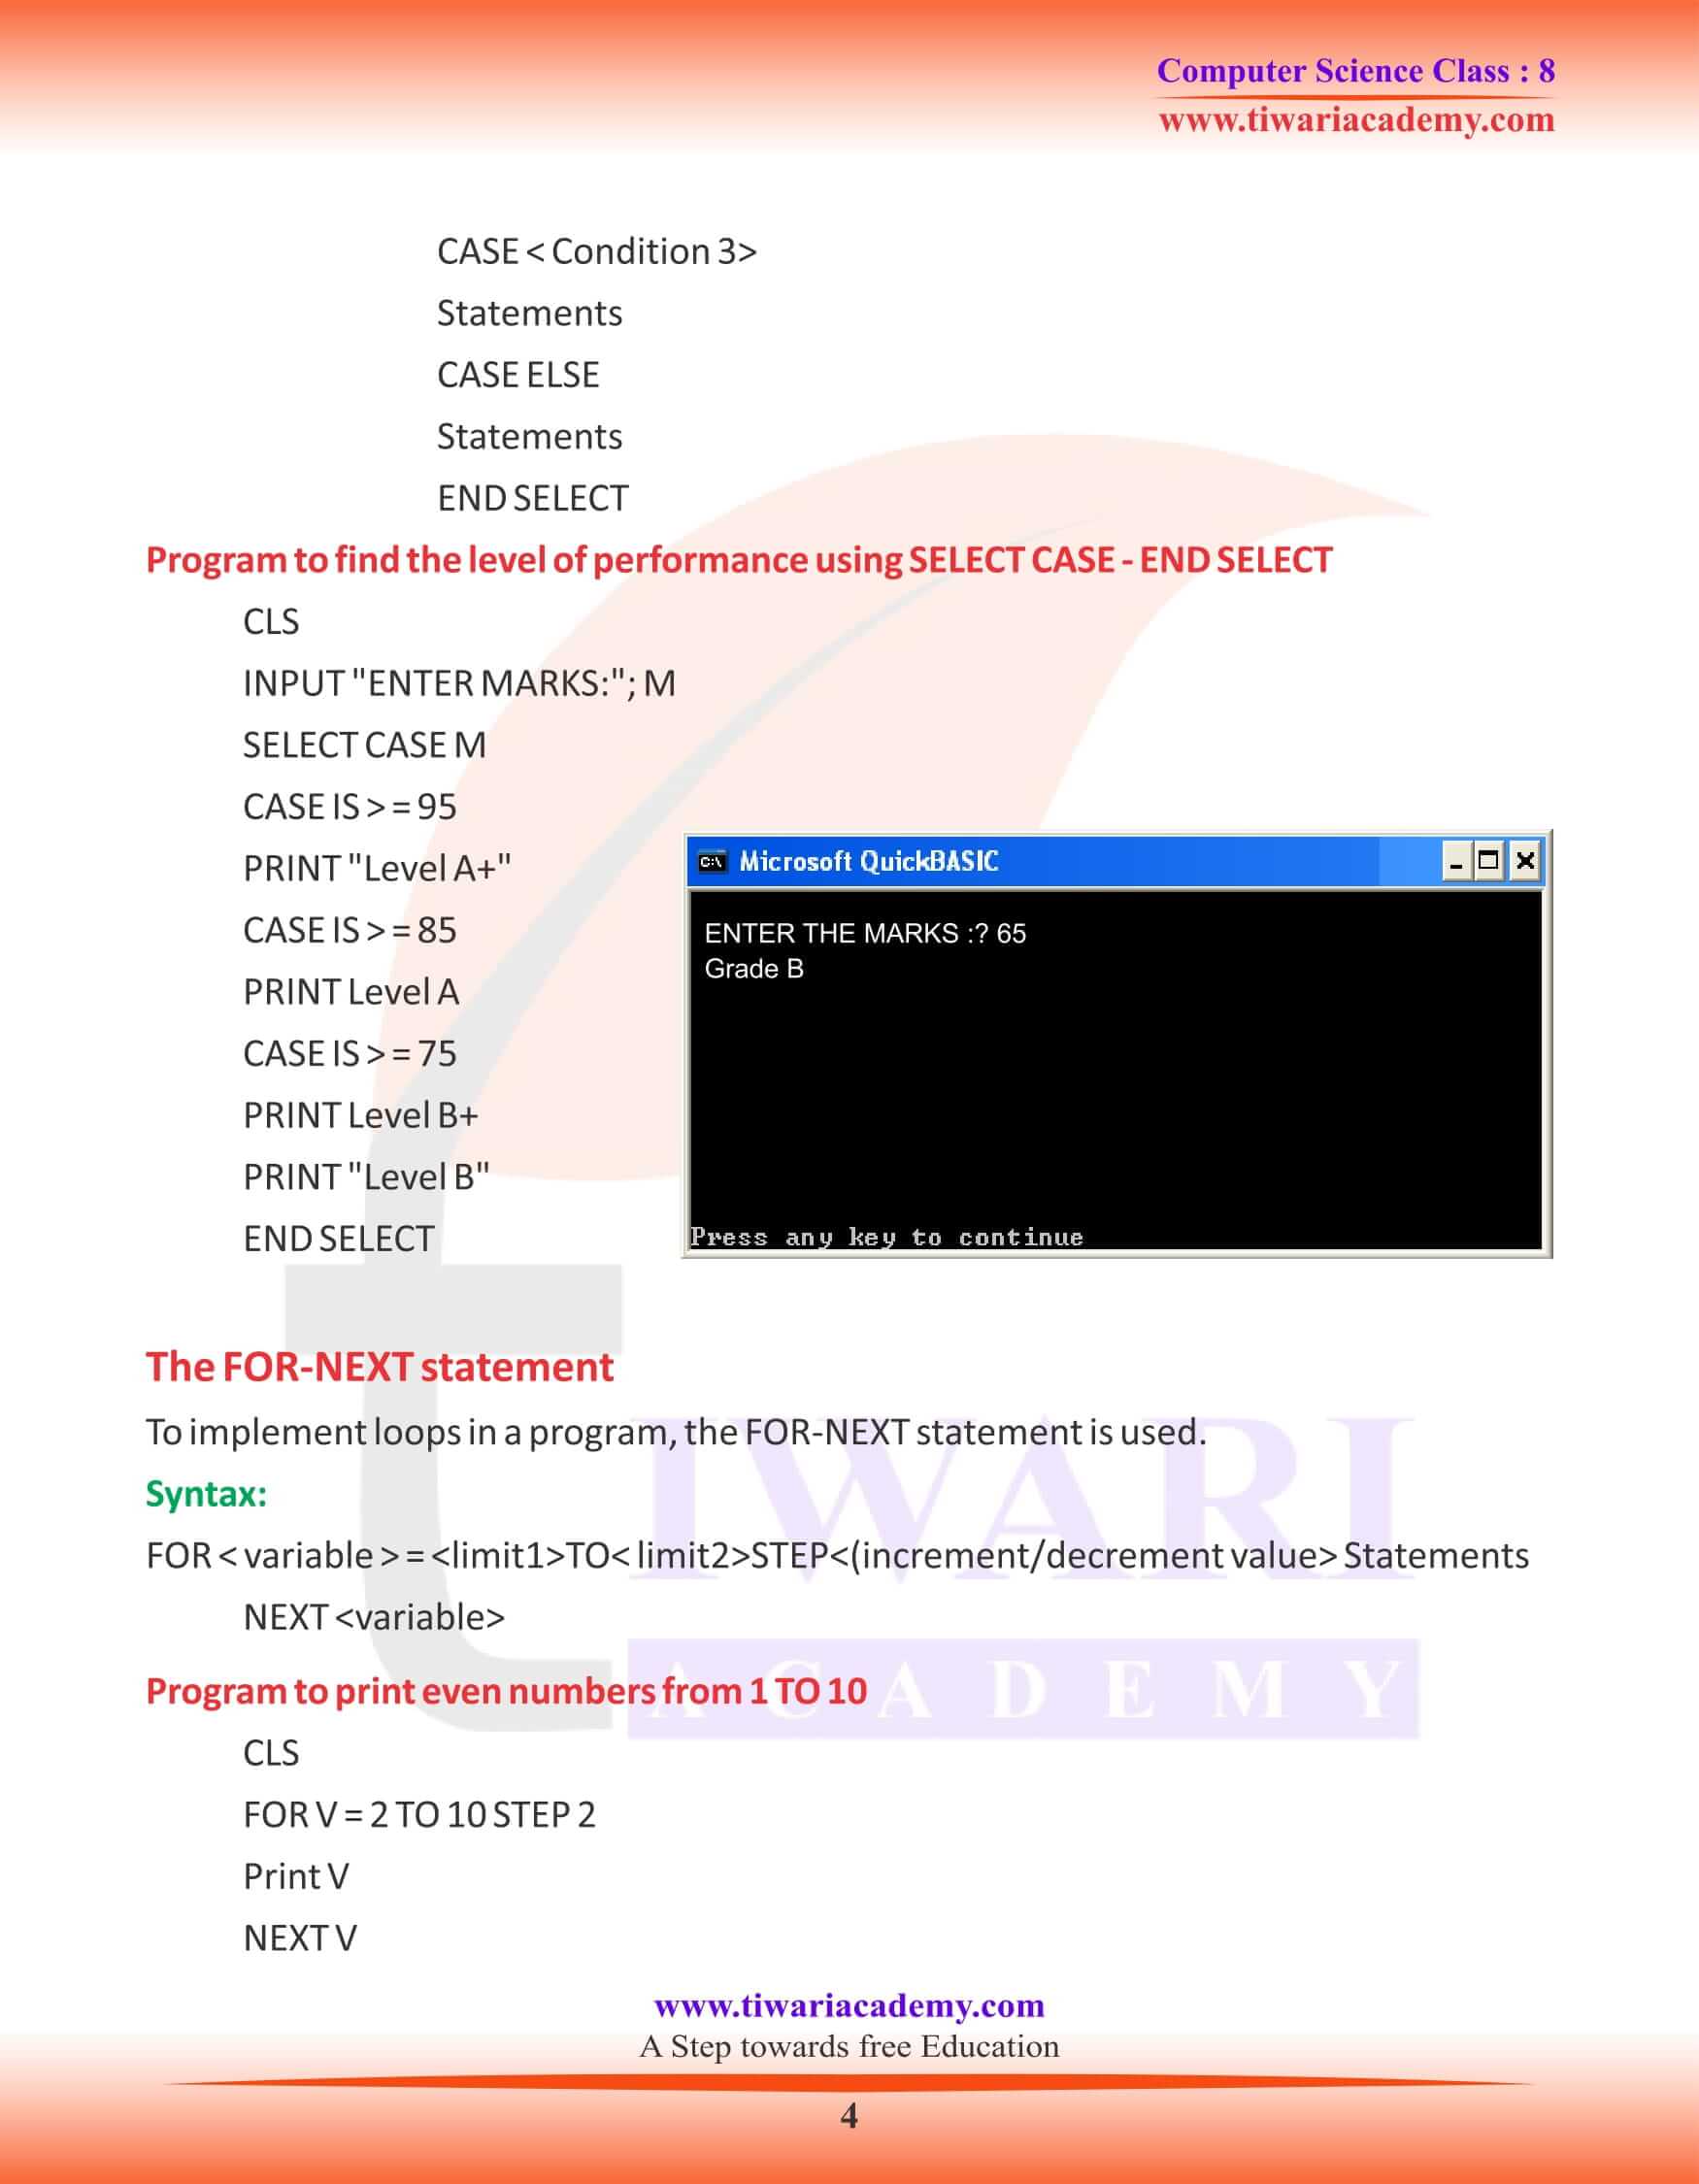
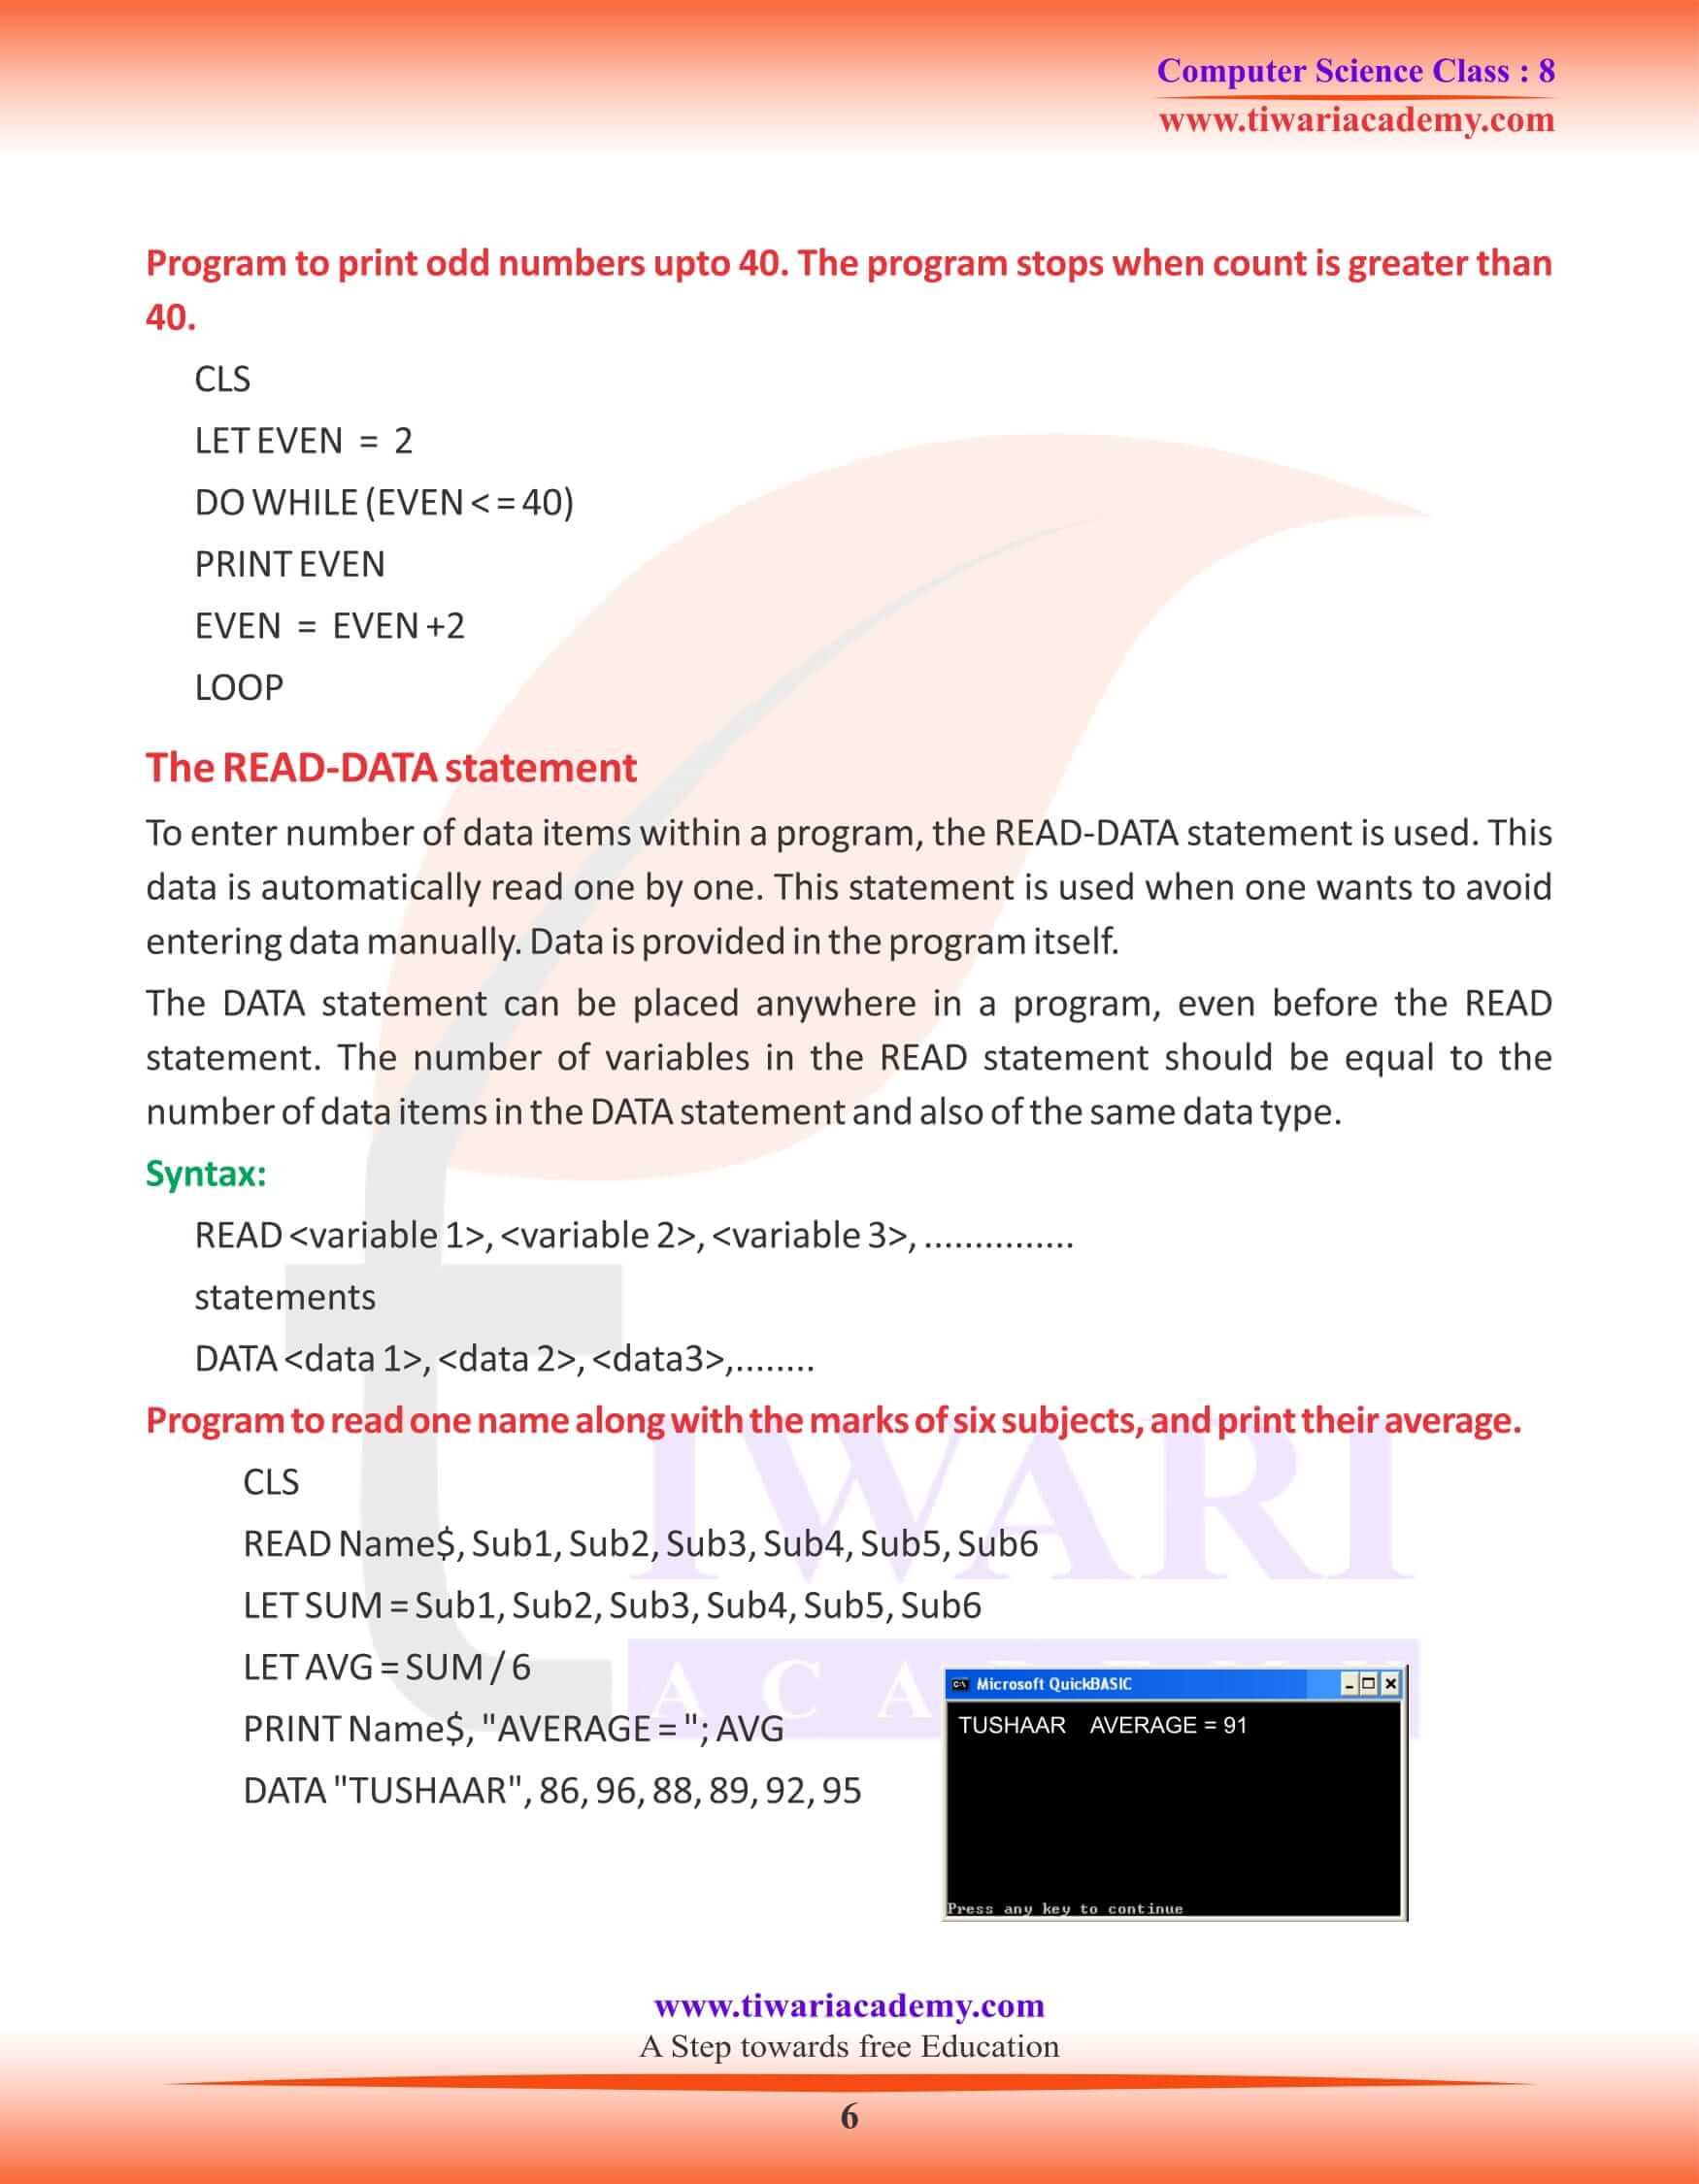
The READ-DATA statement
To enter number of data items within a program, the READ-DATA statement is used. This data is automatically read one by one. This statement is used when one wants to avoid entering data manually. Data is provided in the program itself. The DATA statement can be placed anywhere in a program, even before the READ statement. The number of variables in the READ statement should be equal to the number of data items in the DATA statement and also of the same data type.
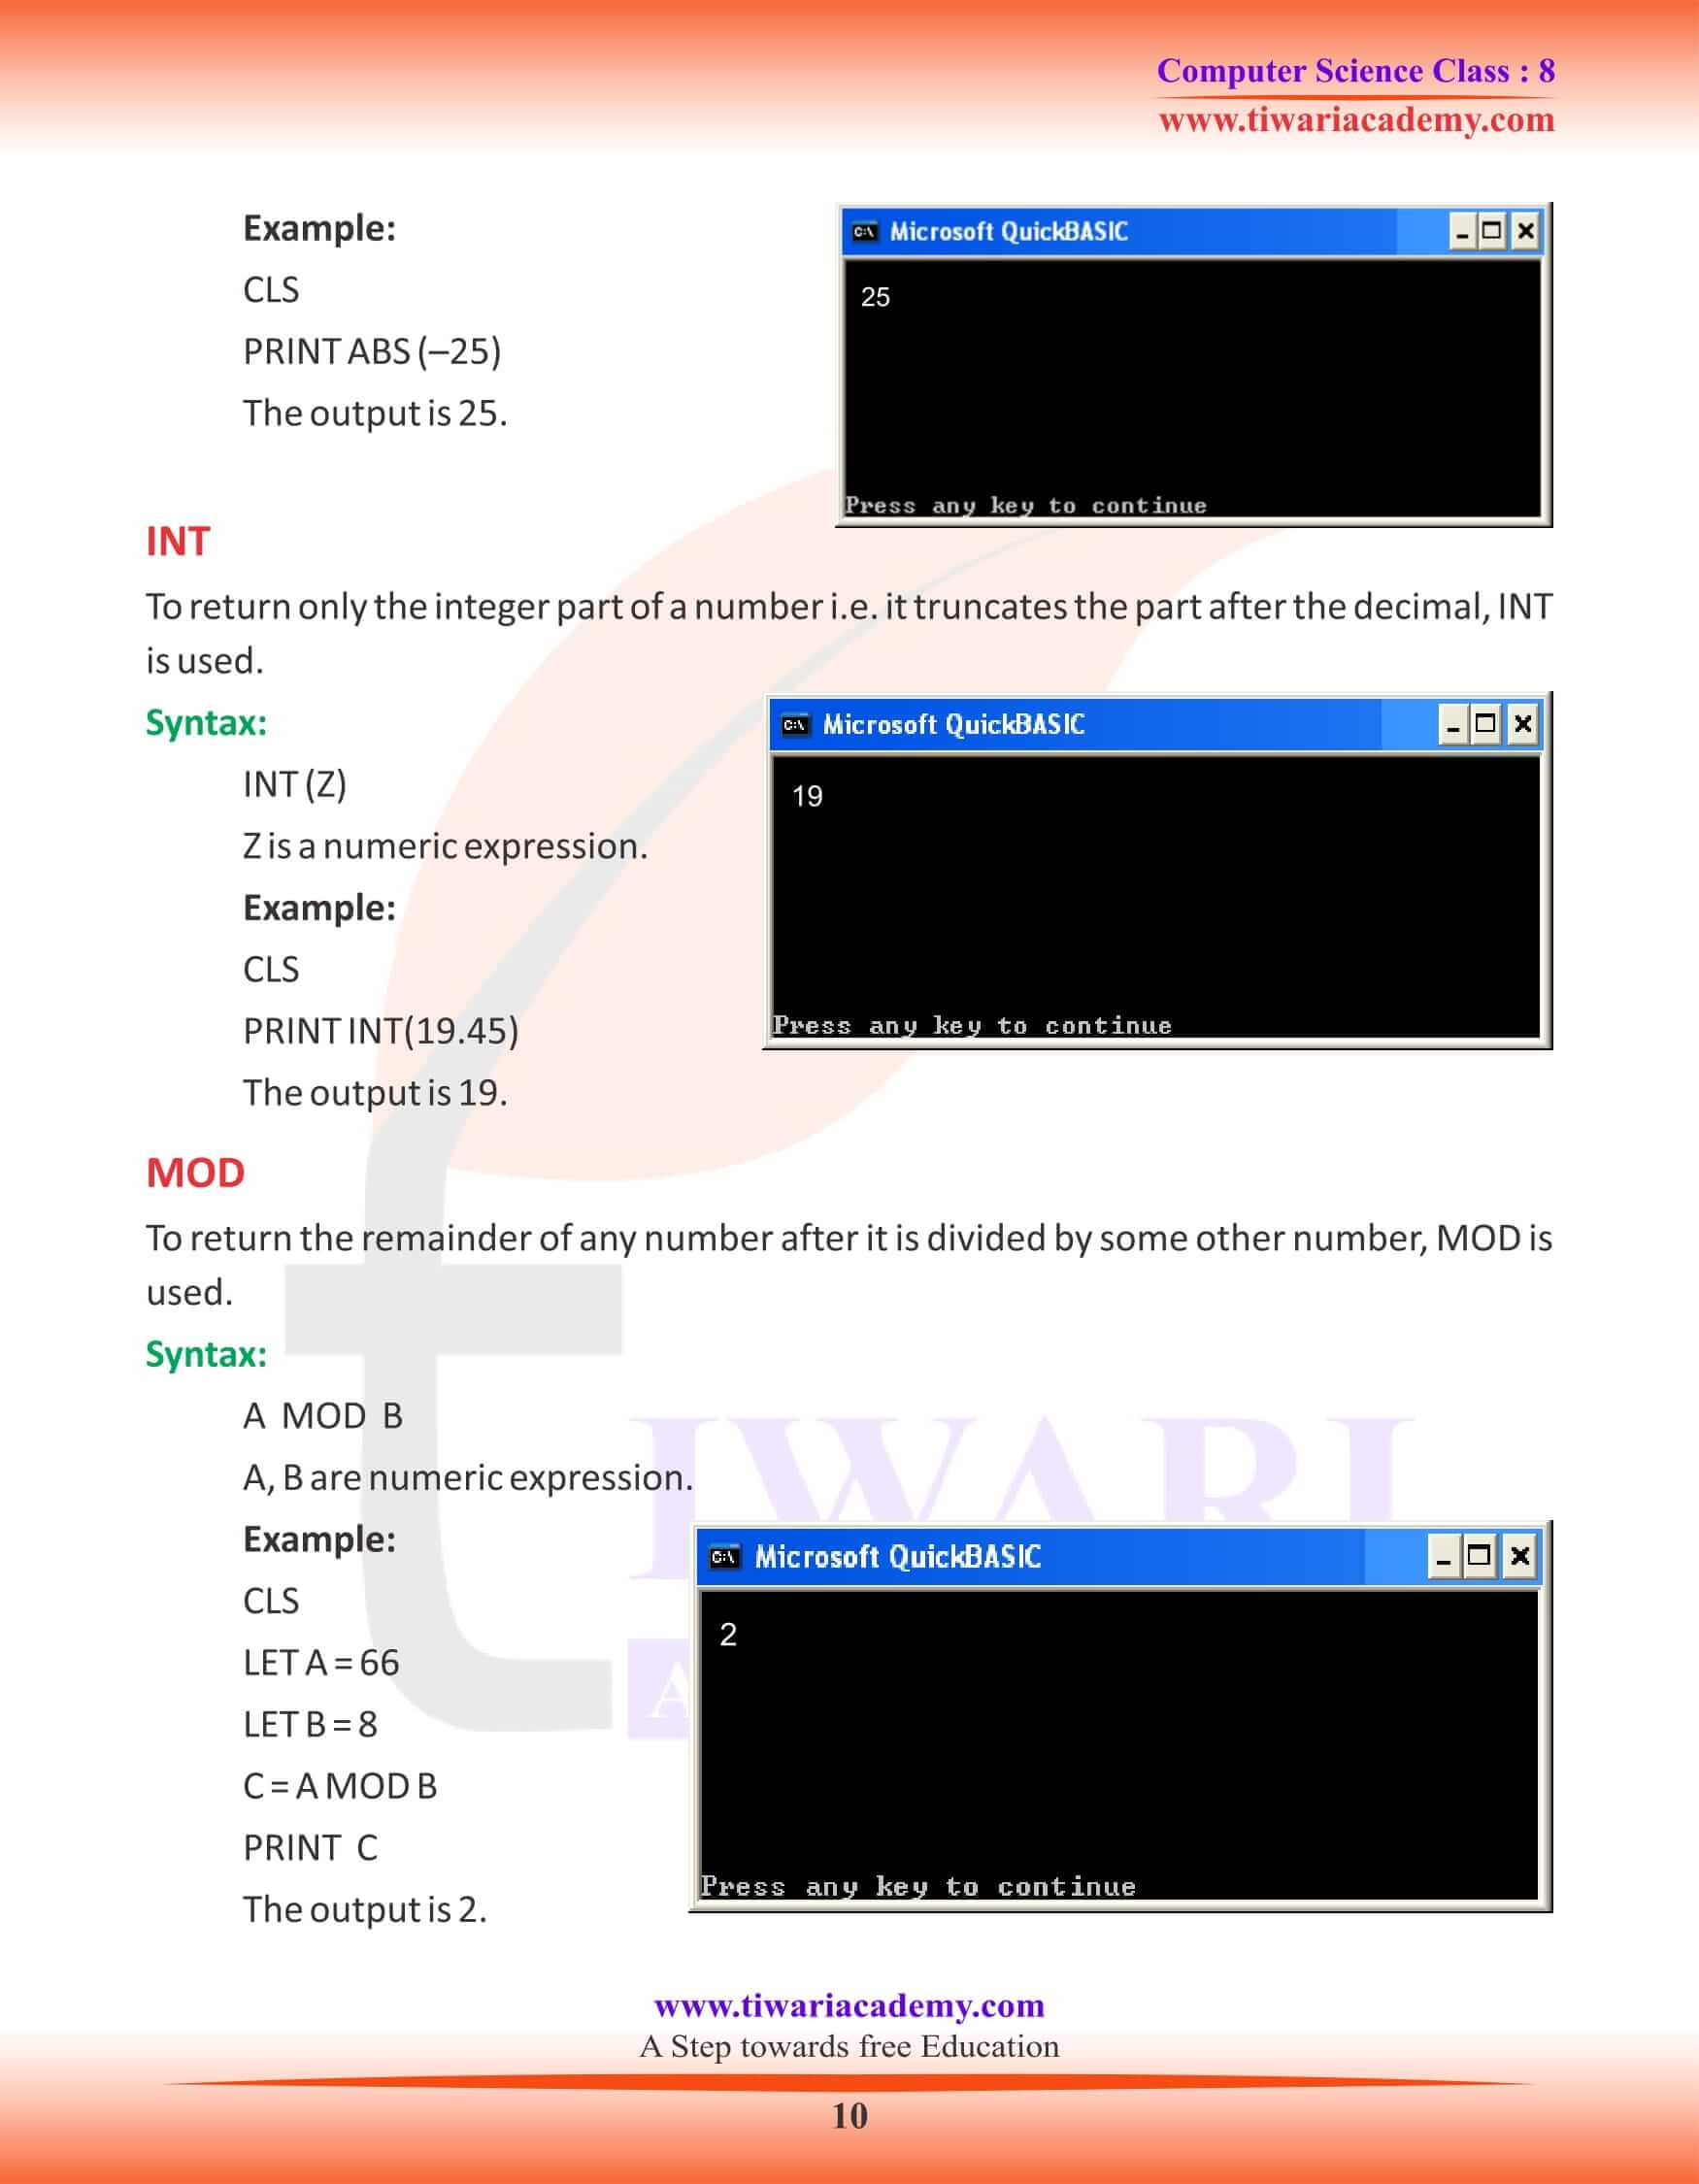
LIBRARY FUNCTIONS IN QBASIC
The built-in programs, which are already present in Qbasic are called Library functions. You cannot write these functions by yourself. Programming is made easier by these functions.
The two Library functions present in Qbasic are following:
1. String functions.
2. Numeric functions.
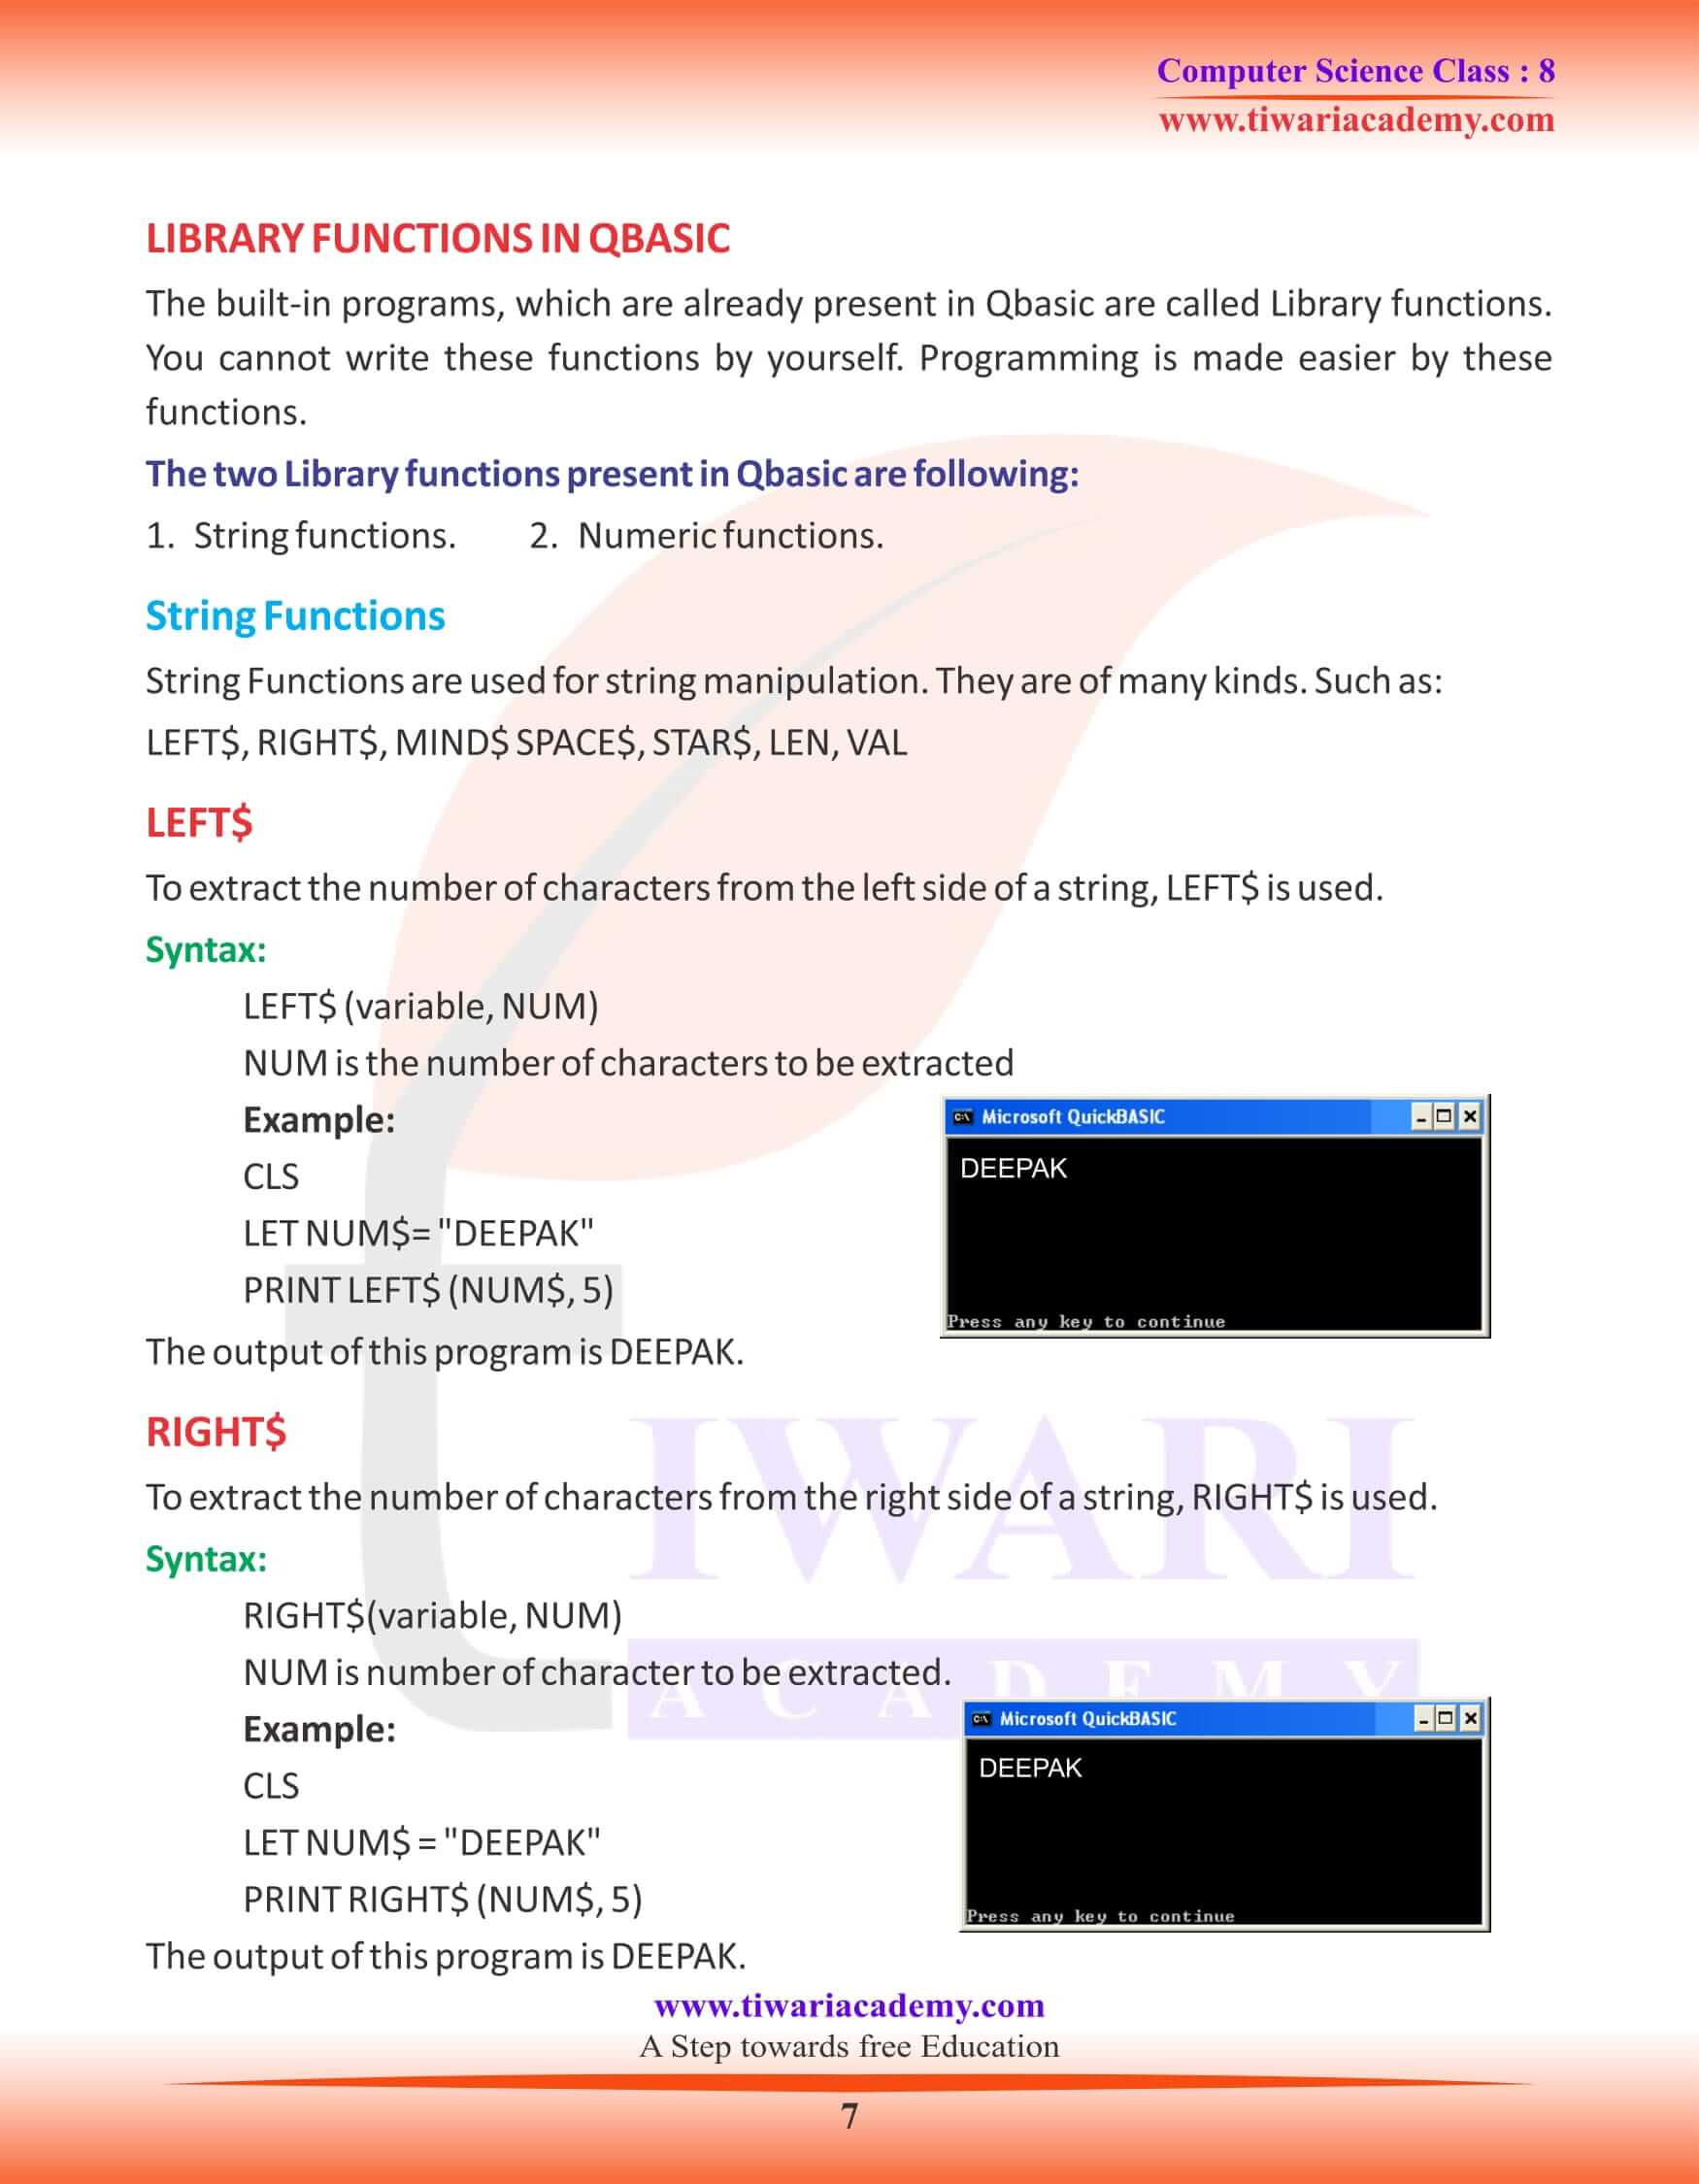
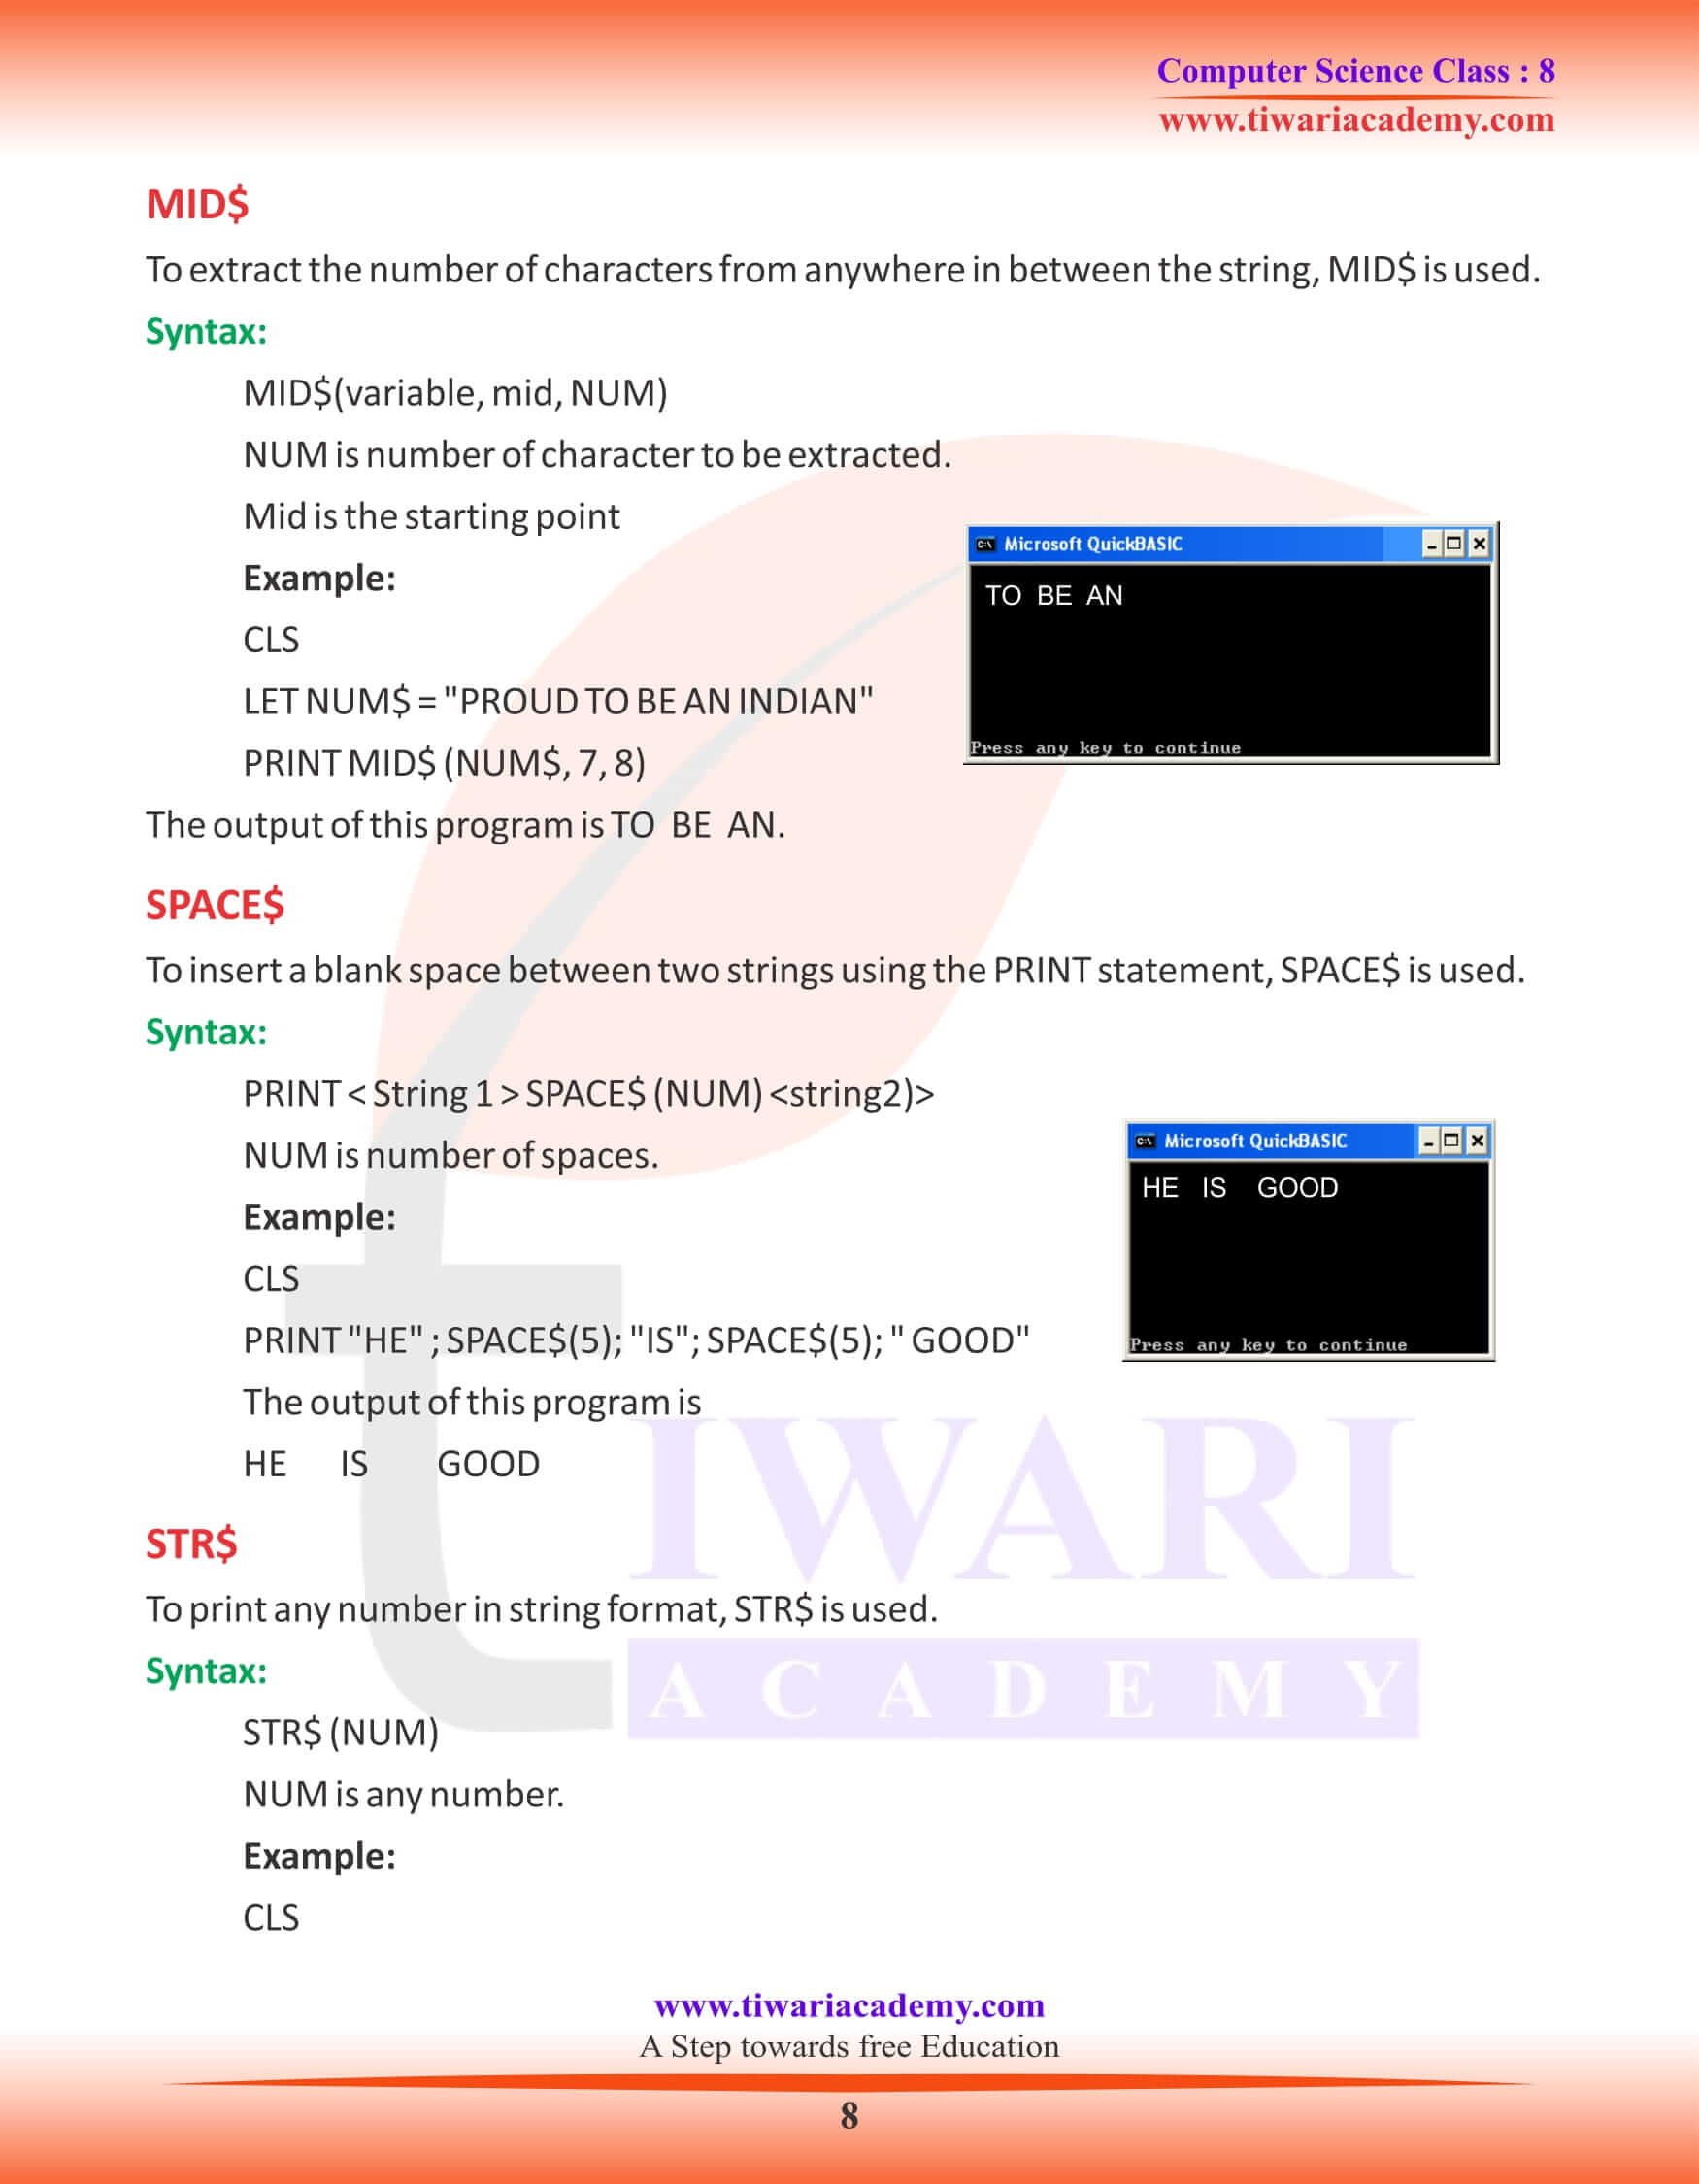
String Functions
String Functions are used for string manipulation. They are of many kinds. Such as: LEFT$, RIGHT$, MIND$ SPACE$, STAR$, LEN, VAL
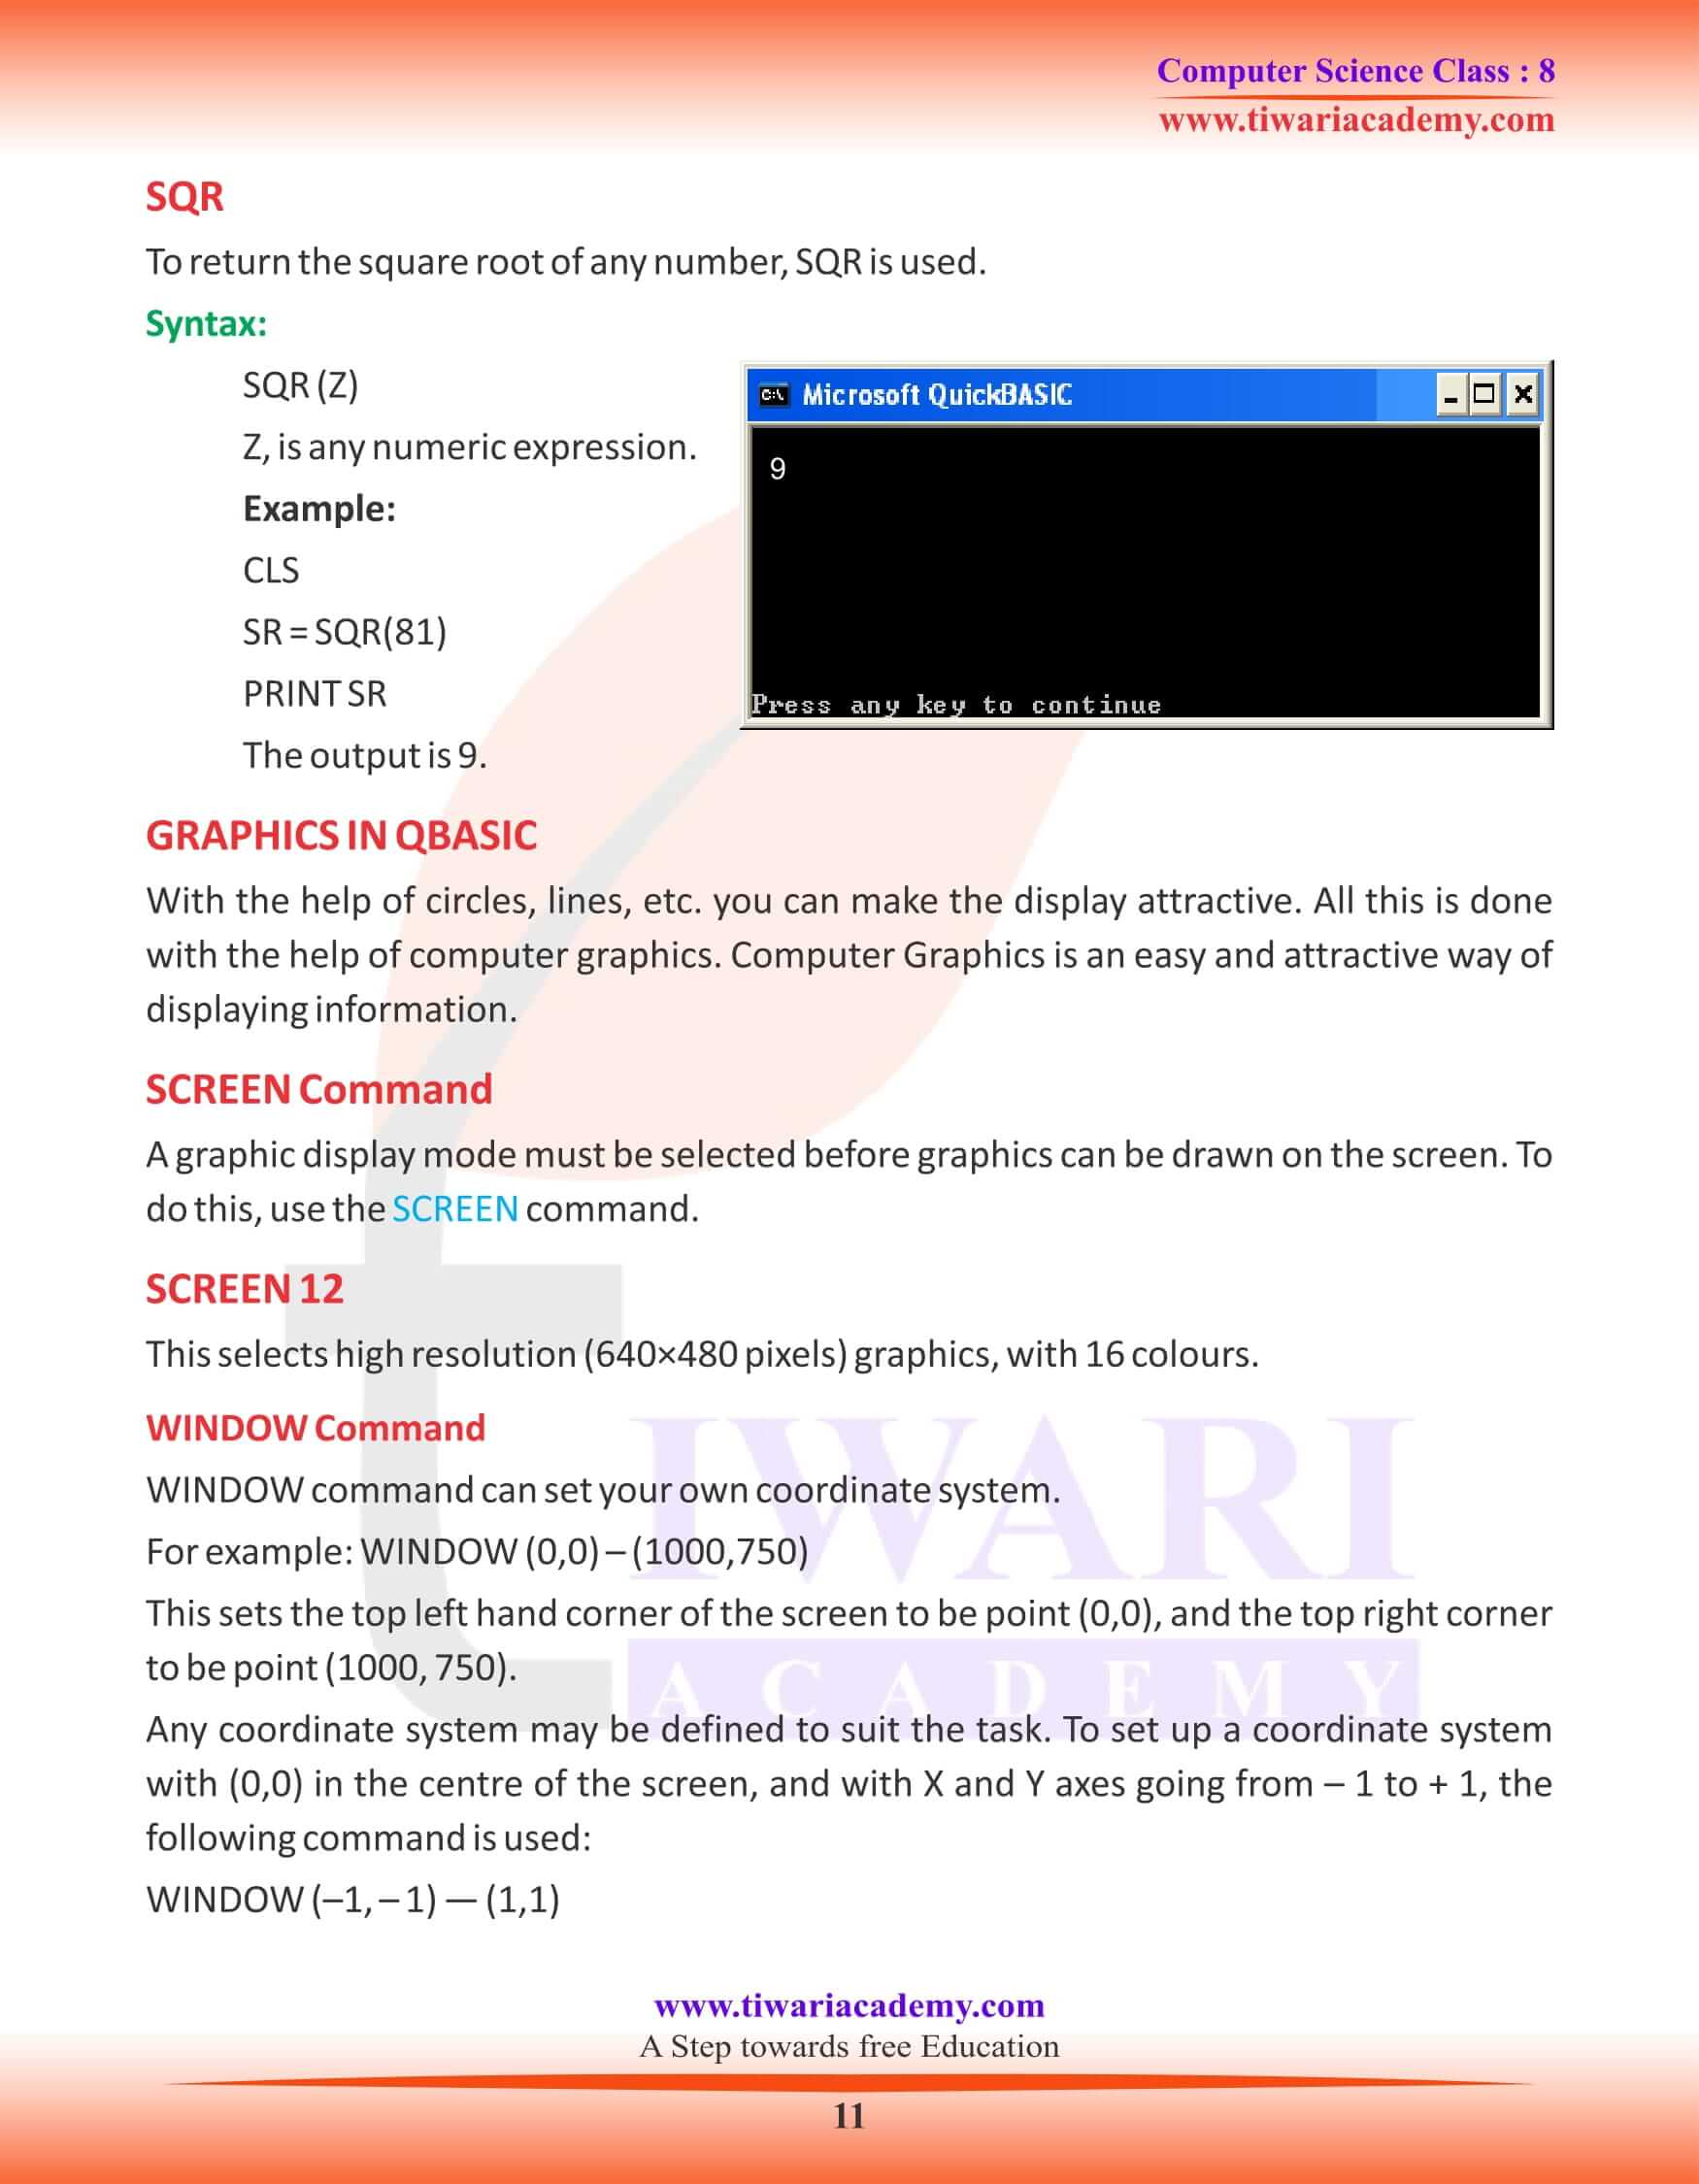
GRAPHICS IN QBASIC
With the help of circles, lines, etc. you can make the display attractive. All this is done with the help of computer graphics. Computer Graphics is an easy and attractive way of displaying information.
SCREEN Command
A graphic display mode must be selected before graphics can be drawn on the screen. To do this, use the SCREEN command.
SCREEN 12
This selects high resolution (640×480 pixels) graphics, with 16 colours.
WINDOW Command
WINDOW command can set your own coordinate system.
For example: WINDOW (0, 0) – (1000, 750)
This sets the top left hand corner of the screen to be point (0, 0), and the top right corner to be point (1000, 750).
Any coordinate system may be defined to suit the task. To set up a coordinate system with (0, 0) in the centre of the screen, and with X and Y axes going from – 1 to + 1, the following command is used: WINDOW (–1, – 1) — (1, 1)
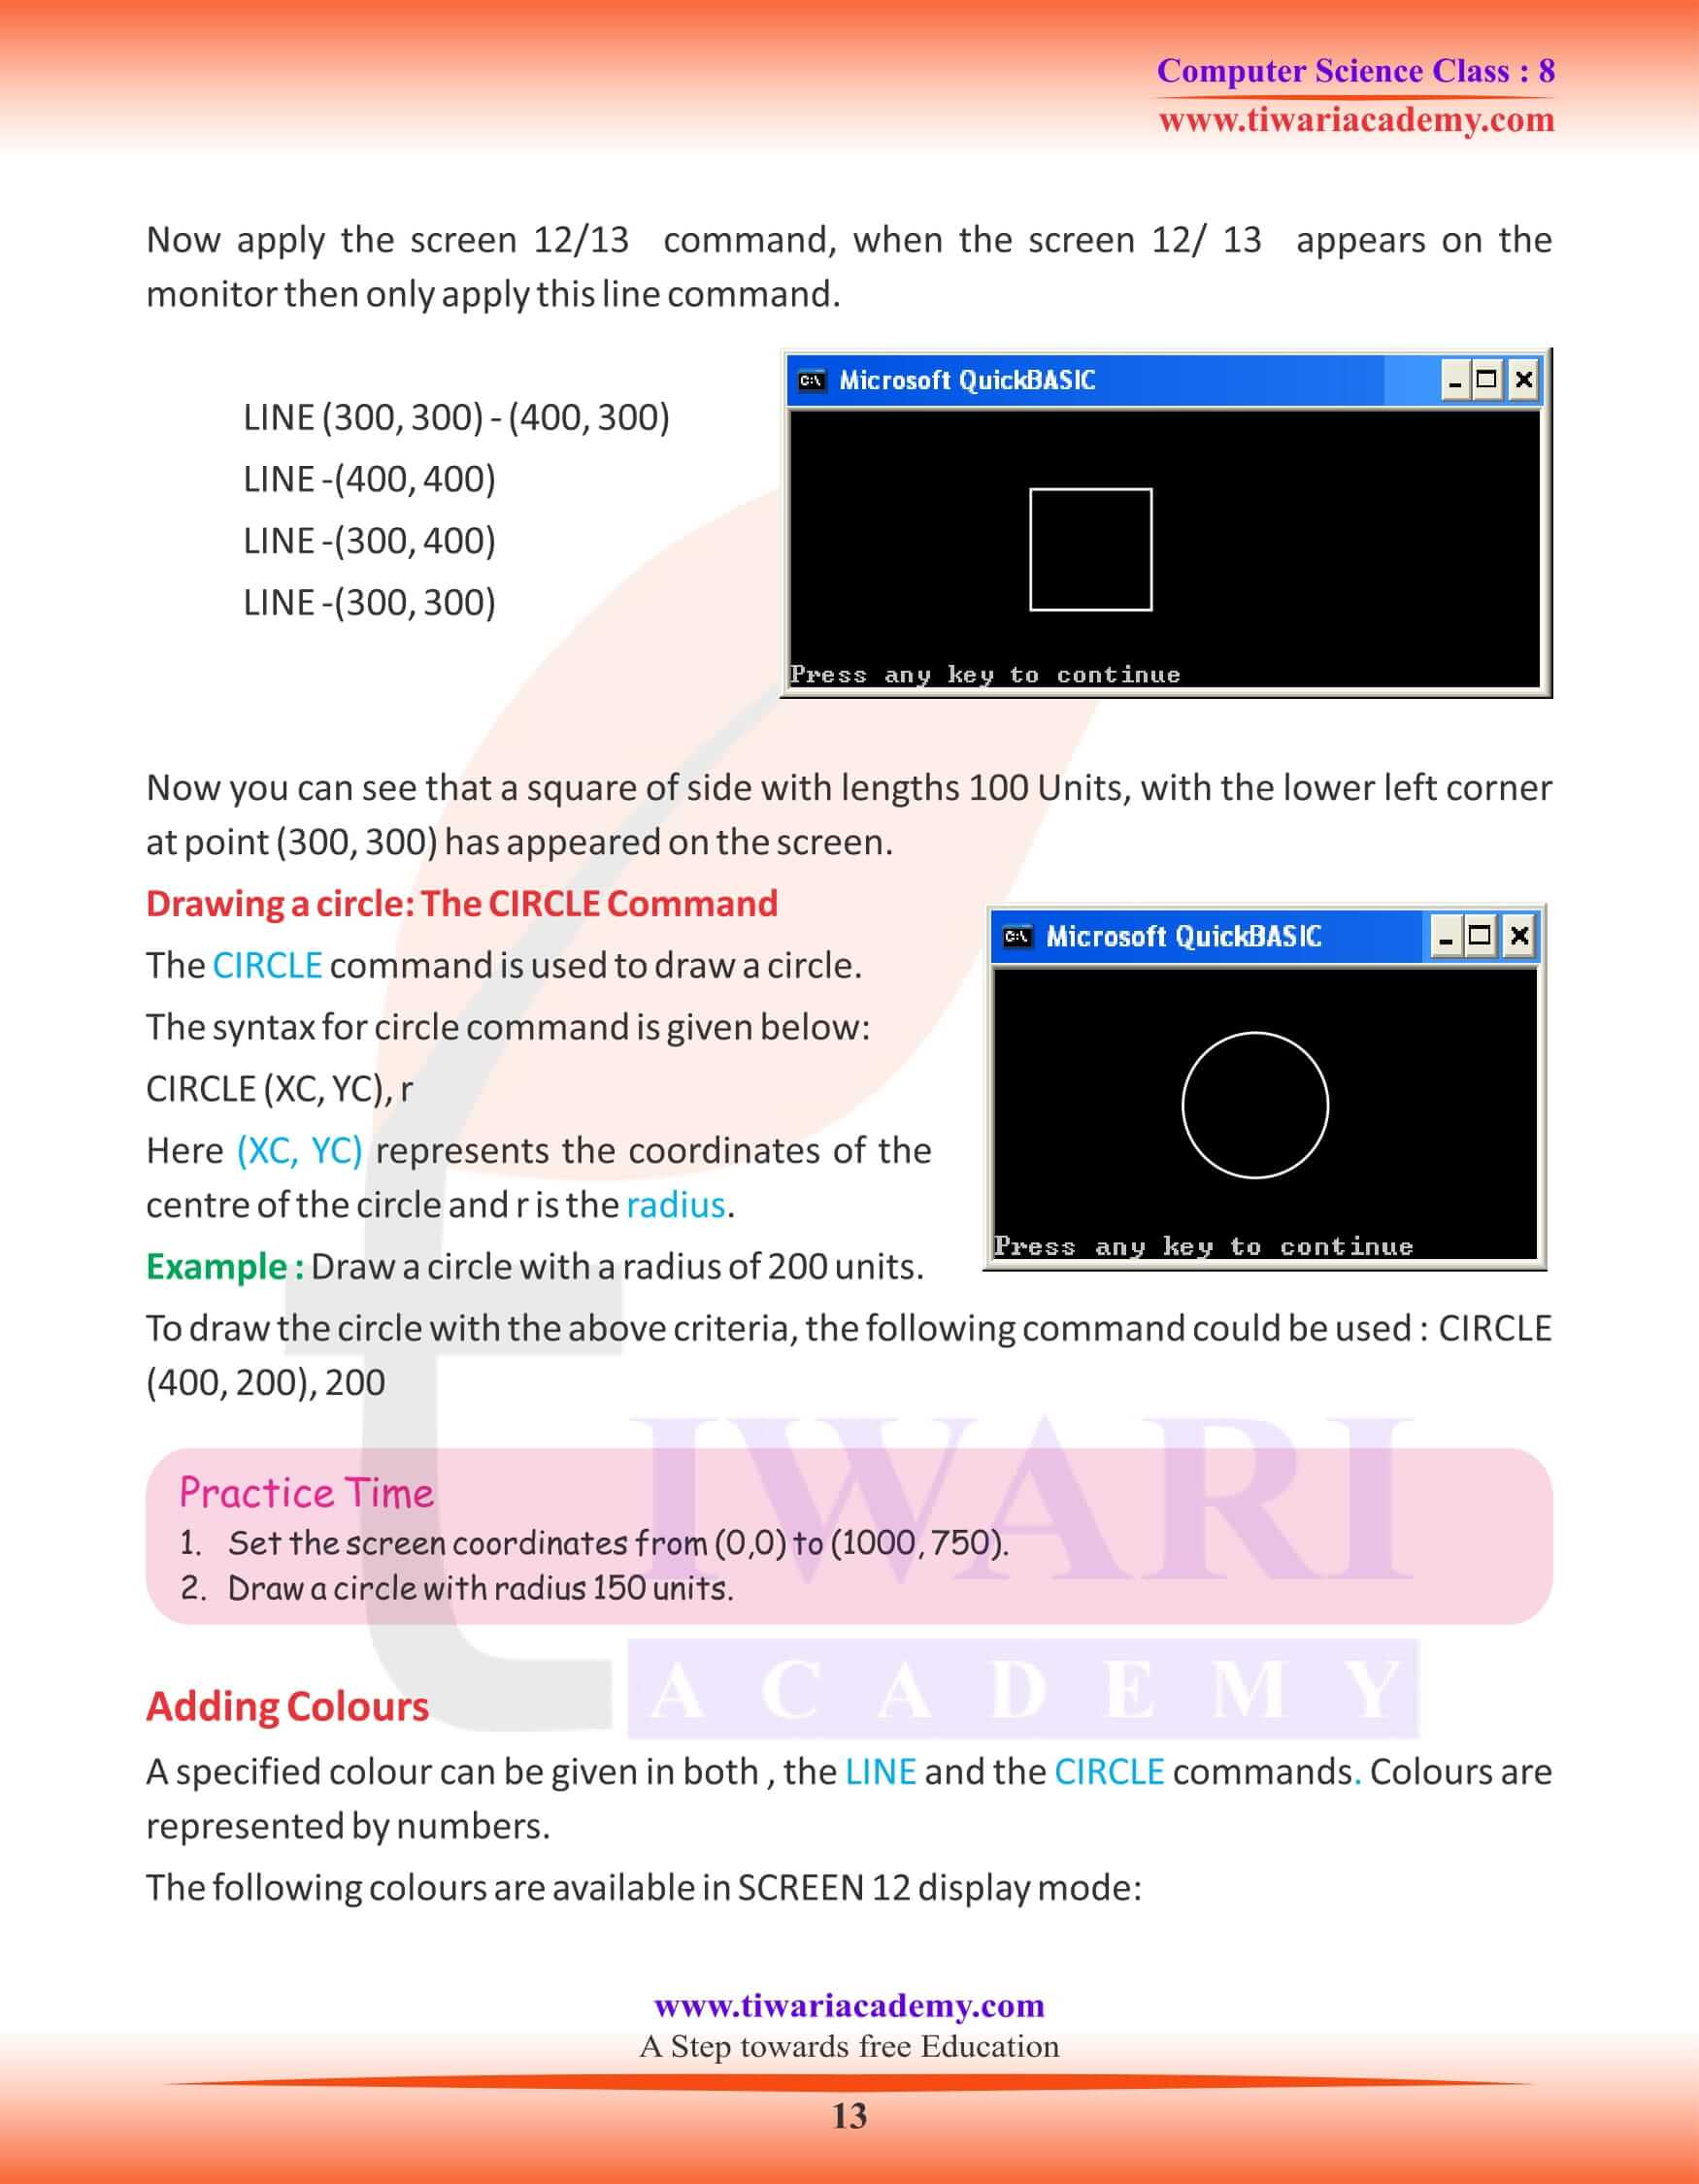
Drawing a line
The LINE Command
As it is very clear by its name “Line Command”, this command is used to draw the lines. The syntax of the command is LINE (x1, y1) – (x2, y2)
Where (x1, y1) and (x2, y2) are coordinate pair which define the start and end points of the line respectively. They use the coordinate system that has been set up by the WINDOW command.
Example: Draw a line starting from (450, 350) to (900, 750).
WINDOW (0, 0) – (1000, 750)
LINE (450, 350) – (900, 750)
You can see that a line is drawn on the screen as the result of the above program. There is also a shorter form of the LINE command which can be used to draw connected straight lines where each line segment is drawn from the end of the previous line segment.
Drawing a circle
The CIRCLE Command
The CIRCLE command is used to draw a circle. The syntax for circle command is given below: CIRCLE (XC, YC), Here (XC, YC) represents the coordinates of the centre of the circle and r is the radius.
Example: Draw a circle with a radius of 200 units.
To draw the circle with the above criteria, the following command could be used : CIRCLE (400, 200), 200.